Hosting guests but short on bed space? An air mattress is a lifesaver for overnight stays, but fumbling with inflation or skipping maintenance can lead to sagging sleeps or punctures. Whether it's family visits or surprise visitors, getting it right ensures everyone rests well without hassle.
In this guide, you'll learn step-by-step how to inflate your air mattress properly and maintain it for repeated use. We'll cover everything from unpacking to storage, so you can set up in minutes and avoid common pitfalls. Expect a beginner-friendly process that's straightforward and rewarding—your guests will thank you!
The whole inflation takes about 10 minutes, with maintenance adding just 5 more. No advanced skills required; just follow along for a firm, reliable bed every time.
▸What You'll Need
- •Air mattress (inflatable model with built-in pump or separate valve)
- •Electric air pump (required for quick inflation; manual foot pump optional for backups)
- •Power outlet or batteries (for electric pump)
- •Clean, flat surface (like a floor or frame)
- •Air mattress sheets or fitted sheet (optional, for comfort)
- •Repair kit with patches and glue (optional, for maintenance)
Estimated Time: 15-20 minutes for initial setup and inflation; 5-10 minutes for post-use maintenance
Difficulty: beginner
▸Step-by-Step Instructions
Step 1: Choose and Prepare a Flat Surface
Start by selecting a spot in your guest room or living area that's level and free of sharp objects. Unroll your air mattress directly onto the floor, a box spring, or an adjustable bed frame to prevent uneven inflation or tipping during the night.
Why it matters: A flat surface ensures even air distribution and stability, reducing the risk of leaks from pressure points. Expect the mattress to lie flat and wrinkle-free once unrolled—any major folds could trap air pockets later.
Lay down a thin rug or mattress pad underneath if the floor is hard, but avoid thick blankets that might cause slipping.
💡 Tips:
- •Measure the space first to ensure the mattress fits without crowding the room.
⚠️ Warnings:
- •Steer clear of rough surfaces like carpet with debris, which can puncture the vinyl.
Step 2: Unpack and Unfold the Mattress
Remove the air mattress from its storage bag or box, shaking it gently to remove any dust. Fully unfold it on your prepared surface, smoothing out creases with your hands.
This step is crucial because compacted folds can lead to weak spots or slow inflation. You'll see the mattress expand slightly as it relaxes—success looks like a smooth, ready-to-inflate base without twists.
If it's your first time, check the instructions on the packaging for model-specific tips, like which side is up.
💡 Tips:
- •Do this in a warm room; cold air makes vinyl stiff and harder to unfold.
Step 3: Locate the Inflation Valve
Find the built-in valve or port, usually on the side or end of the mattress—it's often a Boston valve or screw cap. Open it by twisting counterclockwise or pulling the plug to prepare for the pump.
Why this matters: The valve is your gateway for air; mishandling it can cause premature deflation. Expect a small hiss if residual air escapes, signaling it's ready.
Wipe the valve area with a dry cloth to ensure a clean seal for the pump attachment.
⚠️ Warnings:
- •Don't force the valve if it's stiff—apply gentle pressure to avoid cracking it.
Step 4: Attach and Power On the Pump
Connect the pump's hose to the valve—most pumps have universal nozzles that snap or twist in place. Plug the electric pump into a nearby outlet and switch it on, or use a manual pump if needed.
This ensures efficient airflow without straining your lungs. Listen for the steady hum of the pump; success is a secure fit with no air leaks at the connection.
For battery-powered pumps, insert fresh batteries first to avoid mid-inflation stops.
💡 Tips:
- •Match the pump nozzle to your valve type (e.g., narrow for standard ports).
Step 5: Inflate the Mattress Fully
Run the pump until the mattress reaches maximum firmness, typically 2-4 minutes for a queen size. Stop when it feels bouncy and holds your weight without bottoming out—most models have a built-in stop feature.
Proper inflation prevents sagging overnight, which ruins sleep. You'll notice the mattress rising evenly, edges lifting first, then the center filling out.
Monitor progress by pressing the surface; it should resist firmly but not feel rock-hard.
⚠️ Warnings:
- •Overinflating can stress seams—err on the side of slightly underfilled if unsure.
Step 6: Test Firmness and Adjust
Lie down on the mattress for 1-2 minutes to test comfort. If too soft, add more air; if too firm, release a bit via the valve.
This fine-tuning personalizes the setup for your guests' preferences. Success is a stable, comfortable surface that doesn't deflate quickly.
Top with fitted sheets now for a bed-like feel, ensuring they grip the contours.
💡 Tips:
- •Ask guests their firmness preference in advance for the best setup.
Step 7: Clean and Maintain After Use
After guests leave, wipe the surface with a mild soap solution and damp cloth, then air-dry completely. For deeper maintenance, check for punctures and apply patches if needed.
Regular cleaning prevents mold and extends life—do this every use. Expect a spotless, dry mattress ready for storage.
Deflate by opening the valve and rolling from the far end toward it, pressing out air as you go.
⚠️ Warnings:
- •Never use harsh chemicals or machine-wash; they damage the vinyl.
Step 8: Store Properly for Next Time
Once deflated and dry, roll tightly and secure with the provided strap or bag. Store in a cool, dry place away from sunlight and sharp objects.
Good storage avoids creases and degradation. Success: A compact bundle that fits easily in a closet, ready for quick future setups.
Label the bag with inflation tips for reference.
💡 Tips:
- •Store horizontally if space allows to prevent valve damage.
▸Pro Tips
- •Inflate in short bursts to avoid overheating the pump—let it rest 30 seconds if needed.
- •Use a surge protector for the electric pump to safeguard against power fluctuations.
- •Add a mattress topper for extra cushion if guests prefer softer sleeping.
- •Check the manufacturer's PSI recommendation (usually 0.5-1 PSI) for ideal firmness.
- •For multi-chamber mattresses, inflate one section at a time for even results.
- •Keep a spare pump nozzle handy for compatibility issues.
- •Dust the storage area before packing to minimize dirt transfer.
▸Common Mistakes to Avoid
- •Inflating on an uneven surface, leading to wobbling and discomfort—always level the area first.
- •Skipping the drying step after cleaning, which causes mold—air-dry fully in a ventilated space.
- •Overlooking small punctures post-use, resulting in slow leaks—inspect thoroughly each time.
- •Storing while damp or folded loosely, promoting creases and weakening material—roll tightly and dry completely.
- •Using a mismatched pump nozzle, causing air leaks during inflation—verify fit before starting.
▸Troubleshooting
Problem: Mattress won't hold air or deflates overnight
Solution: Locate the leak by listening for hisses or using soapy water to spot bubbles; apply a patch from a repair kit. If no leak, reinflate fully and check valve seal.
Problem: Pump won't turn on or inflate slowly
Solution: Check power source and connections; clean the nozzle. For manual pumps, ensure no blockages. Replace batteries if applicable.
Problem: Mattress feels uneven after inflation
Solution: Deflate partially, smooth out folds, and reinflate slowly. Ensure the surface underneath is flat.
Problem: Valve is stuck or leaking
Solution: Gently lubricate with soapy water and twist carefully. If damaged, replace the valve cap or seek a warranty claim—no DIY fixes for broken valves.
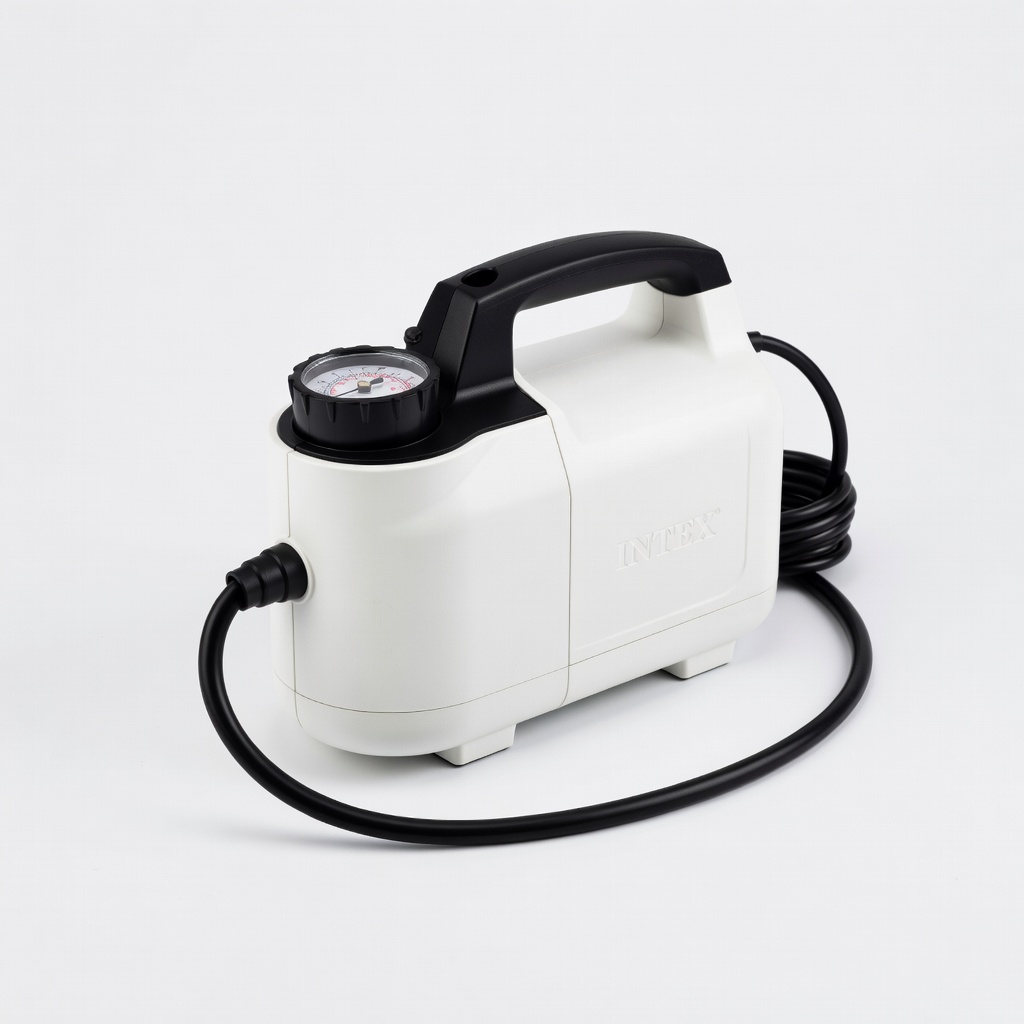
Intex Quick-Fill AC Electric Pump
This reliable pump inflates most air mattresses in under 3 minutes with multiple nozzles for compatibility, saving time for busy hosts.
Best for: Ideal for quick guest setups when you need firm inflation without manual effort.
Price Range: $19.99
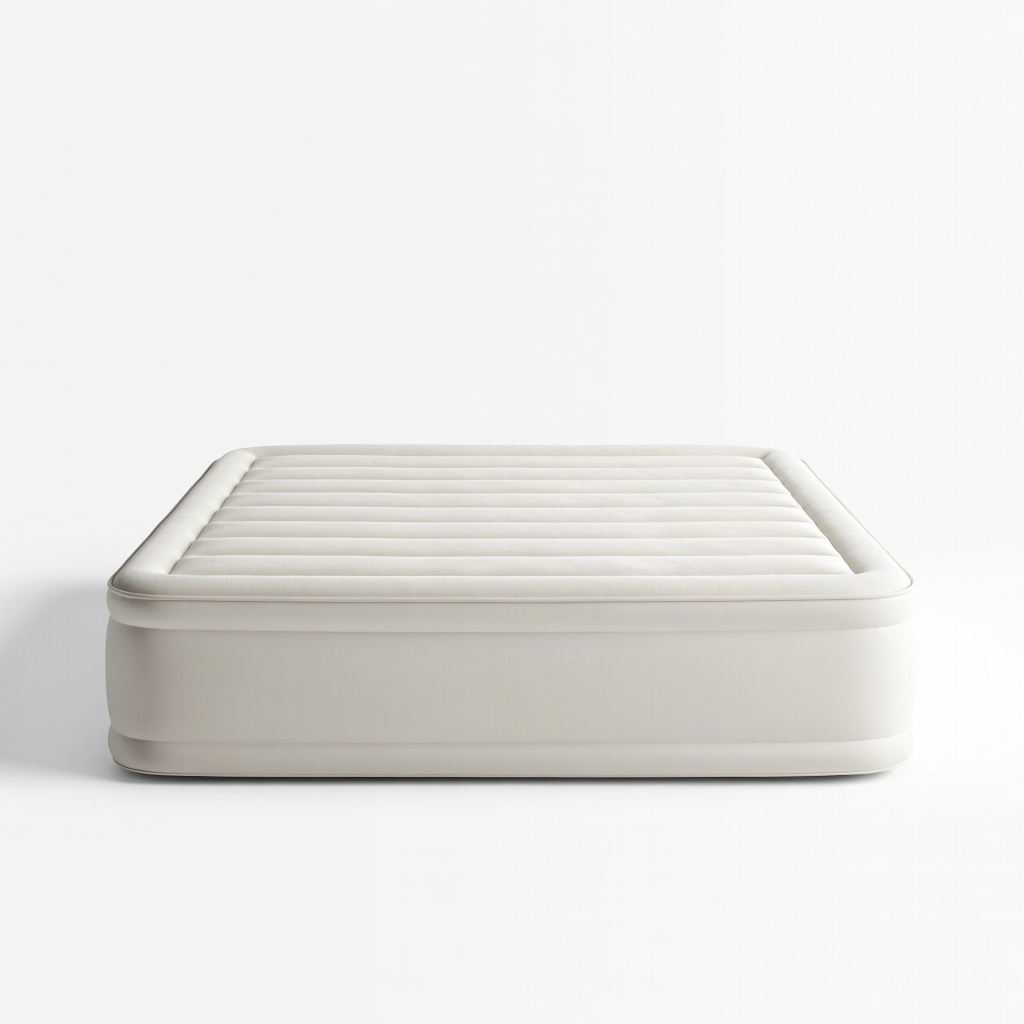
SoundAsleep Dream Series Air Mattress
Features a built-in pump and 40 comfort coils for even support, making inflation and maintenance straightforward for beginners.
Best for: Perfect for frequent guest use, providing hotel-like comfort that holds air for days.
Price Range: $129.99-$149.99
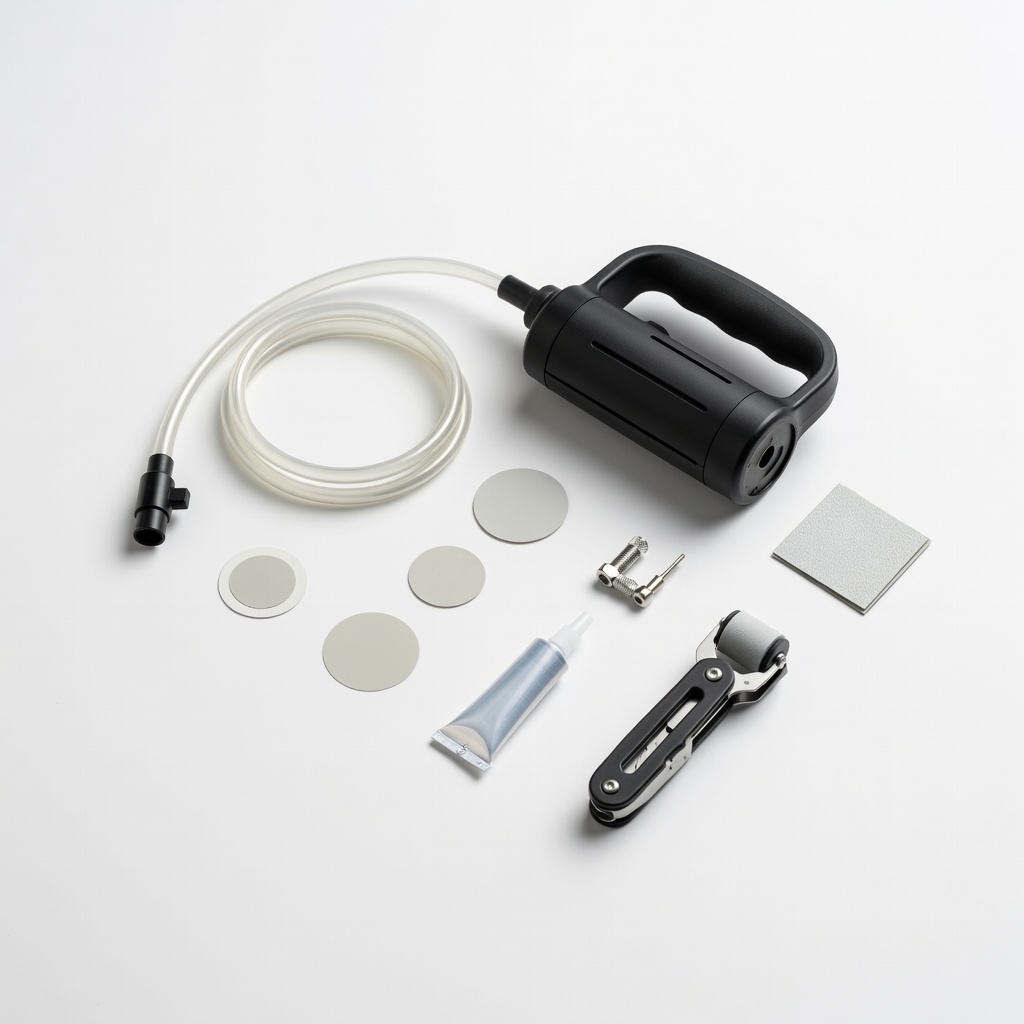
Tire Repair Kit for Air Mattresses
Includes adhesive patches and glue to fix punctures quickly, preventing downtime and extending mattress life.
Best for: Use after detecting leaks during maintenance to keep your mattress guest-ready.
Price Range: $8.99
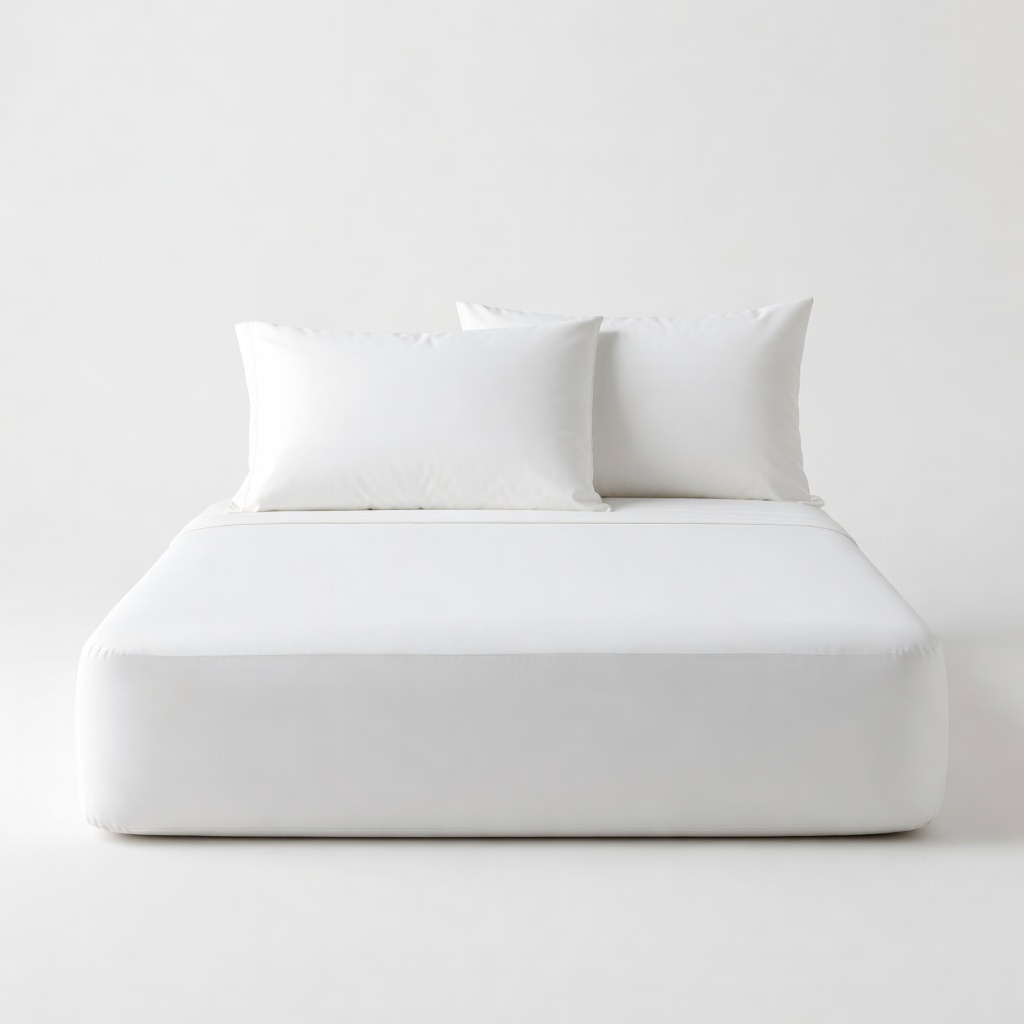
IVY Urban Air Mattress Sheets Set
Fitted sheets designed specifically for air mattresses with deep pockets to stay secure, enhancing comfort without slipping.
Best for: Apply right after inflation for a polished, bed-like finish for guests.
Price Range: $24.99