Fresh herbs are the secret to mouthwatering dishes, but they’re also one of the most wasted ingredients in the kitchen. You buy a bunch of basil for a pasta recipe, use a few leaves, and the rest turns into a slimy mess in the back of the fridge. Freezing your herbs solves that problem—but only if you do it right. Many home cooks simply toss herbs into a freezer bag as-is, only to pull out a watery, brown chunk later. That’s what happens when you skip the critical steps that preserve both texture and flavor.
The good news: freezing fresh herbs is easy and doesn’t require fancy equipment or culinary training. With the right technique, you can keep the bright, aromatic taste of garden-fresh herbs for 6 to 12 months. This guide walks you through every step—from selecting and drying to three proven freezing methods: freezing in oil, freezing in water or stock, and dry-freezing. You’ll also learn how to package, label, and use your frozen herbs so they always taste great.
Ready to turn your herb surplus into a secret freezer weapon? Let’s get started.
▸What You'll Need
- •Fresh herbs (basil, cilantro, parsley, mint, rosemary, thyme, etc.)
- •Colander and a large bowl of cool water
- •Salad spinner or clean kitchen towels/paper towels
- •Cutting board and a sharp knife or herb scissors
- •Ice cube trays (preferably silicone) or freezer-safe muffin tins
- •Olive oil, neutral oil, melted butter, or water/stock
- •Baking sheet and parchment paper (for dry-freezing)
- •Freezer-safe zip-top bags, airtight containers, or vacuum-sealer bags
- •Labels and a permanent marker
Estimated Time: 30–45 minutes of active prep time, plus 1–2 hours for freezing
Difficulty: beginner
▸Step-by-Step Instructions
Step 1: Select the Freshest Herbs
The old saying “you can’t make a silk purse out of a sow’s ear” definitely applies to freezing herbs. Freezing cannot improve quality—it can only preserve what’s there. Choose herbs that are vibrant in color, crisp, and aromatic. Avoid any bunches with yellowing, black spots, wilting, or slimy patches. If you’re harvesting from an herb garden, do so in the morning after the dew has dried but before the heat of the day, when essential oils are at their peak.
Whether you grow your own or buy from the store, try to freeze herbs within a day or two of purchase. The longer they sit in the fridge, the more flavor they lose. If you have a large harvest than you can use at once, you can freeze it in batches over several days—just make sure each batch is at peak freshness.
💡 Tips:
- •Smell the herbs before buying or harvesting—stronger aroma = more flavor to lock in.
- •For store-bought herbs, choose bunches with firm, not mushy, stems.
⚠️ Warnings:
- •Never freeze herbs that are already spoiled or showing signs of decay; freezing won't improve them.
Step 2: Wash Gently to Remove Dirt
Fresh herbs often carry dirt, tiny insects, or pesticides. Fill a large bowl with cool water and gently submerge the herbs. Swish them back and forth a few times. Lift them out and shake off excess water. Repeat in clean water if the herbs are especially sandy or gritty. For hardy herbs like rosemary and thyme, you can run them under a tap; delicate herbs like cilantro and dill need gentler treatment to avoid bruising.
Don’t rub the leaves or plunge them into hot water—you’ll begin the process of wilting and losing essential oils. After washing, let them rest in a colander so the excess water drips away before you move to the next step.
💡 Tips:
- •Use a salad spinner after washing to start the drying process gently.
- •If you're freezing organic herbs from your own garden, you may still want to rinse them to remove dust and bugs.
⚠️ Warnings:
- •Do not soak herbs for more than a few minutes; they’ll act like sponges and absorb water, leading to ice crystals and mush later.
Step 3: Dry Completely (Crucial to Avoid Mush)
Moisture is the number one enemy of frozen herbs. Excess water on the leaves will form ice crystals when frozen, and those sharp crystals will puncture the cell walls. When the herbs thaw, they collapse into a soggy, flavorless mess—exactly what you’re trying to avoid. Your goal is to remove as much surface moisture as possible.
Lay the clean herbs on a clean kitchen towel or layers of paper towels. Gently roll them up and press—don’t wring or rub, especially for soft-leafed herbs. For very delicate herbs like basil, you can pat each leaf individually. Alternatively, use a salad spinner: load it with the herbs and spin until no water droplets appear on the leaflings. After spinning, leave them spread on a dry towel for 10–15 minutes to air-dry completely.
💡 Tips:
- •The “towel roll” method is great: roll a bunch of herbs in a dry towel, then place it in the fridge for 30 minutes to firm up the leaves.
- •If you’re in a hurry, you can use a hairdryer on a cool setting held at a distance—but be careful not to blow tender leaves around.
⚠️ Warnings:
- •Apply no heat, as it will wilt the leaves and cause them to lose their vibrant color.
Step 4: Separate Leaves from Stems
For most herbs, the stems are tough and woody and don’t offer the same flavor as the leaves. Strip the leaves by running your fingers down the stem in an upward motion. For herbs like rosemary, thyme, and oregano, it’s fine to keep small sprigs intact—they are perfect for flavoring soups and roasts and can be frozen that way. For basil, be extra gentle to avoid bruising the tender leaves.
Discard any damaged, browned, or slimy leaves. Large leaves like basil or sage can be left whole, or you can chop them roughly if you prefer. What you do here depends on how you plan to use the herbs later. Smaller pieces freeze and integrate more quickly into dishes, while whole leaves are great for garnish or wrapping.
💡 Tips:
- •For parsley and cilantro, the stalks are actually flavorful—you can include them if you don’t mind a slightly rougher texture.
- •Use herb scissors or a sharp knife to chop herbs very finely if you know you’ll be using them in sauces or rubs.
⚠️ Warnings:
- •Bruised or crushed leaves will darken and lose color; handle delicate herbs as little as possible after picking them.
Step 5: Freeze in Oil Cubes (Best for Cooking)
This is arguably the most popular method for freezing herbs because it does double duty: it preserves the herbs and infuses the oil with flavor. It’s ideal for heartier herbs like basil, oregano, tarragon, rosemary, and thyme. Finely chop the prepared herbs and spoon them into ice cube trays—fill each compartment about ⅔ full. Then pour a good-quality olive oil or a neutral oil like canola or sunflower over the herbs, making sure they are completely submerged. Gently tap the tray on the counter to release any air bubbles.
Place the tray in the freezer and wait 4–6 hours (or overnight) until the cubes are solid. Stick the cubes out and transfer them to a labeled freezer bag or container. When you cook, drop a cube (or two) directly into the hot pan. The oil melts, and the herbs release their flavor into your dish. Each cube is roughly one tablespoon of oil plus herbs—a perfect single-serve portion.
💡 Tips:
- •Use silicone ice cube trays—their flexibility makes it much easier to pop the cubes out, even when the oil is frozen.
- •Create custom blends: freeze basil and garlic together for pasta nights, or rosemary and lemon peel for chicken dishes.
- •Fill the trays only ¾ full because oil expands when freezing.
⚠️ Warnings:
- •Don't overfill the tray with oil that might overflow onto the tray and create a mess in your freezer.
- •Use fresh, high-quality oil—the flavor of the oil becomes part of the dish.
Step 6: Freeze in Water or Stock Cubes (Great for Soups and Stews)
If you often make soups, stews, sauces, or braises, this method is a game changer. Chop the fresh herbs finely and place them in ice cube trays. Cover with water, vegetable stock, or chicken stock. You can also use melted butter for a richer flavor—herb-butter cubes are fabulous for finishing vegetables or melting over steak. Tap the tray to release bubbles, then freeze solid.
Once frozen, pop the cubes out and store them in labeled freezer bags. The herbs are evenly distributed and the cubes are ready to drop into any liquid dish. This method works well for leafy herbs like parsley, dill, and cilantro, but it also works for mixtures with garlic or ginger. When you use them, the liquid added to the dish won’t be obvious—just a flavor boost.
💡 Tips:
- •For larger quantities, use muffin tins instead of ice cube trays to make big cubes that are perfect for a pot of soup.
- •Try using tomato juice or vegetable puree as the liquid for a boon to Mediterranean dishes.
- •Herb cubes in butter are also fantastic for sautéing ingredients—they melt and coat everything with flavor.
⚠️ Warnings:
- •Make sure the herbs are completely submerged in the liquid to prevent freezer burn and oxidation.
- •Don't forget that stock often contains salt—adjust the seasoning of your final dish accordingly.
Step 7: Dry-Freeze Leaves on a Baking Sheet (For Crumbled Toppings)
If you want to add crumbled herbs to salads, pasta, or eggs without introducing any extra oil or liquid, dry-freezing is the technique for you. Spread the clean, completely dry leaves in a single layer on a baking sheet lined with parchment paper. Place the sheet in the freezer on a flat surface. Wait 1–2 hours until the leaves are frozen rigid. Transfer the frozen leaves to a zip-top bag or airtight container—you can simply crumble them with your fingers as you use them.
This method preserves the structure of the leaves better than the other techniques. When you crumble them into a dish, they resemble dried herbs but with a much fresher taste. It's also a great technique for storing chives, dill, and other small-leaf herbs. Once you take them off the sheet, they keep for several months in the freezer.
💡 Tips:
- •Make sure the leaves are 100% dry before freezing; any residual moisture will cause clumping.
- •After freezing, place the leaves in a freezer bag and gently press out the air—this prevents them from breaking too much.
- •Store the frozen leaves in a rigid, narrow container so you can reach in without crushing the whole bag.
⚠️ Warnings:
- •Don't forget the baking sheet—the leaves will freeze together into a solid block if you just bag them flat.
- •Do not use this method for herbs that you want to keep whole—they will be too fragile after freezing.
Step 8: Package and Label Your Frozen Herbs
Proper packaging is the difference between herbs that taste fresh and herbs that taste like the freezer. If air gets in, your herbs will develop freezer burn and absorb odors from the freezer. Use freezer-safe zip-top bags, glass containers, or vacuum-sealed bags. For bags, press out as much air as possible—lay the bag flat and push the air out with your hands or use a straw. If you have a vacuum sealer, this is the time to use it—it creates an airtight seal that significantly extends the shelf life.
Labeling is equally important. You won’t remember what’s what after a few weeks, and most herbs look identical when frozen. Write the herb name (or a combination, like “basil-garlic”) and the date on the bag. You can also note “oil” or “stock” if you used the liquid method. A small piece of painter’s tape and a marker work fine, or you can buy freezer-safe labels.
💡 Tips:
- •Create a simple inventory list stuck on the freezer door with item names and dates—this saves you from digging blindly.
- •Flatten bags as much as possible—they stack easily and thaw more quickly in recipes.
- •Use small containers, about 8-ounce size, so you don’t have to open a large bag and expose all the herbs to air each time.
- •For vacuum sealing, you can even seal individual herb cubes or portions in a roll of vacuum sealer film.
⚠️ Warnings:
- •Avoid regular sandwich bags; they are permeable and not designed for long-term freezer storage.
- •Never put warm herbs into the bag—that causes condensation and leads to ice crystals.
Step 9: Use Frozen Herbs Directly in Cooking
Frozen herbs perform best when they are added directly to hot dishes. The good news is you almost never need to thaw them first—the heat of the pan or pot will melt ice and release the flavor. For oil or stock cubes, simply drop them into your sautéing vegetables, stirring soup, or simmering sauce. For dry-frozen leaves, crush them with your fingers and scatter them into cooked meats, veggies, or dressings.
Frozen herbs won’t look or taste exactly like fresh herbs; they lose their crisp texture, so they should not be used as a garnish. Instead, use them in anything that will be cooked or marinated. This includes soups, stews, slow-cooker recipes, curries, pasta sauces, marinades, and even salad dressings. You may need to use a slightly larger amount than you would of fresh herbs—tasting as you go—to compensate for any loss of aroma. In most cases, you’ll be adding frozen herbs to the pot in the same quantity as you would fresh for a satisfying result.
💡 Tips:
- •For a super quick weeknight meal, stir a frozen herb cube into pasta water when cooking noodles for subtle flavor in the pasta itself.
- •Use frozen herb cubes to deglaze a pan—they add liquid and flavor at once.
- •If a recipe calls for fresh herbs and you’re using frozen, add them a few minutes before the dish finishes cooking and simmer gently to preserve brightness.
- •Make sure the herb cubes are completely incorporated—taste and adjust seasoning, especially if you used stock with added salt.
⚠️ Warnings:
- •Do not thaw frozen herbs on the counter; they will turn into a watery, unrecognizable pile.
- •Never garnish a finished plate with frozen herbs—they will be limp and unappealing; add them during cooking instead.
▸Pro Tips
- •Invest in a few silicone ice cube trays—they make popping out frozen cubes effortless. Clear plastic trays can crack or become brittle at freezer temperatures.
- •Make your own herb blends: combine basil, oregano, garlic, and thyme in a single cube for an instant Italian flavor bomb. Label carefully!
- •If you regularly freeze herbs, consider using a vacuum sealer. It removes air completely, maximizing both flavor retention and storage life.
- •For basil specifically, puree a large batch with olive oil (about 2 parts basil to 1 part oil) in a food processor, then freeze the paste in ice cube trays. This prevents basil from turning black and is perfect for sauces.
- •You can freeze herbs in small portions inside parchment paper ‘envelopes’—this keeps them separated and easy to grab.
- •Keep a permanent marker attached to your kitchen freezer drawer or cabinet so you’ll never skip the labeling step.
- •Try freezing herb cubes in two sizes: make large cubes in muffin tins for big pots of soup, and small cubes in ice trays for quick single-serving dishes.
- •Add a pinch of citric acid (or a squeeze of lemon juice) to leafy herbs before freezing—this helps preserve their green color in cooked dishes.
▸Common Mistakes to Avoid
- •Freezing herbs completely wet—the biggest cause of mushy, flavorless herbs. Always dry thoroughly.
- •Overfilling freezer bags with air—air causes freezer burn and makes the herbs dry out and lose taste.
- •Using the wrong method for the herb. Hearty woody herbs like rosemary and thyme freeze well in oil, while soft-leafed basil can turn mushy without enough oil. Choose the right technique for your end use.
- •Trying to use frozen herbs as a raw garnish on salads or pristine dishes—they won’t have the same crispness, so stick to cooked applications.
- •Not labeling the containers—weeks later, you’ll have a mystery bag of green cubes. Write the herb name and date every time.
▸Troubleshooting
Problem: Frozen herbs have a bitter taste.
Solution: The herbs may have been past their prime or oxidized during preparation. Use the freshest herbs possible and avoid bruising the leaves. Also, use a high-quality olive oil or neutral oil that doesn’t become bitter when frozen.
Problem: Herb cubes are stuck in the tray and won’t release.
Solution: If using a rigid plastic tray, briefly run the tray under warm water (just for a few seconds) to loosen the edges. Alternatively, use the back of a wooden spoon to gently push the cubes out from the bottom. For silicone trays, press from underneath—if they’re still stuck, let them sit out for 2–3 minutes at room temp.
Problem: Herbs turned mushy even after following the steps.
Solution: The likely culprit is residual moisture. Go back to the drying step and make sure every leaf is bone-dry. Also, avoid thawing them before cooking—drop them straight into the hot dish.
Problem: My frozen herbs have freezer burn (grayish, ice-covered spots).
Solution: That indicates air got in. Your packaging wasn’t airtight enough. Next time, use freezer-type containers or vacuum seal. You can also trim freezer-burned spots before using the rest—the flavor will still be okay in a soup, but not as fresh.
Problem: The smell of herbs is transferring to other foods in the freezer.
Solution: Make sure all herb packaging is truly airtight. Double-bag or use a vacuum sealer if you notice any odor. Strong herbs like rosemary or garlic can be especially pungent. Store them in the same area of the freezer with other strong-smelling items like onions and berries.
Silicone Ice Cube Trays with Lids
Flexible silicone lets you pop out frozen herb cubes effortlessly, and the lids prevent spills and stop the cubes from picking up odd freezer smells. They come in various sizes, so you can freeze standard tablespoon-sized cubes or larger portions.
Best for: Ideal for both oil and water/stock freeze methods. The lids also help when you need to stack trays in the freezer.
Price Range: $10–$25
Salad Spinner
A salad spinner is the most effective way to remove excess water from herbs after washing. It replaces hours of blotting with paper towels and seriously reduces the chance of mush.
Best for: Essential for any herb freezing project, especially for delicate leaves like basil and cilantro.
Price Range: $20–$45
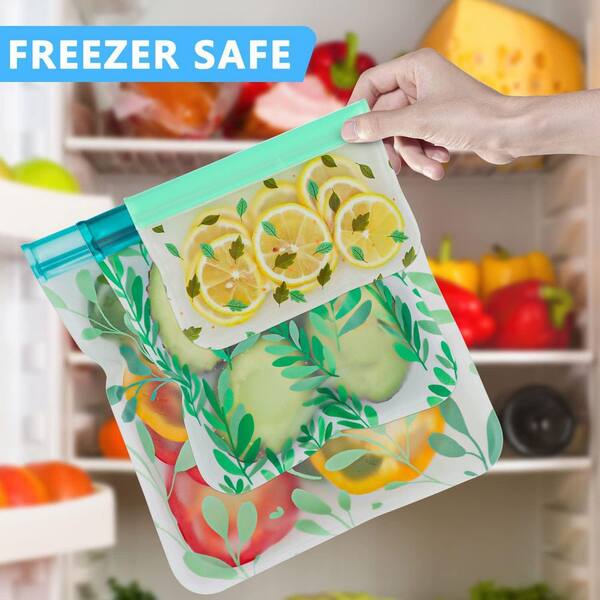
Freezer-safe Reusable Silicone Bags
Reusable silicone bags are airtight, durable, and completely freezer-safe. They keep your frozen herbs fresh while helping you cut down on plastic waste. Look for bags with a secure double seal.
Best for: Great for storing dry-frozen whole leaves or cubes in the freezer. They also stand up nicely and are easy to label.
Price Range: $20–$40 for a set
Vacuum Sealer Machine
A vacuum sealer removes all air from the packaging—this is the gold standard for preventing freezer burn and preserving the color, flavor, and aroma of herbs for months longer than standard bags.
Best for: Best if you freeze herbs in bulk or routinely preserve vegetables, meats, sous vides, or leftovers. Perfect for dry-freeze herb packs.
Price Range: $60–$150