
Super Lube 21030 Synthetic Grease with PTFE
Apply to linear components during step 6 for smooth motion.
$12.99
Super Lube 21030 Synthetic Grease with PTFE Ideal dry lubricant for rods and bearings—reduces friction without attracting dust.
Get the App
Better experience on mobile
Diagnose and eliminate layer shifts step-by-step to achieve flawless 3D prints on your intermediate-level printer setup.
Layer shifts are one of the most frustrating issues in 3D printing, turning what should be a perfect model into a skewed mess. They occur when the print head or bed moves unexpectedly, often ruining hours of printing time. If you're seeing layers that don't align horizontally, don't worry—this guide will help you fix it.
You'll learn to identify the root cause, perform mechanical checks and adjustments, and tweak software settings for reliable prints. The process is straightforward for intermediate users familiar with basic printer maintenance.
Expect to spend 30-60 minutes troubleshooting, depending on your printer model (e.g., Ender 3, Prusa). No advanced soldering required—just tools and patience. By the end, your prints will stack perfectly.
Estimated Time: 30-60 minutes Difficulty: intermediate
Start by pausing or stopping the current print if possible, or examine the completed shifted print closely. Look for shifts in the X (left-right) or Y (front-back) directions—these indicate which axis is problematic. Layer shifts typically show as sudden horizontal offsets, not gradual warping.
Power off the printer and remove the print bed or model for better access. Take photos for reference. Why it matters: Accurate diagnosis saves time; X/Y shifts have different causes from Z issues.
Success looks like: Clear identification of the shifted axis and no visible debris or jams.
💡 Tips:
⚠️ Warnings:
Locate the GT2 timing belts on your X (gantry) and Y (bed) axes. They connect the stepper motors to the carriages. Gently pluck the belt like a guitar string—it should twang at middle-C pitch (around 100-120 Hz) or deflect 1-2mm under firm thumb pressure without sagging.
If loose, loosen the motor mount screws slightly, pull the motor to tension the belt evenly, and retighten. Why it matters: Loose belts skip teeth under load, causing shifts.
Success looks like: Even tension across the belt span; no play when shaking the carriage.
💡 Tips:
⚠️ Warnings:
Examine all pulleys on motors and idlers. Ensure grub (set) screws are tight against the motor shaft flats using a 2mm Allen key. Spin pulleys by hand—they should rotate smoothly without wobble.
Loosen, realign if slipped, and retighten. Why it matters: Slipped pulleys desynchronize movement, mimicking belt issues.
Success looks like: Pulleys spin true; no radial play when gripped.
💡 Tips:
⚠️ Warnings:
Check idler pulleys and eccentric spacers (often on X gantry ends). Rotate eccentrics with a wrench to ensure proper belt grip without binding. Clean dust from bearings.
Why it matters: Binding idlers increase resistance, skipping steps.
Success looks like: Carriages glide smoothly; belts track straight.
💡 Tips:
⚠️ Warnings:
Vibrate-test: Run motors slowly and shake mounts. Tighten all frame screws, especially steppers and bed mounts. Check frame squareness with a ruler (diagonals equal).
Why it matters: Loose mounts flex under torque, shifting layers.
Success looks like: No movement when tugged; frame rigid.
💡 Tips:
Clean rods/rails with isopropyl alcohol, then apply PTFE dry lube sparingly. Wipe excess. Move carriages full travel to distribute.
Why it matters: Friction causes skipped steps.
Success looks like: Smooth, quiet motion.
💡 Tips:
⚠️ Warnings:
In Cura/PrusaSlicer, reduce acceleration to 1000-2000mm/s², jerk to 5-10mm/s, and speed to 40-60mm/s for testing. Enable input shaping if available.
Why it matters: High speeds overload mechanics.
Success looks like: Settings saved; preview shows feasible paths.
💡 Tips:
Slice and print a calibration cube (20x20mm). Monitor first layers.
Why it matters: Confirms fix.
Success looks like: Perfect layer alignment.
💡 Tips:
⚠️ Warnings:
Problem: Shifts only on one axis
Solution: Focus fixes on that axis (e.g., X belt loose)—retest isolated moves.
Problem: Shifts during fast moves only
Solution: Lower acceleration/jerk in slicer; add dampers to motors.
Problem: Recurring after fix
Solution: Replace worn belt; check for frame flex or power supply voltage drops.
Problem: Shifts with noise/skipping
Solution: Stepper current too high—dial down 10% in firmware.
Problem: Shifts persist after all steps
Solution: Inspect extruder gears for slippage; seek firmware expert or upgrade board.
Ideal dry lubricant for rods and bearings—reduces friction without attracting dust.
Best for: Apply to linear components during step 6 for smooth motion.
Price Range: $12.99
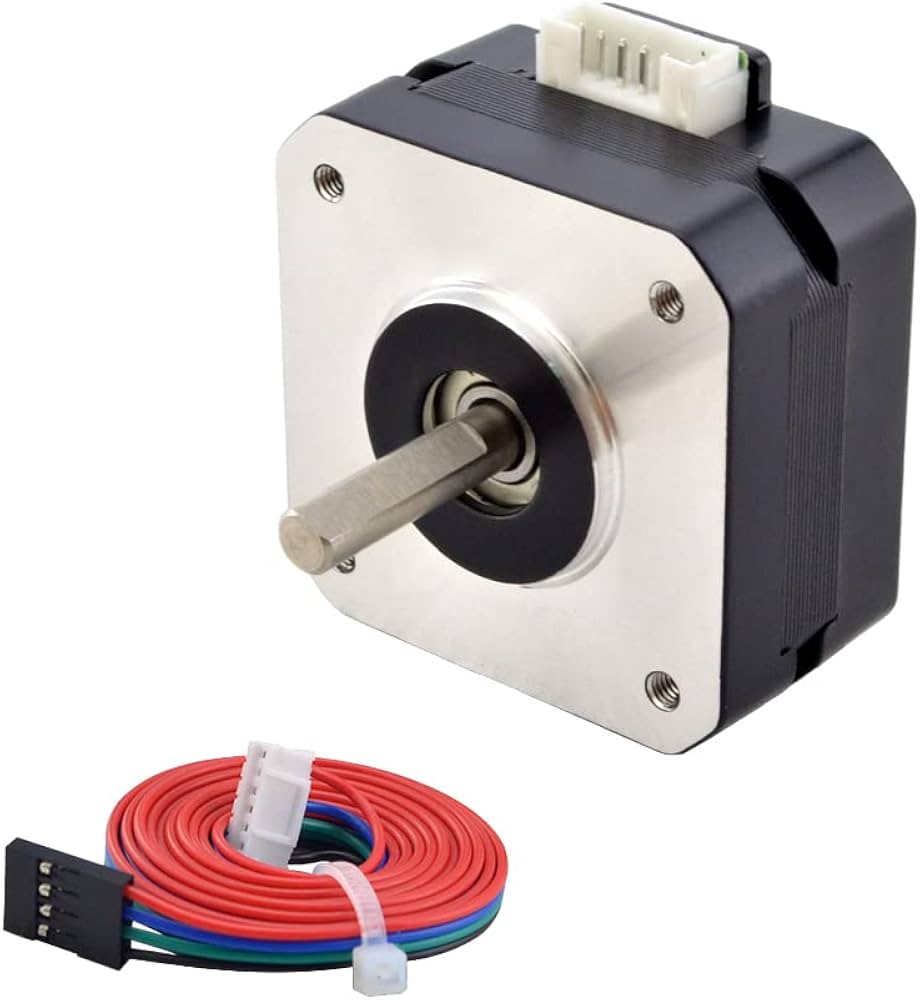
Exact replacement for common printers; high-quality neoprene resists stretching.
Best for: Swap worn belts if tension won't hold during step 2.
Price Range: $8.99
Precision metric Allen keys for grub screws and mounts—ergonomic for tight spaces.
Best for: Essential for steps 3 and 5 on most FDM printers.
Price Range: $14.99
Digital tool for accurate tension (Hz)—eliminates guesswork.
Best for: Pro measurement in step 2 for repeatable results.
Price Range: $19.99
Reduces vibrations that cause shifts—easy clip-on install.
Best for: Add to motors if high-speed shifts remain.
Price Range: $9.99
Apply to linear components during step 6 for smooth motion.
Super Lube 21030 Synthetic Grease with PTFE Ideal dry lubricant for rods and bearings—reduces friction without attracting dust.

Swap worn belts if tension won't hold during step 2.
Creality Ender 3 GT2 Timing Belt (2m) Exact replacement for common printers; high-quality neoprene resists stretching.
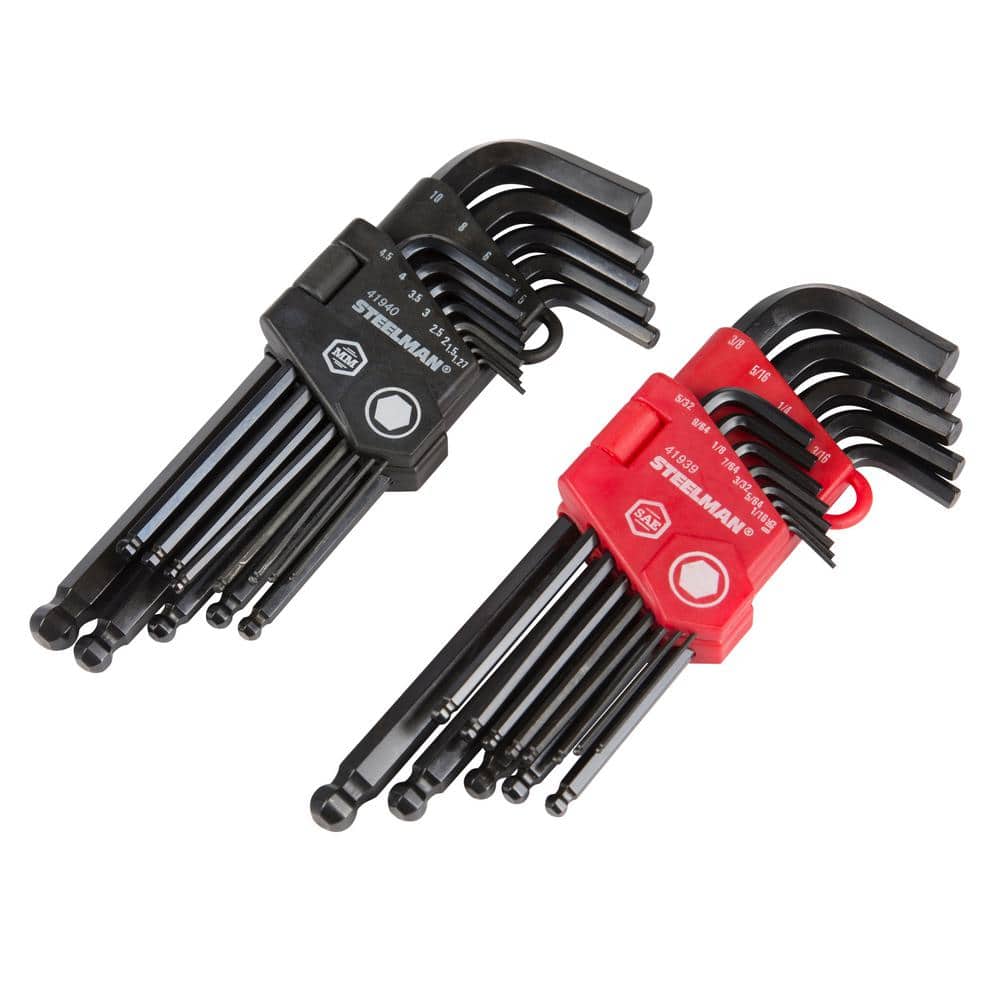
Essential for steps 3 and 5 on most FDM printers.
Neiko 53547A SAE Long Arm Ball End Hex Key Set Precision metric Allen keys for grub screws and mounts—ergonomic for tight spaces.
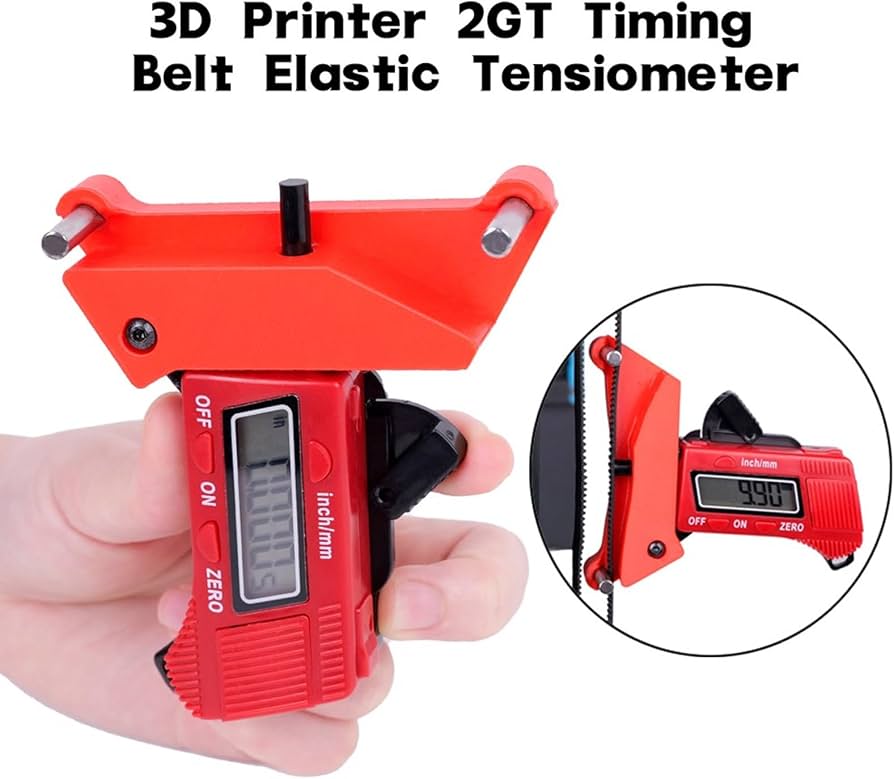
Pro measurement in step 2 for repeatable results.
Geeetech GT2 Belt Tension Meter Digital tool for accurate tension (Hz)—eliminates guesswork.
Add to motors if high-speed shifts remain.
StepperOnline NEMA17 Damper Set Reduces vibrations that cause shifts—easy clip-on install.