Layer shifting is one of the most frustrating 3D printing problems. You've spent hours on a print, only to watch the layers suddenly offset, ruining the model. It's a common issue that can stem from mechanical looseness, electrical problems, or slicer settings. The good news is that layer shifting is almost always fixable with some systematic troubleshooting.
In this guide, you'll learn a proven process to diagnose and correct layer shifting. We'll cover everything from checking belt tension and pulley set screws to adjusting stepper motor current and slicer settings. By the end, you'll be able to identify the root cause and get back to flawless prints.
This is an intermediate-level task that requires basic tools and a bit of patience. Expect to spend 1-2 hours on adjustments, plus time for test prints. No advanced electronics skills are needed, but you should be comfortable using hex keys and following precise instructions.
▸What You'll Need
- •Hex key set (metric, typically 1.5mm, 2mm, 2.5mm, 3mm)
- •Adjustable wrench or pliers
- •Isopropyl alcohol (90% or higher)
- •Lint-free cloths or paper towels
- •Synthetic grease (e.g., Super Lube) or dry lubricant
- •Threadlocker (e.g., Loctite Blue 242) - optional but recommended
- •Belt tensioner (optional, if your printer lacks one)
- •Digital calipers (optional, for precise measurements)
- •Multimeter (optional, for checking stepper motor Vref)
- •Test print model (e.g., a calibration cube or dedicated layer shift test)
Estimated Time: 1-2 hours (plus test print time)
Difficulty: intermediate
▸Step-by-Step Instructions
Step 1: Diagnose the Layer Shift Pattern
Before touching any hardware, examine the failed print. Determine which axis shifted: X (left-right) or Y (front-back). Look at the offset layers—is it a single sudden shift or multiple shifts? A single shift often points to a loose pulley or a one-time obstruction, while recurring shifts suggest a persistent issue like a loose belt or overheating stepper.
Note the direction of the shift. If layers shift only in one direction, the problem is likely specific to that axis's mechanics. If shifts occur in both axes, you may have a common cause like insufficient stepper current or overly aggressive acceleration settings.
Also, check if the shift happens at a specific height. If so, inspect the Z-axis for binding, debris, or a wobbling gantry. Document your observations—this will guide your troubleshooting.
💡 Tips:
- •Take a photo of the shifted print with a ruler for reference.
- •Print a small test cube first to reproduce the issue quickly.
⚠️ Warnings:
- •Don't assume the problem is always belts; misdiagnosis wastes time.
Step 2: Inspect and Adjust Belt Tension
Loose belts are the most common cause of layer shifting. Turn off and unplug your printer. Locate the X and Y belts. Pluck each belt like a guitar string—it should feel tight and produce a low, consistent twang. If it feels slack or produces a dull sound, it needs tightening.
Most printers have belt tensioners on the X and Y axes. Use the appropriate hex key or wrench to tighten the tensioner. If your printer lacks tensioners, you may need to loosen the belt clamp, pull the belt tight, and re-secure it. Aim for a tension where the belt deflects about 1-2mm when pressed firmly with your finger.
After adjusting, move the print head manually along the axis. It should move smoothly without binding. If it feels too tight, loosen slightly—over-tightening can damage bearings and motors.
💡 Tips:
- •Mark the tensioner position with a marker before adjusting, so you can revert if needed.
- •Tighten in small increments and re-check tension.
⚠️ Warnings:
- •Never over-tighten belts; this can cause motor strain and premature wear.
- •Ensure the belt is centered on the pulleys and not rubbing against the frame.
Step 3: Tighten Pulley Set Screws
Even with proper belt tension, a loose pulley on the stepper motor shaft can cause layer shifts. The pulley is secured by one or two small set screws (grub screws). Over time, these can loosen, allowing the pulley to slip under load.
Locate the pulleys on your X and Y stepper motors. Use the correct size hex key (usually 1.5mm or 2mm) to tighten each set screw firmly. If there are two screws, tighten both. For extra security, apply a small amount of blue threadlocker to the screw threads before tightening. Avoid red threadlocker, as it's permanent and will make future removal difficult.
After tightening, gently try to rotate the pulley by hand—it should not move independently of the motor shaft.
💡 Tips:
- •Check the set screws on both the motor pulley and any idler pulleys.
- •If a set screw is stripped, replace it with a new one from a hardware kit.
⚠️ Warnings:
- •Do not overtighten set screws; you can strip the threads or crack the pulley.
- •Ensure the pulley is aligned with the belt path before final tightening.
Step 4: Adjust Eccentric Nuts and Wheel Tension
Many 3D printers use V-slot wheels with eccentric nuts to adjust the tension between the wheels and the rails. If these are too loose, the gantry or print head can wobble, causing layer shifts. If too tight, the wheels bind and cause skipped steps.
To adjust, locate the eccentric nuts (usually a hex-shaped nut on one of the wheels). Use a wrench to turn the nut slightly. The goal is to eliminate any play while allowing smooth movement. Test by trying to wiggle the gantry or print head—there should be no side-to-side movement, but it should still slide freely.
Adjust one wheel at a time, then re-check. This step is often overlooked but can be a major contributor to layer shifting.
💡 Tips:
- •Adjust the eccentric nut on the bottom wheel first, then the top if needed.
- •Move the axis back and forth after adjustment to feel for binding.
⚠️ Warnings:
- •Over-tightening eccentric nuts can flatten the wheels and damage the rails.
- •If wheels are worn or flat-spotted, replace them.
Step 5: Clean and Lubricate Rails and Rods
Debris, dust, and old lubricant can cause binding on linear rails or rods, leading to skipped steps and layer shifts. Turn off the printer and move the axes to access the rails. Wipe them down with a lint-free cloth dampened with isopropyl alcohol. Remove any visible debris or gummy residue.
Once clean, apply a thin layer of appropriate lubricant. For linear rods, use a synthetic grease like Super Lube. For V-slot rails, a dry lubricant (e.g., PTFE spray) is better because it doesn't attract dust. Move the axes back and forth to distribute the lubricant.
Avoid using WD-40 as a lubricant—it's a solvent and will strip away existing grease, leaving parts dry.
💡 Tips:
- •Lubricate every few months or after heavy printing.
- •Use a clean toothbrush to scrub hard-to-reach areas.
⚠️ Warnings:
- •Do not apply too much grease; excess can attract dust and cause clogs.
- •Never lubricate belts—they should run dry.
Step 6: Check Stepper Motor Current (Vref)
If your printer uses adjustable stepper drivers (e.g., A4988, DRV8825, TMC2208), the motor current may be set too low, causing the motor to skip steps under load. Too high, and the motor overheats and also skips steps. This is an advanced step, but it's crucial if mechanical fixes don't solve the issue.
You'll need a multimeter. Look up your specific printer board's Vref calculation and target value (e.g., 0.8V for a 1.5A motor). With the printer powered on, measure the voltage at the potentiometer or via the driver's test point. Adjust the potentiometer screw until you reach the target voltage. Make small adjustments (1/8 turn) and re-measure.
After setting, run a test print. Check motor temperature—if too hot to touch (over 60°C), reduce current slightly.
💡 Tips:
- •Consult your printer's manual or online community for the correct Vref.
- •Use a ceramic screwdriver to avoid shorting the driver.
⚠️ Warnings:
- •High voltage: always power off before connecting probes, then power on to measure.
- •Incorrect Vref can fry drivers or motors—double-check calculations.
Step 7: Review Slicer Settings for Acceleration and Jerk
Aggressive acceleration and jerk settings can cause the stepper motors to skip steps, especially on heavier print heads or direct-drive extruders. Open your slicer and reduce acceleration values. A common starting point is 500 mm/s² for print moves, 1000 mm/s² for travel. Jerk (or junction deviation) should be moderate—around 8-10 mm/s for jerk.
Also, check print speed. Very high speeds (e.g., 100+ mm/s) can exceed the printer's capabilities, leading to shifts. Try slowing down outer walls and infill. If you're using Klipper or Marlin, you can also enable 'square corner velocity' or 'input shaping' to reduce ringing and skipped steps.
Change one setting at a time and test to identify the culprit.
💡 Tips:
- •Use a calibration cube to test speed and acceleration changes.
- •Many printers have a 'silent' profile with lower acceleration—try that.
⚠️ Warnings:
- •Don't reduce settings so much that print quality suffers unnecessarily.
- •Ensure your firmware supports the changes (e.g., M204 for acceleration).
Step 8: Ensure Proper Cooling for Stepper Drivers and Motors
Overheating stepper drivers or motors can cause thermal shutdown or skipped steps. Check if your control board has cooling fans directed at the drivers. If not, add a small fan or heatsinks. For motors, ensure they are not enclosed in a hot chamber without ventilation.
After a print, carefully touch the motors. They should be warm but not burning hot (typically under 60°C). If they're too hot, reduce motor current (as in Step 6) or improve airflow. Overheating is a common cause of intermittent layer shifts that worsen during long prints.
💡 Tips:
- •Use an infrared thermometer to check motor temperatures accurately.
- •Add a fan duct to blow air directly over the stepper drivers.
⚠️ Warnings:
- •Do not block existing cooling fans; ensure they are running.
- •Overheating can damage motors permanently if ignored.
Step 9: Run a Calibration Test Print
After making adjustments, print a dedicated layer shift test model. There are many free models available on Thingiverse or Printables, such as a tall thin tower or a calibration cube with a marker. These tests are designed to reveal shifts quickly and use minimal filament.
Observe the print as it progresses. If a shift occurs, note the height and axis. Stop the print if it fails early to save time. Compare the result to your previous print to see if the issue is resolved or improved.
If the test print is successful, move on to a more complex model to confirm the fix.
💡 Tips:
- •Use a small layer height (0.2mm) and moderate speed for the test.
- •Print two test models at once to check both X and Y axes simultaneously.
⚠️ Warnings:
- •Don't use a large, expensive print as your first test.
- •If the test fails, don't keep printing—re-troubleshoot.
Step 10: Iterate and Verify the Fix
If layer shifting persists, don't give up. Go back through the steps systematically. Often, multiple small issues combine to cause shifting. Re-check belt tension, set screws, and eccentric nuts. Try adjusting one variable at a time and re-testing.
If you've exhausted mechanical fixes, consider electrical issues: a failing stepper motor, a damaged driver, or loose wiring. Swap the X and Y motor connectors on the board—if the shift moves to the other axis, the motor or driver is likely faulty. Replace as needed.
Once the test print is clean, print a benchmark model like a Benchy to confirm. With patience, you'll eliminate layer shifting and restore print quality.
💡 Tips:
- •Keep a log of changes and results to track what works.
- •Join 3D printing forums or subreddits for specific printer advice.
⚠️ Warnings:
- •Don't replace parts without confirming they're faulty.
- •If all else fails, consult a professional or the printer manufacturer.
▸Pro Tips
- •Always turn off and unplug your printer before making mechanical adjustments.
- •Use a belt tension gauge or a phone app that measures belt frequency for precise tension.
- •Apply blue threadlocker to all set screws to prevent them from vibrating loose.
- •Check both X and Y axes even if only one is shifting—issues can be interrelated.
- •Keep spare belts, pulleys, and set screws on hand for quick replacements.
- •After any adjustment, move the axes by hand to feel for smooth operation before printing.
- •Reduce acceleration and jerk by 20-30% as a quick test to see if layer shifting is settings-related.
- •Regularly clean and lubricate your printer's motion system as part of a maintenance schedule.
▸Common Mistakes to Avoid
- •Only tightening belts and ignoring pulley set screws—loose pulleys are a top cause of shifting.
- •Over-tightening belts, which strains motors and bearings, leading to more problems.
- •Adjusting slicer settings before checking mechanical issues—mechanical fixes are usually the root cause.
- •Using the wrong lubricant (e.g., WD-40) on rails, which attracts dust and causes binding.
- •Forgetting to check eccentric nuts, which can cause wobble and shifting even with tight belts.
▸Troubleshooting
Problem: Layer shifting persists after tightening belts.
Solution: Check pulley set screws, eccentric nuts, and stepper motor current. Also inspect for debris on rails and ensure the print head isn't wobbling.
Problem: Shifting occurs only on one axis (e.g., X).
Solution: Focus on that axis: inspect its belt, pulley, motor, and wiring. Swap motor connectors to test if the issue moves to the other axis, indicating a motor or driver problem.
Problem: Shifting happens at a specific height.
Solution: Inspect the Z-axis for binding, debris, or a bent lead screw. Check if the gantry is wobbling at that height and adjust eccentric nuts or Z-rod couplers.
Problem: Stepper motors become very hot during printing.
Solution: Reduce motor current (Vref) and improve cooling with fans or heatsinks. Overheating causes skipped steps and layer shifts.
Problem: Shift appears randomly, not consistently.
Solution: Check for intermittent electrical connections, loose wires, or a failing stepper driver. Also consider ambient temperature and cooling.
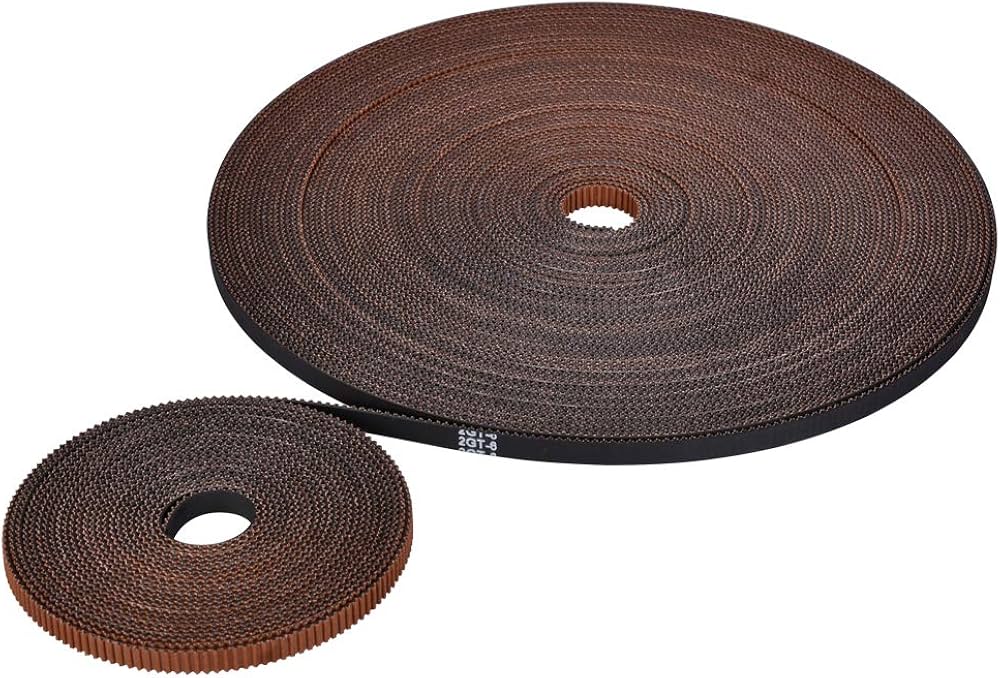
Gates GT2 Belt
Gates belts are known for their high quality and minimal stretch, providing consistent tension and reducing the chance of layer shifts caused by belt elasticity.
Best for: Replace worn or low-quality belts on X and Y axes for precise, long-lasting performance.
Price Range: $10-$20
3D Printer Belt Tensioner
A dedicated tensioner makes it easy to adjust belt tension accurately without disassembling the printer, ensuring optimal tension and preventing shifts.
Best for: Upgrade printers that lack built-in tensioners or replace broken ones for quick adjustments.
Price Range: $10-$15
Loctite Blue 242 Threadlocker
Blue threadlocker secures pulley set screws and other fasteners against vibration, preventing them from loosening and causing layer shifts.
Best for: Apply to set screws, motor mounts, and other critical screws to keep them tight without making removal impossible.
Price Range: $6-$10
Super Lube Synthetic Grease
This grease is ideal for lubricating linear rods and bearings, reducing friction and binding that can lead to skipped steps and layer shifts.
Best for: Apply to Z-axis lead screws, linear rods, and bearings during regular maintenance.
Price Range: $10-$15