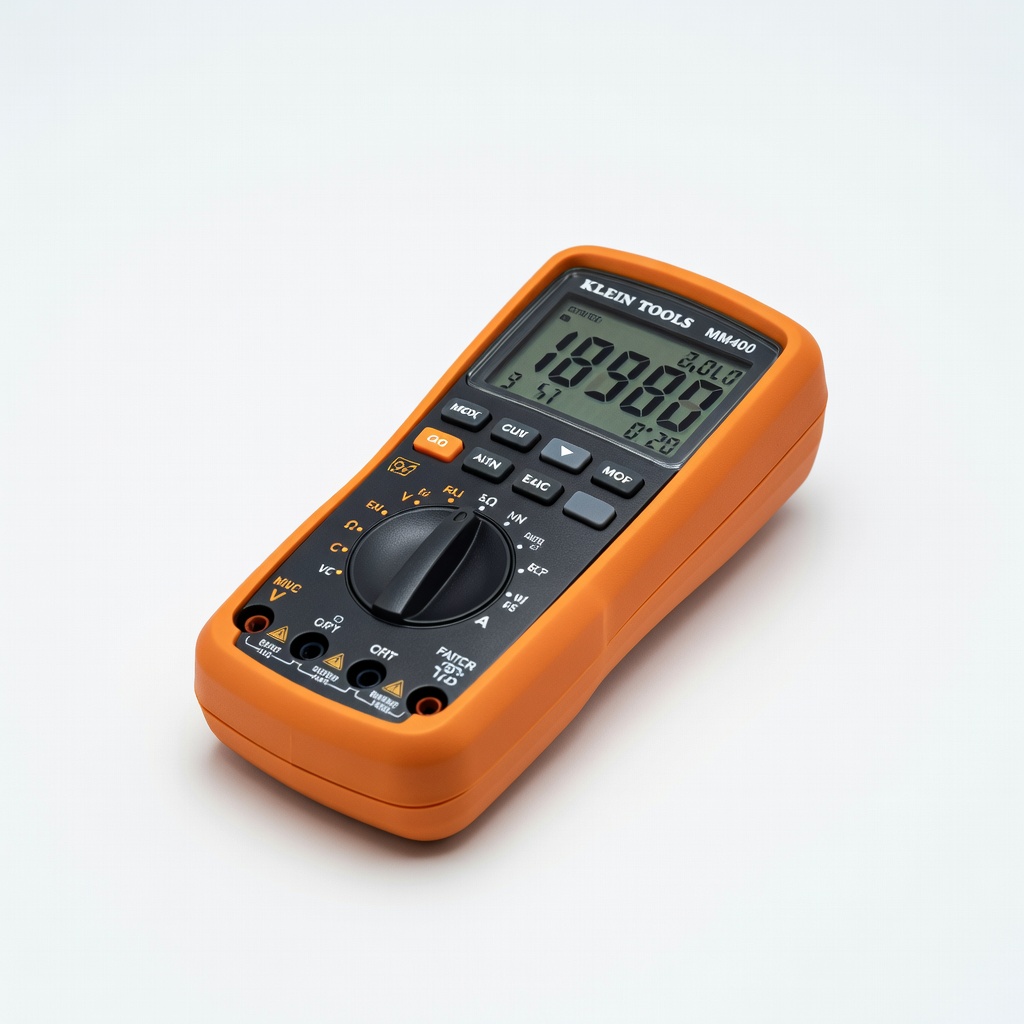
Klein Tools MM400 Digital Multimeter
Use during steps 5 and 6 to check continuity and voltage safely.
$50-$60
Klein Tools MM400 Digital Multimeter Essential for accurately testing electrical components like fans and thermostats without guesswork.
Get the App
Better experience on mobile
Restore your fridge's cooling with these intermediate DIY steps, saving time and money on repairs.
Nothing disrupts your kitchen routine like a refrigerator that won't cool properly—spoiled food, wasted groceries, and the hassle of last-minute shopping trips. If your fridge is running but not keeping things cold, it could be a simple fix like dirty coils or a faulty thermostat, rather than a major breakdown. This guide empowers intermediate DIYers to troubleshoot and repair common issues without needing a professional right away.
You'll learn to identify the root cause through systematic checks, from basic power verification to inspecting key components like fans and seals. By the end, you'll have actionable steps to get your refrigerator back to optimal performance, potentially extending its lifespan. Expect a process that's straightforward but requires some tools and caution around electrical parts.
This repair typically takes 30 minutes to 1 hour, depending on the issue, and assumes you have basic comfort with tools like screwdrivers and multimeters. If you're new to appliance repairs, consider watching a quick tutorial video first. Always prioritize safety to avoid shocks or further damage.
Estimated Time: 30 minutes to 1 hour Difficulty: intermediate
Before diving into any repairs, safety is paramount. Locate the power cord at the back of your refrigerator and unplug it from the wall outlet. This prevents electrical shocks, especially when working near internal components.
Why it matters: Refrigerators involve high-voltage parts like the compressor, and working live can lead to injury or damage. Expect the fridge to be completely powered down—no lights or humming sounds.
Once unplugged, move the fridge away from the wall if needed (get help for heavy models) to access the back panel.
💡 Tips:
⚠️ Warnings:
Verify that the issue isn't as simple as a tripped breaker or incorrect settings. Plug the fridge back in briefly to test: ensure the outlet works by plugging in another device, like a lamp. Then, check your home's circuit breaker panel for any flipped switches related to the kitchen.
Inside the fridge, confirm the temperature dial is set to the middle (around 37°F for the fridge, 0°F for the freezer). Why it matters: Power interruptions or wrong settings account for up to 20% of cooling issues. Success looks like the fridge humming and lights turning on normally.
If power is fine, unplug again and proceed. This quick check can resolve the problem in minutes.
💡 Tips:
⚠️ Warnings:
Dirty condenser coils are a top culprit for poor cooling, as they prevent heat dissipation. With the fridge unplugged and pulled out, remove the rear or bottom access panel using a screwdriver (location varies by model—check your manual).
Use a vacuum with brush attachment to gently remove dust and debris from the coils. Follow with a coil brush for stubborn spots. Why it matters: Clogged coils make the compressor overwork, reducing efficiency by up to 30%. Expect coils to look shiny and free of buildup afterward; the fridge should cool better once reassembled.
Reattach the panel securely and plug in to test—wait 30 minutes for temperature drop.
💡 Tips:
⚠️ Warnings:
Faulty door seals let warm air in, forcing the fridge to work harder. Clean the seals with warm soapy water first, then check for cracks or gaps by closing the door on a dollar bill—if it pulls out easily, the seal is weak.
Why it matters: Poor seals can cause 10-15% efficiency loss, leading to uneven cooling. For testing, use the multimeter on the seal's magnetic strip if applicable, but visual inspection is key. Success: The bill stays put, and no warm air leaks feel when your hand is near the door.
If damaged, order a replacement gasket (model-specific) and install by peeling off the old one and pressing the new into place.
💡 Tips:
⚠️ Warnings:
The evaporator fan circulates cold air; listen for it inside the freezer (unplug first). Remove the back panel in the freezer compartment with a screwdriver to access the fan.
Spin the fan blades manually—if stuck, clean or lubricate; if it doesn't run when plugged in, test with multimeter for continuity (set to ohms; 0-1 reading means good). For the thermostat, locate it (often behind the control panel) and test similarly.
Why it matters: A bad fan or thermostat stops cold air flow, mimicking a total failure. Expect the fan to spin freely and hum when powered; replace if readings show infinite resistance. Reassemble and monitor cooling.
💡 Tips:
⚠️ Warnings:
If frost builds up excessively, the defrost timer, heater, or thermostat may be faulty. Locate the defrost timer (usually near the compressor at the back) and advance it manually with a screwdriver to listen for a click.
Use the multimeter to test the heater (behind evaporator coils) for continuity and the bi-metal thermostat for closure when cold. Why it matters: A failed defrost cycle leads to ice blockages, halting cooling. Success: Components click or show continuity; the fridge should maintain even temperatures without frost.
Replace faulty parts (inexpensive, model-specific) and test after 24 hours.
💡 Tips:
⚠️ Warnings:
Plug the fridge back in, set temperatures correctly, and wait 4-24 hours to monitor. Use a thermometer inside to confirm 37°F in the fridge and 0°F in the freezer.
Why it matters: Some fixes take time to show results. Success: Food stays cold, no unusual noises, and even cooling throughout. If still not cooling, it may be the compressor—time for a pro.
Document what you fixed for future reference.
💡 Tips:
⚠️ Warnings:
Problem: Fridge cools but freezer doesn't
Solution: Check the damper control or air flow vents; clean or adjust them. If persistent, test the fan again.
Problem: Noises like clicking or buzzing
Solution: Likely a failing compressor or loose parts—tighten screws or call a pro if compressor-related.
Problem: Cooling improves temporarily then fails
Solution: Could be low refrigerant; this requires professional recharge as it's sealed system work.
Problem: Error codes on digital display
Solution: Look up codes in the manual; reset by unplugging for 5 minutes, then retest.
Essential for accurately testing electrical components like fans and thermostats without guesswork.
Best for: Use during steps 5 and 6 to check continuity and voltage safely.
Price Range: $50-$60
Specifically designed for fridge coils, it removes dust effectively without damaging fins.
Best for: Ideal for step 3 to ensure thorough cleaning and better heat dissipation.
Price Range: $10-$15
Reliable OEM-style part that fits many models, restoring precise temperature control.
Best for: Replace during step 5 if testing shows failure, for a quick intermediate fix.
Price Range: $20-$30
Durable silicone seal that improves energy efficiency by preventing air leaks.
Best for: Apply in step 4 for models with worn seals, ensuring long-term cooling performance.
Price Range: $40-$50
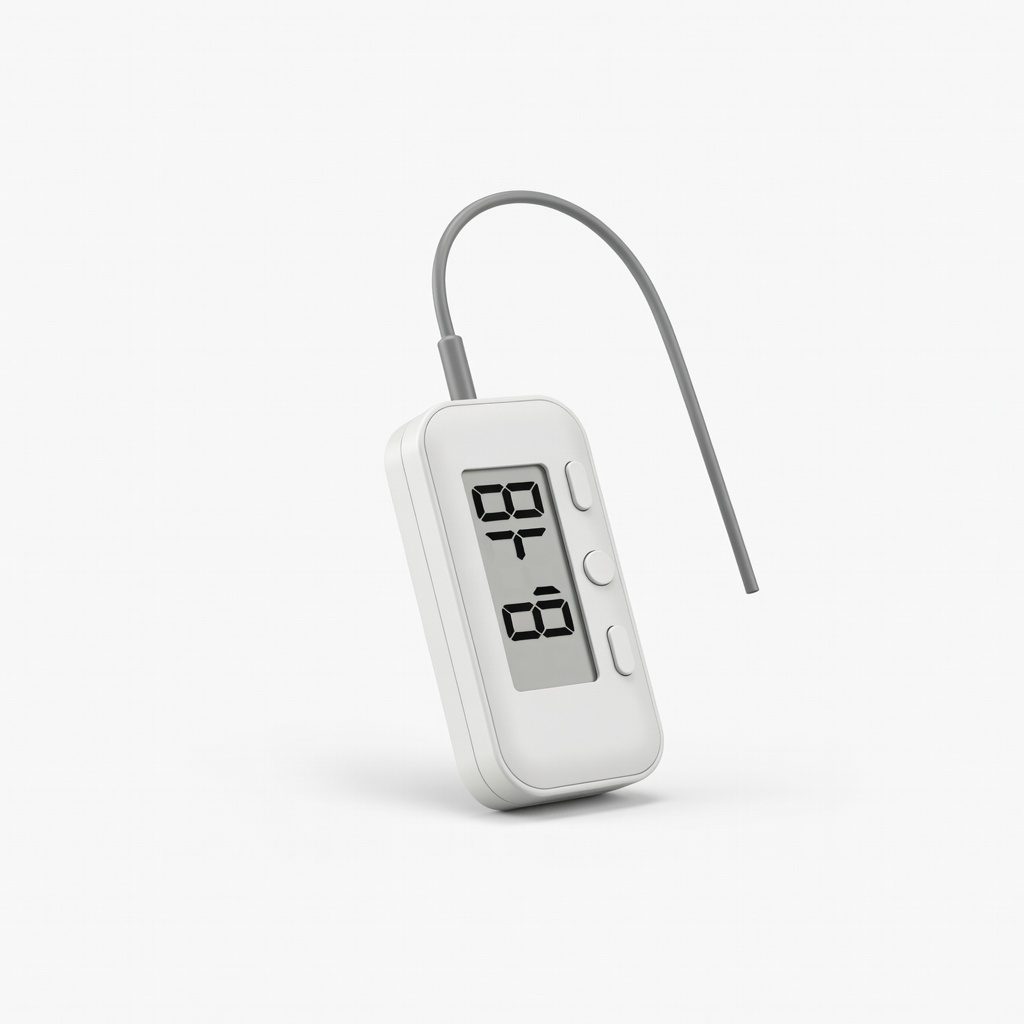
Helps monitor internal temperatures accurately during testing and ongoing maintenance.
Best for: Use in step 7 and beyond to verify fixes and prevent food spoilage.
Price Range: $10-$15
Use during steps 5 and 6 to check continuity and voltage safely.
Klein Tools MM400 Digital Multimeter Essential for accurately testing electrical components like fans and thermostats without guesswork.
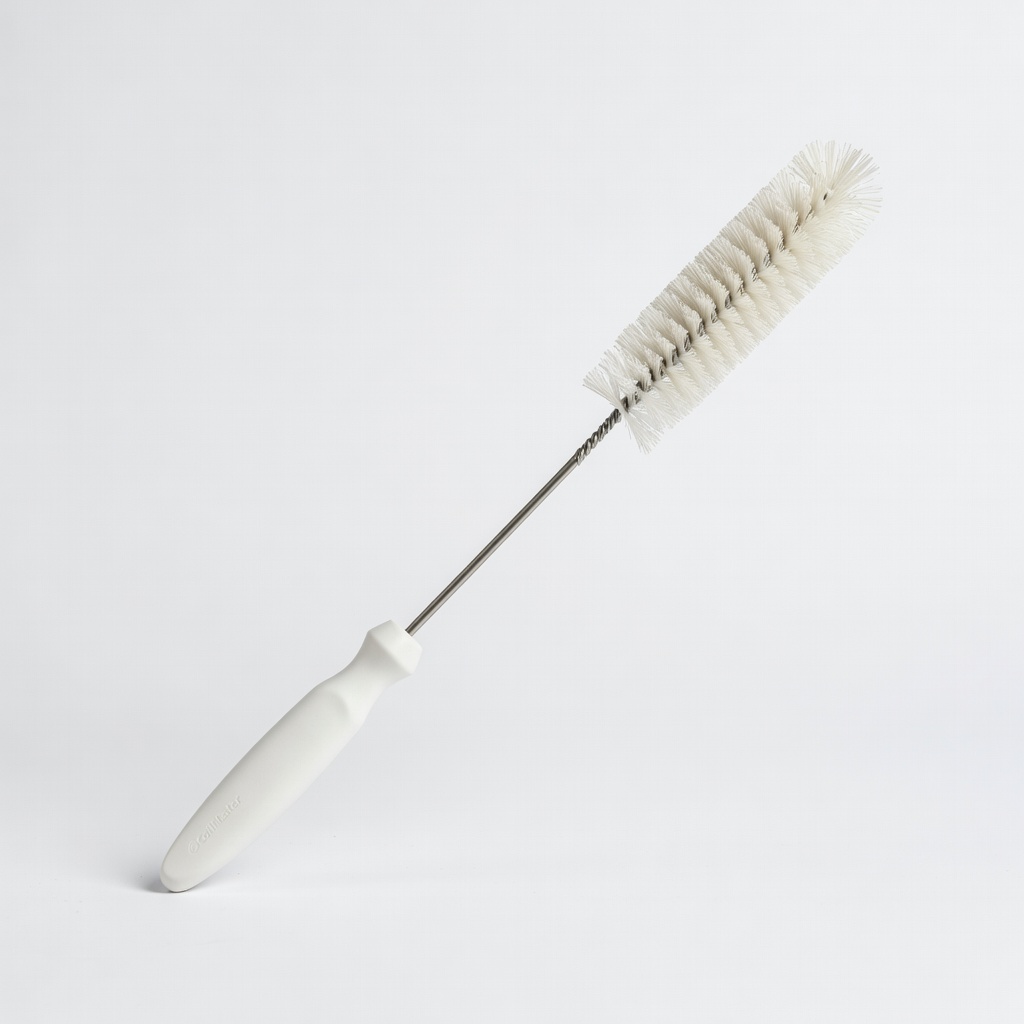
Ideal for step 3 to ensure thorough cleaning and better heat dissipation.
CoilMaster Refrigerator Condenser Coil Cleaning Brush Specifically designed for fridge coils, it removes dust effectively without damaging fins.
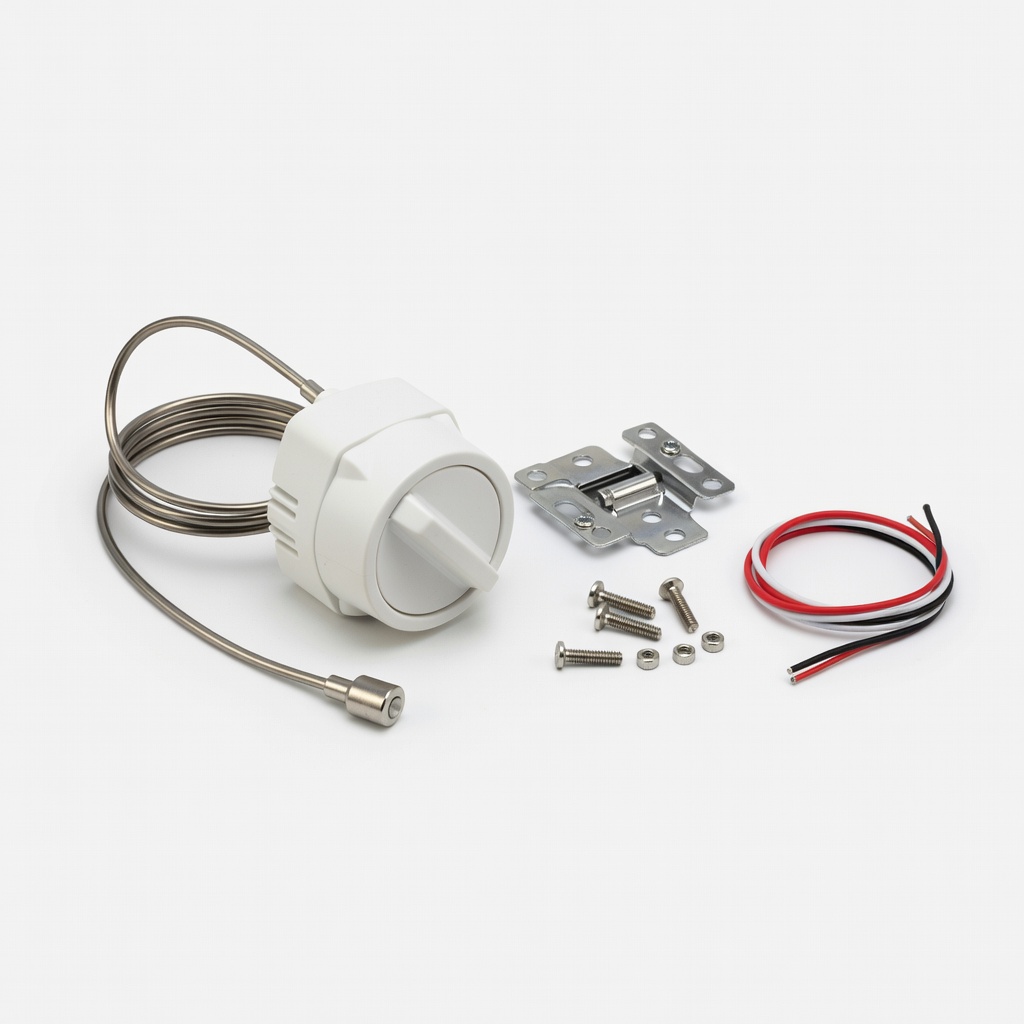
Replace during step 5 if testing shows failure, for a quick intermediate fix.
Supco Ranco Refrigerator Thermostat Replacement Reliable OEM-style part that fits many models, restoring precise temperature control.

Apply in step 4 for models with worn seals, ensuring long-term cooling performance.
Everchill Refrigerator Door Gasket Seal Durable silicone seal that improves energy efficiency by preventing air leaks.
Use in step 7 and beyond to verify fixes and prevent food spoilage.
Inkbird Digital Thermometer for Fridge Helps monitor internal temperatures accurately during testing and ongoing maintenance.