A leaky kitchen faucet isn't just annoying—it's wasting water and driving up your utility bills. That constant drip can add up to gallons lost each day, and ignoring it might lead to bigger plumbing issues. If you're a homeowner or renter tired of the sound and mess, fixing it yourself is simpler than you think and can save you hundreds in service calls.
In this guide, you'll learn how to identify the leak type, gather basic tools, and follow step-by-step instructions to replace worn parts like washers or O-rings. We'll cover the most common compression-style faucets found in kitchens. The process is straightforward for beginners, requiring no advanced skills—just patience and a few household items.
Expect to spend 20-30 minutes on the repair, depending on your faucet's age. By the end, you'll have a drip-free faucet and the confidence to tackle similar DIY fixes.
▸What You'll Need
- •Adjustable wrench or basin wrench (required for tightening nuts)
- •Screwdriver set (Phillips and flathead, required for handles)
- •Replacement washer or O-ring kit (required; get one matching your faucet type)
- •Plumber's tape (Teflon tape, required for threads to prevent future leaks)
- •Bucket or towel (required to catch water)
- •Vinegar or faucet cleaner (optional for cleaning mineral buildup)
- •Penetrating oil like WD-40 (optional for stuck parts)
Estimated Time: 20-30 minutes
Difficulty: beginner
▸Step-by-Step Instructions
Step 1: Turn Off the Water Supply
Before touching the faucet, locate and shut off the water supply to avoid a flood. Under the sink, find the shutoff valves for hot and cold water—usually two small handles or knobs on pipes leading to the faucet.
Turn both valves clockwise until they stop (tight but not forced). If valves are stuck or absent, shut off the main water supply to your home via the basement or exterior valve. Open the faucet to drain remaining water and relieve pressure. This step is crucial because working with live water can cause spraying and make the job messy.
Success looks like no water flowing from the faucet when turned on. Place a bucket under the sink to catch any drips.
💡 Tips:
- •Label hot and cold valves with tape if they're confusing to remember later.
⚠️ Warnings:
- •Never force stuck valves; use penetrating oil and try again to avoid breaking them.
Step 2: Clear the Area Under the Sink
Remove any items from under the sink cabinet to create a clear workspace. This includes cleaning supplies, trash cans, or pipes that might obstruct access. Lay down an old towel or plastic sheet to protect surfaces from water or tools.
Plug the sink drain with a rag to prevent small parts from falling in. Inspect the faucet from below for visible leaks or corrosion—this helps diagnose if it's a simple washer issue or something more complex like a cracked pipe.
You'll now have easy access to the faucet's underside. Expect some dust or grime; wipe it away for better visibility.
💡 Tips:
- •Work with a headlamp if the space is dark for safer handling of tools.
⚠️ Warnings:
- •Avoid sharp edges on pipes; wear gloves to protect your hands.
Step 3: Disassemble the Faucet Handle
Start by removing the faucet handle. Look for a small cap or screw on top of the handle (often decorative). Pry off the cap with a flathead screwdriver to reveal the screw beneath.
Use a Phillips screwdriver to loosen and remove the screw, then lift off the handle. If it's a single-handle faucet, you may need to remove a set screw on the side. Gently pull the handle away— it might be stiff from mineral buildup.
This exposes the faucet stem or cartridge. Success: The handle comes off cleanly without damaging the finish. Why it matters: This is where most leaks originate from worn internal parts.
💡 Tips:
- •Soak the handle in vinegar for 10 minutes if it's stuck to loosen deposits.
⚠️ Warnings:
- •Don't use excessive force; if it won't budge, apply penetrating oil and wait 5 minutes.
Step 4: Remove the Nut and Inspect the Stem
With the handle off, use an adjustable wrench to loosen the large nut securing the stem or valve assembly to the faucet body. Turn counterclockwise while holding the stem to prevent rotation.
Pull out the stem carefully. Examine it for a rubber washer at the bottom or O-rings along the sides—these are usually the culprits of leaks when worn or cracked. Note the size and type for replacement.
Place parts in your bucket to keep them organized. Expect some water residue; wipe it dry. This step reveals the problem— a deteriorated washer means it's time for a new one.
💡 Tips:
- •Take a photo of the assembly before disassembly for reassembly reference.
⚠️ Warnings:
- •Avoid scratching chrome finishes with the wrench; wrap jaws in cloth if needed.
Step 5: Replace the Washer or O-Ring
Take your old washer or O-ring to compare with the replacement kit. Remove the old one with a small screwdriver or your fingernail— it may be seated in a groove.
Clean the groove with a cloth and vinegar to remove debris or buildup, which can cause new leaks. Install the new washer by pressing it firmly into place, ensuring it seats flat. For O-rings, lubricate lightly with plumber's grease if included in your kit.
Why replace? Worn seals lose their ability to create a watertight barrier. Success: The new part fits snugly without gaps.
💡 Tips:
- •Buy a universal kit to cover multiple faucet types and save future trips to the store.
⚠️ Warnings:
- •Don't overtighten during later reassembly; it can crack parts.
Step 6: Reassemble the Faucet
Wrap the threads of the stem with 2-3 layers of plumber's tape clockwise before reinserting it into the faucet body. This prevents future leaks at connections.
Secure the nut with the wrench, tightening until snug but not overly tight—about 1/4 turn past hand-tight. Replace the handle, screw, and cap in reverse order of disassembly.
Double-check all parts are aligned. Expect a clean, secure fit. This restores the faucet to working order.
💡 Tips:
- •Turn the tape clockwise to match the tightening direction for best seal.
⚠️ Warnings:
- •Misaligned parts can cause binding; test handle movement before full tightening.
Step 7: Turn Water Back On and Test
Slowly turn the shutoff valves counterclockwise to restore water flow. Start with cold, then hot, to check for issues gradually.
Turn on the faucet fully, then close it and check for drips. Run water for 1-2 minutes and observe the handle and base for leaks.
Success: No drips, smooth operation. If it leaks slightly, tighten the nut a bit more. Wipe up any water and clean the area.
💡 Tips:
- •Have a towel ready for initial spurts when turning water on.
⚠️ Warnings:
- •If water sprays forcefully, shut off immediately and check connections.
▸Pro Tips
- •Always work on one side (hot or cold) first if it's a two-handle faucet to isolate issues.
- •Keep parts sorted in a muffin tin or egg carton during disassembly to avoid mix-ups.
- •Apply a dab of silicone grease to O-rings for longer life and easier future repairs.
- •Test for leaks multiple times: immediately after, after 10 minutes, and the next day.
- •If your faucet is old, consider upgrading during repair for better efficiency—link to guides below.
- •Use LED work lights clipped to the cabinet for hands-free illumination in tight spaces.
- •Prevent buildup by cleaning aerators monthly with vinegar to extend faucet life.
▸Common Mistakes to Avoid
- •Forgetting to turn off the water supply, leading to a messy flood—always double-check before starting.
- •Over-tightening nuts, which can strip threads or crack porcelain—hand-tighten then use wrench sparingly.
- •Using the wrong size washer, causing continued leaks—measure or match the old one exactly.
- •Skipping plumber's tape on threads, resulting in leaks at reassembly—it's a cheap fix for prevention.
- •Not cleaning mineral deposits, which hide underlying issues—vinegar soak reveals problems early.
▸Troubleshooting
Problem: Faucet still leaks after reassembly
Solution: Check and retighten all nuts; ensure washer is seated properly. If persistent, replace the entire cartridge—seek a pro if unsure.
Problem: Handle feels loose or wobbly
Solution: Tighten the handle screw more; if it spins freely, the stem spline may be worn—consider a full replacement kit.
Problem: Water pressure is low post-repair
Solution: Clean or replace the aerator screen at the faucet tip, clogged by debris during work. Unscrew and rinse.
Problem: Can't remove a stuck nut
Solution: Apply penetrating oil, let sit 10-15 minutes, then tap gently with a hammer. Use a basin wrench for better leverage in tight spaces.
Problem: Leak from under the sink pipes
Solution: Tighten compression nuts on supply lines. If cracked, replace the line—call a plumber for flexible hose issues.
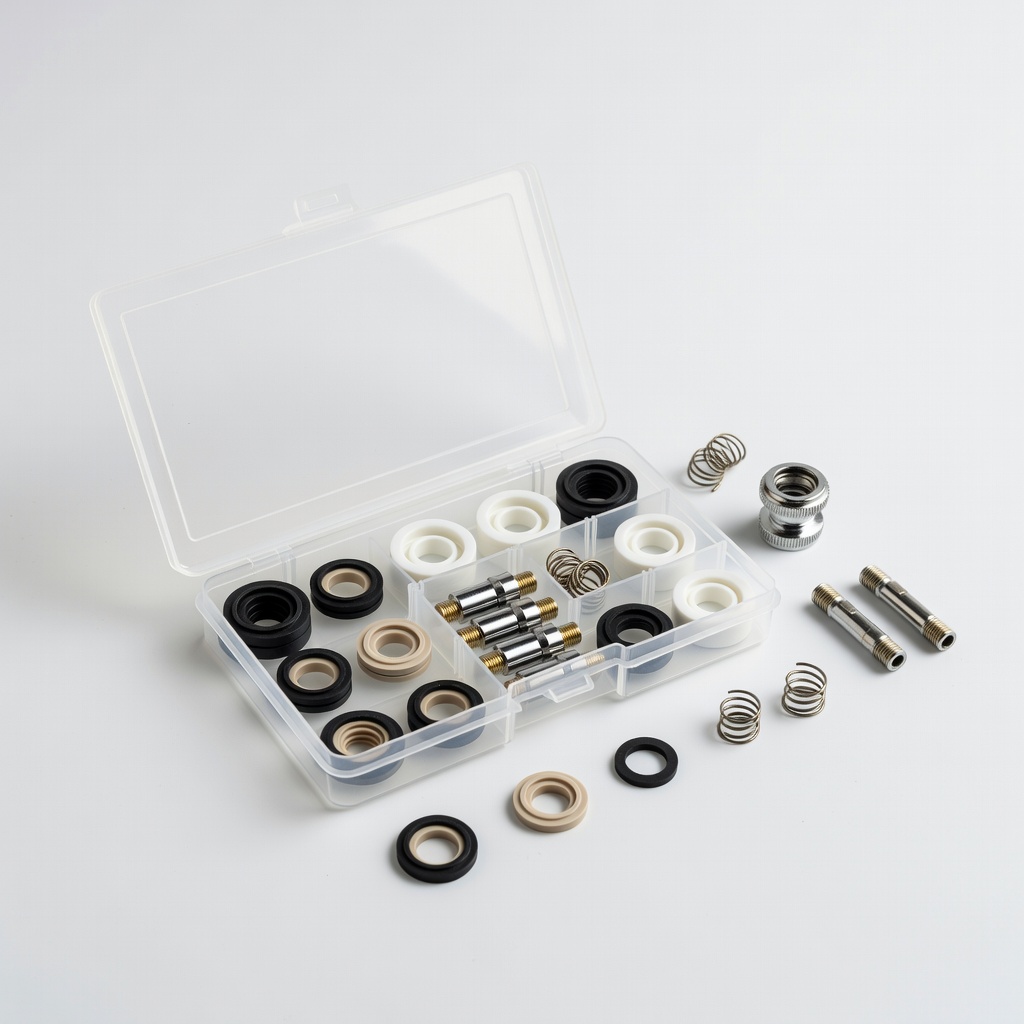
Danco Universal 2-Handle Bathroom and Kitchen Faucet Repair Kit
This kit includes assorted washers, O-rings, and seats for most compression faucets, making it ideal for beginners to match and replace parts without guesswork.
Best for: Use for standard leaky drips from worn seals in older kitchen faucets.
Price Range: $8.99
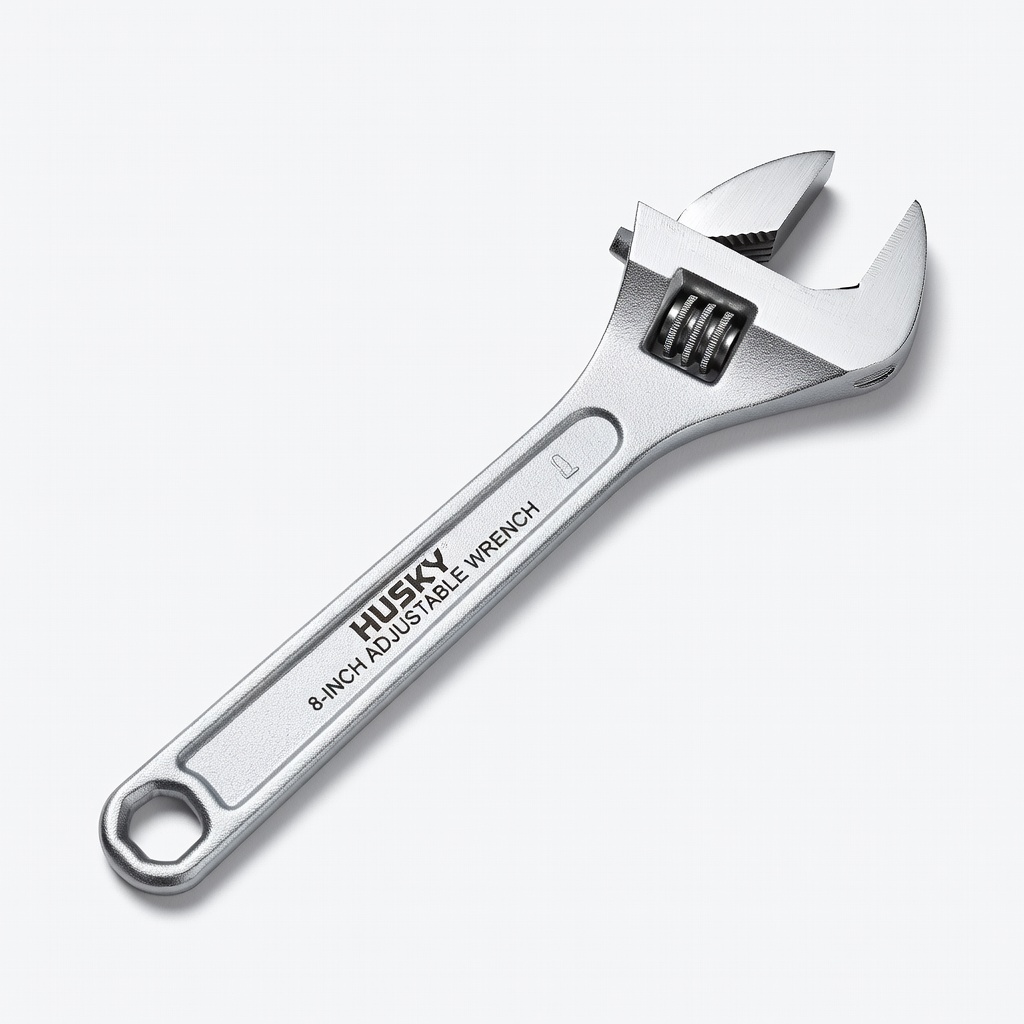
Husky 8-Inch Adjustable Wrench
Durable and versatile for gripping faucet nuts without slipping, with a comfortable grip for tight under-sink work—essential for safe disassembly.
Best for: Tightening or loosening stubborn nuts during repair without damaging finishes.
Price Range: $12.97
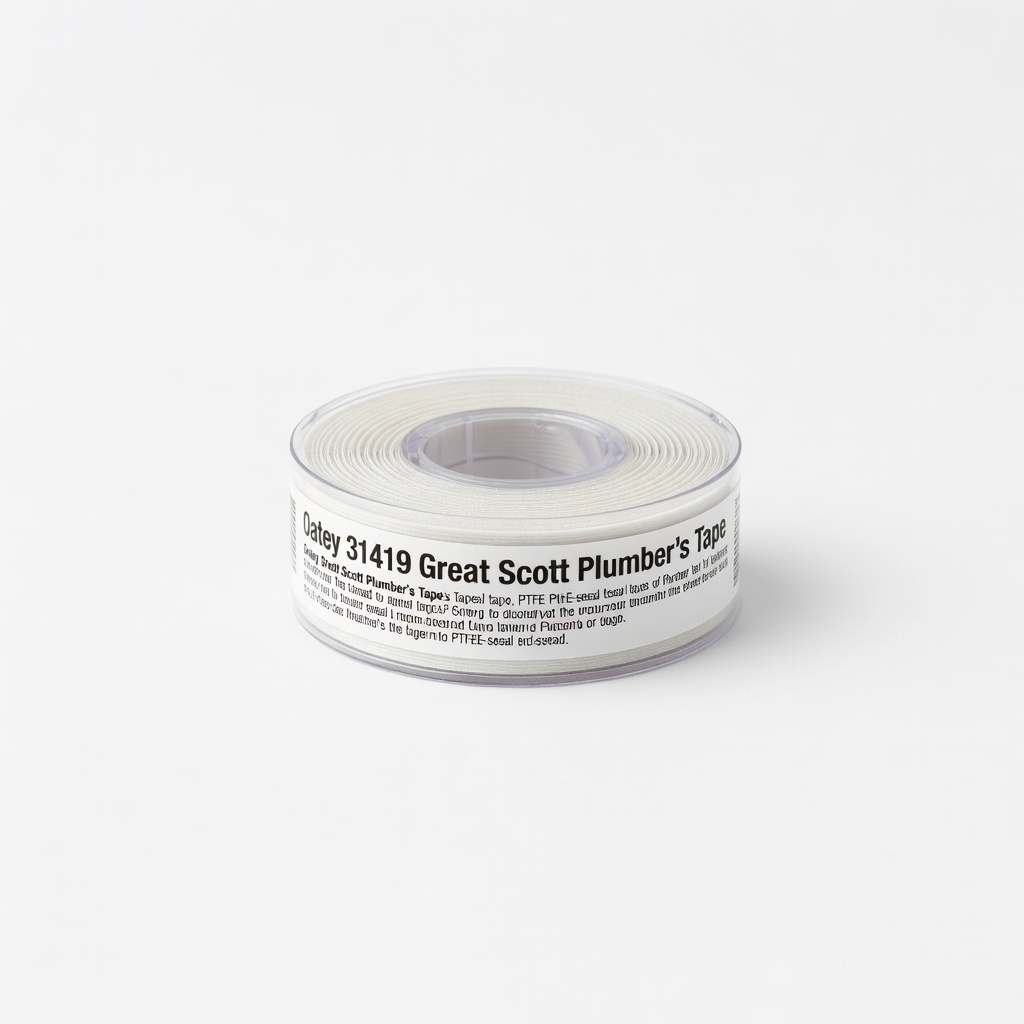
Oatey 31419 Great Scott Plumber's Tape
High-quality Teflon tape that seals threads effectively, preventing leaks at connections—thicker than generic for better reliability.
Best for: Wrapping faucet stems before reassembly to ensure a watertight fit.
Price Range: $4.98
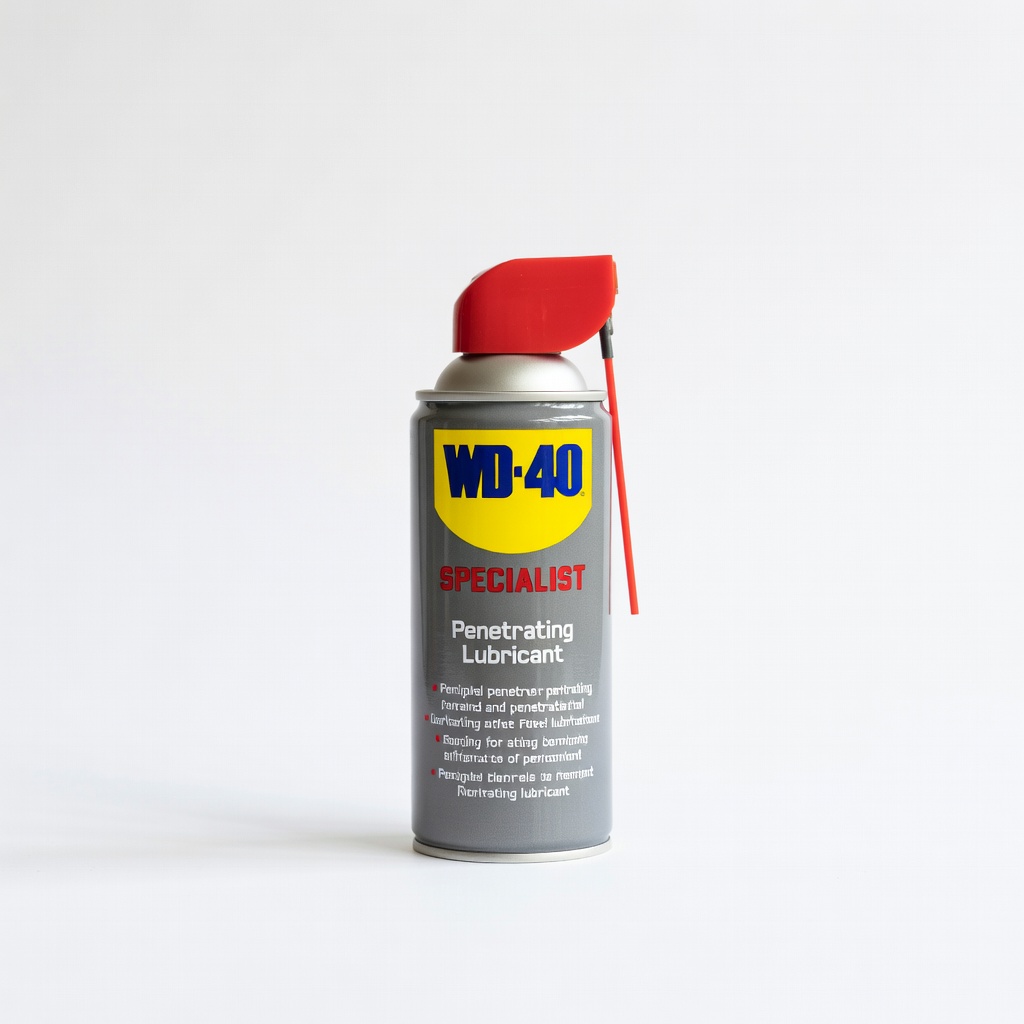
WD-40 Specialist Penetrating Lubricant
Breaks down rust and corrosion on stuck parts quickly, saving time and frustration for older faucets without harming seals.
Best for: Loosening seized nuts or valves that won't budge during disassembly.
Price Range: $6.99
Delta Faucet RP19660 Universal Cartridge for Single-Handle Faucets
If your leak is from a cartridge (common in modern single-handle models), this replaces the entire unit for a like-new fix—compatible with many brands.
Best for: For single-handle kitchen faucets where washers alone don't solve the issue.
Price Range: $15-20