A leaking dishwasher door seal can turn your kitchen cleanup into a watery mess, wasting water, energy, and potentially causing mold or floor damage. If you've noticed puddles around your appliance after a cycle, the rubber gasket around the door is often the culprit—it's a common wear item that degrades over time from heat, detergent residue, and constant use. Fixing it yourself can save you $100+ in repair costs and get your dishwasher back to watertight performance quickly.
In this guide, you'll learn how to diagnose the issue, clean the seal if salvageable, or replace it entirely for a permanent fix. We'll cover the process for most major brands like Whirlpool, Bosch, and GE, assuming basic DIY comfort. Expect a straightforward job that takes 30-60 minutes, depending on your model— no advanced plumbing skills required, but you'll need to handle some disassembly.
By the end, your dishwasher will run leak-free, and you'll gain confidence in simple appliance maintenance. Always prioritize safety by unplugging the unit first.
▸What You'll Need
- •Replacement door seal gasket (model-specific; check your dishwasher manual for part number)
- •Phillips and flathead screwdrivers
- •Soft cloth or sponge
- •Mild dish soap and warm water (or dishwasher cleaner)
- •Towel or rag for cleanup
- •Optional: Silicone lubricant for easier installation
- •Optional: Flashlight for better visibility
Estimated Time: 30-60 minutes
Difficulty: intermediate
▸Step-by-Step Instructions
Step 1: Unplug and Prepare the Dishwasher
Start by ensuring your safety and workspace readiness. Unplug the dishwasher from the electrical outlet to avoid any shock risk—never work on an appliance that's powered on. If it's hardwired, turn off the circuit breaker at the panel. Clear the counter space around the unit and lay down a towel to catch any drips.
This step matters because electricity and water don't mix, and preparation prevents slips or further leaks during handling. You'll know it's done when the dishwasher is powered down and you've got a clean, dry area to work in—expect about 5 minutes here.
Pro tip: Take photos of your setup before starting for easy reassembly.
💡 Tips:
- •Label screws or parts with tape to avoid mix-ups later.
⚠️ Warnings:
- •Do not skip unplugging; water near live wires can cause injury.
Step 2: Inspect the Door Seal for Damage
Open the dishwasher door fully and examine the rubber seal (gasket) around the entire perimeter. Look for cracks, tears, mold, or areas where it's pulling away from the door frame. Run your finger along it gently to feel for gaps or brittleness—also check if debris is lodged in the seal.
Inspection is key to confirming the seal is the leak source; sometimes hinges or the tub cause issues, but a damaged gasket is the most common. Success looks like identifying specific problem spots; if it's just dirty, you might clean instead of replace. This takes 5-10 minutes.
Use a flashlight if your kitchen is dim for a thorough view.
💡 Tips:
- •Wiggle the door to check for loose alignment, which can mimic seal problems.
⚠️ Warnings:
- •Avoid using sharp tools to probe the seal, as you could worsen damage.
Step 3: Clean the Existing Seal
If the seal shows no major damage, try cleaning first. Mix mild dish soap with warm water and use a soft sponge to gently scrub the gasket, removing soap scum, food particles, or mildew. Rinse with a clean, damp cloth and dry thoroughly with a towel.
Cleaning restores flexibility and adhesion, potentially fixing minor leaks without replacement. Why it matters: Residue hardens the rubber over time. Expect the seal to look cleaner and more pliable afterward—if leaks persist after testing, proceed to replacement. Allow 10 minutes for drying.
For stubborn buildup, a dishwasher-safe cleaner can help without harsh chemicals.
💡 Tips:
- •Dry completely to prevent new mold growth.
⚠️ Warnings:
- •Don't use abrasive cleaners like bleach, which can degrade the rubber.
Step 4: Remove the Inner Door Panel
Locate the screws holding the inner door liner (usually 10-12 around the edges and perimeter). Use a Phillips screwdriver to remove them, keeping track of each one. Gently lift off the panel to expose the seal attachment points—some models have clips, so release those too.
This access is essential for seal removal without damaging the door. It matters for precise work; expect to see wiring or dispensers inside, but don't disconnect unless necessary. Success: Panel off safely in 10 minutes, revealing the full gasket.
Store screws in a small container to avoid losing them.
💡 Tips:
- •Work from the top down to prevent the panel from falling.
⚠️ Warnings:
- •Be gentle with plastic clips to avoid breaking them.
Step 5: Remove the Old Seal
The gasket is typically held by a retaining strip or molded into the door. Pry it out starting from one end using a flathead screwdriver wrapped in tape to prevent scratches. Pull steadily along the entire length until it's free—discard the old seal.
Removing it clears the way for a new one, ensuring no old debris causes issues. This step is crucial for a clean install; you'll feel resistance but it should come out in one piece. Takes 5-10 minutes; expect some effort but no force.
If stuck, warm the area with a hairdryer to soften the rubber.
💡 Tips:
- •Note the seal's orientation (e.g., lip facing in) for the new one.
⚠️ Warnings:
- •Don't reuse a damaged seal; it will leak again soon.
Step 6: Install the New Seal
Align the new gasket with the starting point (often the top). Press it firmly into the groove, working around the door in a continuous motion—use your fingers or a rubber mallet for tight spots. Ensure it's fully seated without twists or gaps.
Proper installation prevents future leaks by creating a tight barrier. Why it matters: Misalignment causes immediate issues. Success: Seal flush and even; takes 10 minutes. Lubricate with silicone if dry for smoother fitting.
Double-check corners, as they're prone to bunching.
💡 Tips:
- •Start at the hinge side for easier alignment.
⚠️ Warnings:
- •Avoid stretching the seal excessively, which can cause tears.
Step 7: Reassemble and Test
Replace the inner door panel, reinserting screws snugly but not overtightened. Plug in the dishwasher, run a short cycle with the door closed, and check for leaks around the edges. Wipe up any initial drips.
Reassembly ensures everything functions; testing confirms the fix. Expect no water escape—if it leaks, recheck seating. Total wrap-up: 5-10 minutes.
Monitor for a full cycle to verify long-term seal.
💡 Tips:
- •Run an empty hot water cycle first to set the seal.
⚠️ Warnings:
- •Overtightening screws can crack the plastic door.
▸Pro Tips
- •Always match the replacement seal to your exact model number for a perfect fit—check the manual or door interior.
- •Clean the door groove thoroughly before installing the new seal to remove old adhesive residue.
- •Apply a thin layer of silicone lubricant to the new gasket for easier insertion and better longevity.
- •Test the door latch mechanism while everything is open to ensure it's not contributing to leaks.
- •Schedule seal inspections every 6-12 months, especially in hard water areas where buildup accelerates wear.
- •If your dishwasher is under warranty, contact the manufacturer before DIY to avoid voiding coverage.
- •Use painter's tape to hold the seal in place temporarily while aligning the ends.
▸Common Mistakes to Avoid
- •Installing the seal backwards or twisted, leading to immediate leaks—always follow the original orientation.
- •Skipping the cleaning step, which leaves debris that prevents a proper seal and causes recurring issues.
- •Using the wrong size gasket for your model, resulting in gaps—double-check part compatibility online.
- •Not drying the area fully after cleaning, promoting mold growth and seal degradation.
- •Forcing a stuck old seal out aggressively, which can damage the door frame and complicate reinstallation.
▸Troubleshooting
Problem: New seal installed but still leaking from the bottom.
Solution: Check for twists in the seal or misalignment at corners; remove and reinstall, ensuring even pressure. Also inspect door hinges for sagging.
Problem: Seal won't fit into the groove.
Solution: Clean out old gasket remnants with a plastic scraper. Warm the new seal slightly with a hairdryer to make it more pliable.
Problem: Leak persists after fix.
Solution: The issue might be the spray arm, tub cracks, or float switch—run a diagnostic cycle or call a pro if DIY checks fail.
Problem: Door panel won't align after reassembly.
Solution: Ensure all screws are in the correct holes; if warped, the panel may need gentle bending or professional repair.
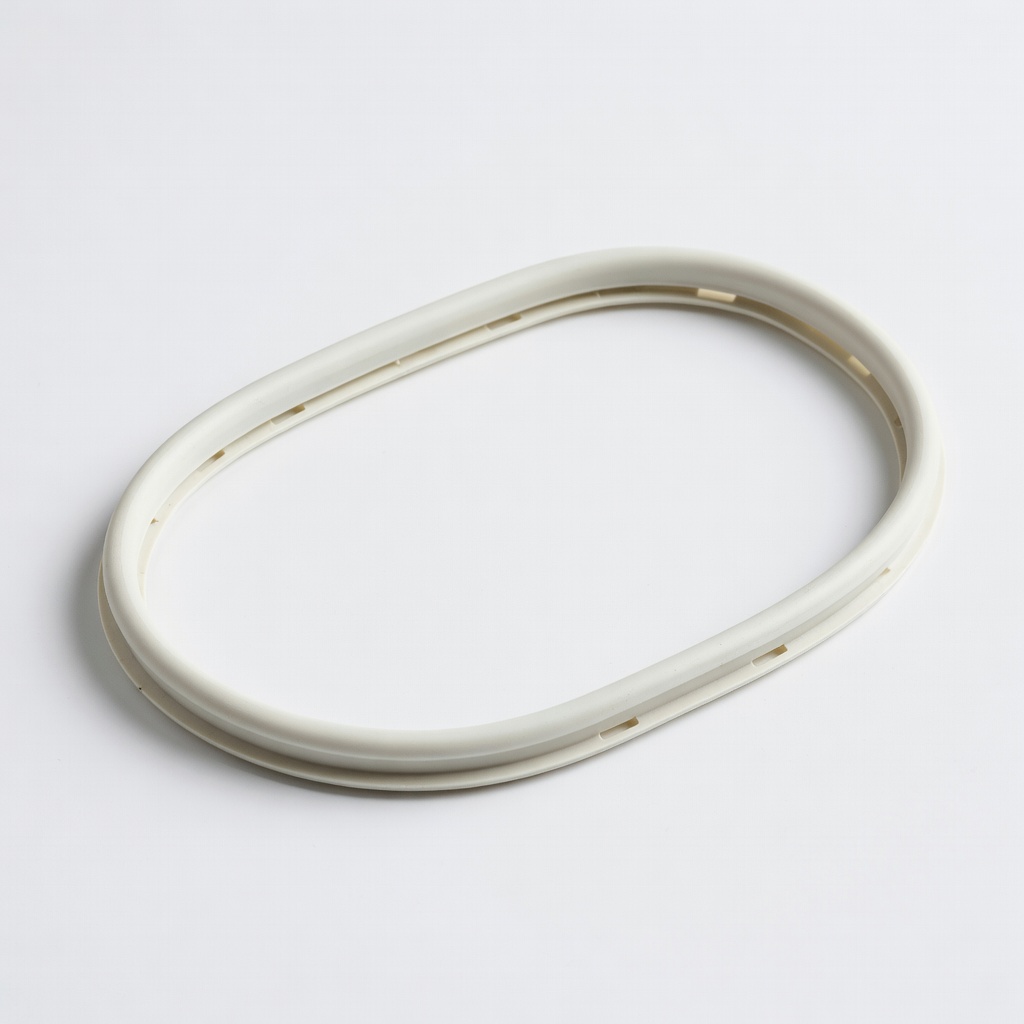
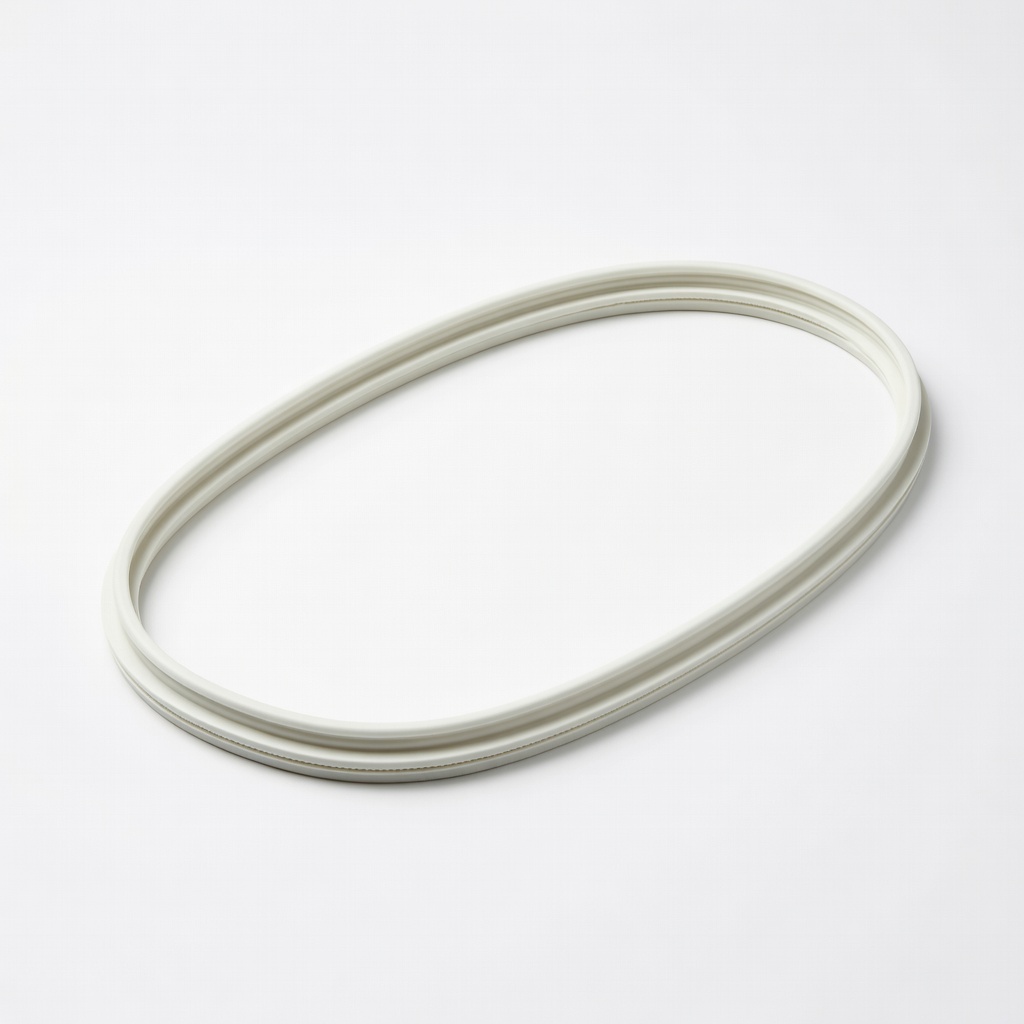
Whirlpool WPW10130696 Dishwasher Door Gasket
This OEM replacement is durable, made of high-quality rubber that resists cracking and ensures a watertight seal for most Whirlpool, Kenmore, and KitchenAid models.
Best for: Ideal for users with compatible Whirlpool dishwashers experiencing seal wear; quick fix for common leaks without custom ordering.
Price Range: $20-$25
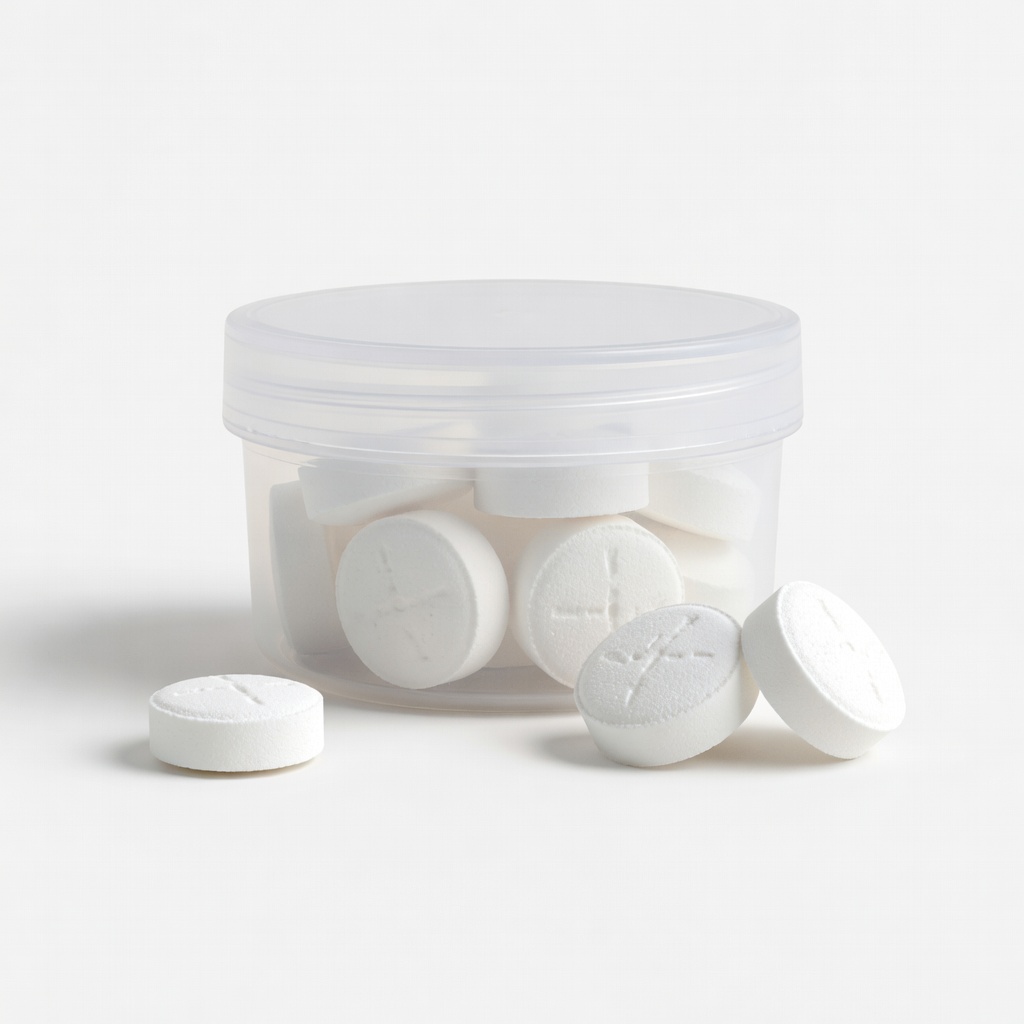
Affresh Dishwasher Cleaner Tablets
These effervescent tablets effectively dissolve limescale and residue buildup on seals and interiors, prepping surfaces for better seal adhesion and preventing future degradation.
Best for: Use before seal replacement to clean thoroughly; great for maintenance in hard water areas to extend gasket life.
Price Range: $10-$15 for 6 tablets
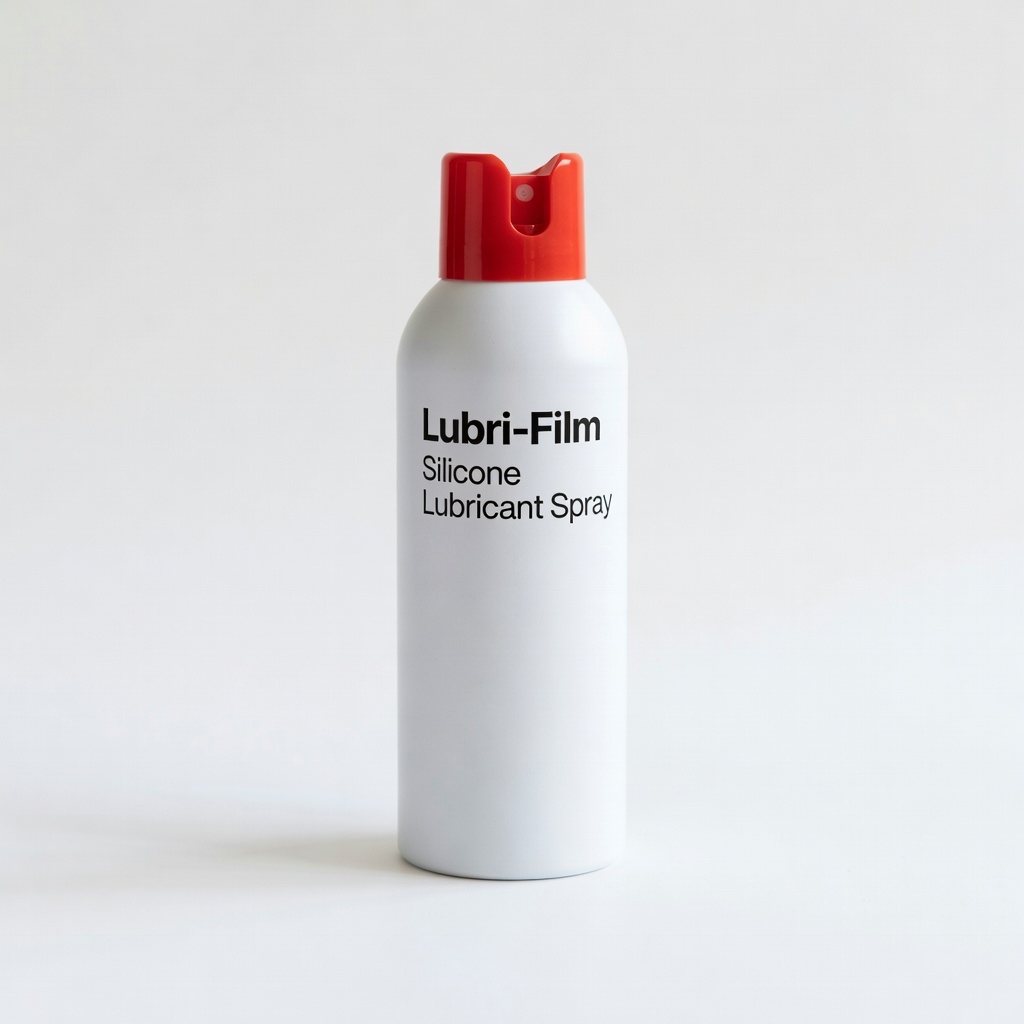
Lubri-Film Silicone Lubricant Spray
Food-grade silicone lubricant eases new seal installation without damaging rubber, reducing friction and helping it seat properly for a leak-proof fit.
Best for: Apply sparingly to the new gasket groove during install; optional but recommended for stiff or older door frames.
Price Range: $8-$12
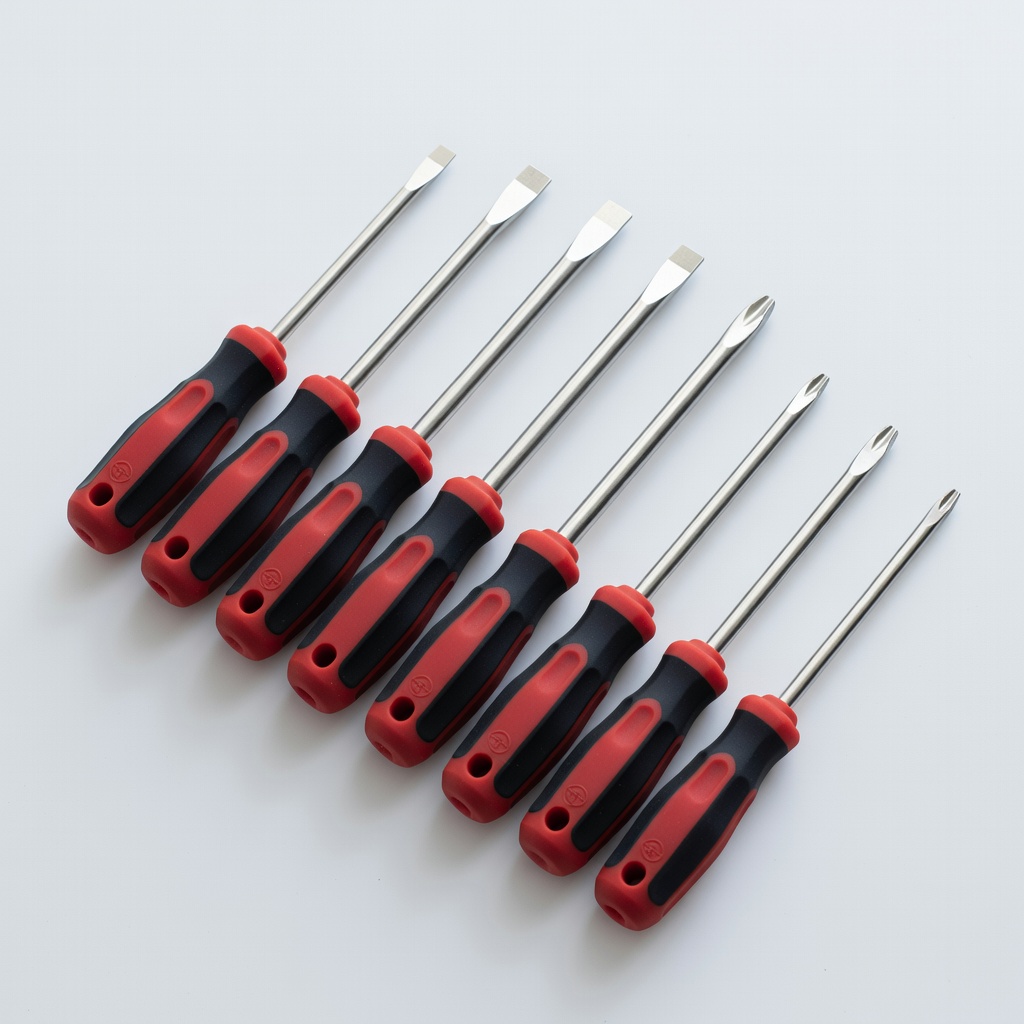
Craftsman 8-Piece Screwdriver Set
Versatile set with Phillips and flathead bits in various sizes, perfect for precise disassembly of dishwasher doors without stripping screws.
Best for: Essential tool for removing inner panels; durable for repeated home repairs beyond just dishwashers.
Price Range: $15-$20
UPGRADED Universal Dishwasher Door Seal for Bosch
Aftermarket option that's affordable and fits multiple Bosch/Siemens models, with reinforced edges for longer life in high-use households.
Best for: Budget-friendly replacement for Bosch owners; use if OEM is unavailable or pricier.
Price Range: $15-$20