Nothing ruins a long road ride faster than uncomfortable bike shoes that cause blisters, numbness, or inefficient pedaling. As an intermediate cyclist, you've likely upgraded your bike and kit, but overlooked shoe fit—a critical factor for optimal performance. Poorly fitted shoes can lead to energy loss, discomfort, and even injury, while a proper fit enhances power transfer and keeps you pedaling smoothly for hours.
In this guide, you'll learn how to measure your feet, select the right shoes, position cleats, and fine-tune the fit for peak efficiency. We'll cover everything from basic sizing to advanced adjustments, drawing on pro cycling insights. Expect a hands-on process that takes 30-45 minutes and requires no special tools beyond what you likely have at home.
By the end, you'll achieve a glove-like fit that feels secure yet breathable, allowing you to focus on the road ahead rather than your feet. This intermediate-level tutorial assumes basic knowledge of cycling gear but provides clear steps for anyone ready to level up their setup.
▸What You'll Need
- •Road bike shoes (new or existing pair in your approximate size)
- •Compatible cleats (e.g., SPD-SL for Shimano systems; required if shoes don't have them pre-installed)
- •Three-pair cycling socks (thin, medium, and thick to test fit; required)
- •Measuring tape or ruler (required for foot measurement)
- •Marker and paper (for tracing foot outline; required)
- •Pedals (your road bike pedals for final testing; required)
- •Optional: Shoe fitting insert or last (like a Brannock device for precise width measurement)
- •Optional: Anti-slip spray or talc powder (to ease initial wear-in)
Estimated Time: 30-45 minutes
Difficulty: intermediate
▸Step-by-Step Instructions
Step 1: Measure Your Feet Accurately
Start by measuring both feet in the evening when they are slightly swollen from daily activity—this mimics riding conditions. Sit comfortably with your legs extended and trace the outline of each foot on paper using a marker, ensuring the paper is flat on the floor. Measure the length from heel to the longest toe and the widest part of the forefoot for width.
Why this matters: Road bike shoes are sized in European (EU) or US scales, and a mismatch can cause slippage or pressure points. Expect lengths around 25-28 cm for most adults, converting to sizes 40-45 EU. Compare left and right feet—use the larger one as your guide.
For precision, stand and add 0.5-1 cm to the length for toe room (your big toe should have about a thumb's width from the end when seated on pedals).
💡 Tips:
- •Measure in cycling socks to account for thickness—start with medium ones.
⚠️ Warnings:
- •Avoid measuring in the morning; feet expand up to half a size during the day.
Step 2: Select the Right Shoe Size and Style
Using your measurements, consult the brand's sizing chart (found on manufacturer sites like Shimano or Fizik). Road shoes typically run true to size but vary by brand—opt for a snug fit with no heel lift. Choose a style with adjustable features like BOA dials or Velcro straps for customization.
Consider foot shape: Low-volume for narrow feet, high-volume for wider ones. Why it matters: Optimal pedaling requires forefoot security without compressing toes, improving efficiency by 5-10%. Success looks like shoes that hug your midfoot while allowing slight toe wiggle.
If between sizes, go half-size up for comfort on long rides. Test in-store if possible, or order from retailers with easy returns.
💡 Tips:
- •Prioritize stiff carbon soles for power transfer if you're racing-oriented.
⚠️ Warnings:
- •Don't size based on street shoes; cycling shoes are narrower and more performance-focused.
Step 3: Install or Adjust Cleats
If your shoes need cleats, attach them to the sole using the provided screws and a hex wrench (usually 4mm). Position cleats so the ball of your foot is over the pedal axle—align the cleat's arrow with the shoe's marked line.
Why this matters: Proper cleat position prevents knee strain and optimizes the pedaling stroke for a natural float (10-15 degrees). Expect a slight learning curve with engagement/disengagement. Tighten securely but not overly so to allow micro-adjustments.
For existing setups, loosen and reposition if you feel hot spots. Use pedal spacers if needed for more float.
💡 Tips:
- •Mark your current cleat position with tape before adjusting to revert if needed.
⚠️ Warnings:
- •Misaligned cleats can cause IT band issues—double-check with a bike fit app if unsure.
Step 4: Put On the Shoes and Secure the Fit
Wear your thinnest cycling socks and slide your foot in, ensuring toes aren't cramped. Fasten straps or dials starting from the toes and working up, aiming for even pressure. The shoe should feel secure around the midfoot and heel without sliding.
Why it matters: This stage confirms sizing—secure fit enhances power transfer by minimizing movement. Success: No pressure on the top of the foot, and you can wiggle toes freely while the heel locks in place.
Stand and walk around; the shoes should feel slightly tight initially as they break in over 100-200 km.
💡 Tips:
- •Use a shoe horn if the heel is stiff—common in premium leather models.
⚠️ Warnings:
- •Over-tightening BOA dials can numb toes; loosen if circulation feels off.
Step 5: Test the Fit on Your Bike
Clip into your pedals in a stationary trainer or safe area. Pedal at varying cadences (80-100 RPM) for 5-10 minutes, noting any rubbing, numbness, or instability. Adjust straps mid-test for hotspots.
Why it matters: Real-world testing reveals dynamic fit issues like forefoot squeeze during high torque. Expect minor discomfort at first; optimal fit means efficient, pain-free pedaling.
Ride a short 5-10 km loop post-setup to confirm. If issues persist, revisit cleat position.
💡 Tips:
- •Warm up with easy spins to simulate blood flow and swelling.
⚠️ Warnings:
- •Never test on busy roads initially—use a trainer to avoid accidents.
Step 6: Fine-Tune and Break In
After testing, make micro-adjustments: Loosen for width if bunions form, or add insoles for arch support. Ride progressively longer distances to break them in.
Why it matters: Iterative tweaks ensure longevity and performance. Success: Shoes mold to your foot over 2-3 rides, feeling custom-fitted.
Re-measure after a week if feet adapt.
💡 Tips:
- •Alternate sock thicknesses on first rides to dial in volume.
⚠️ Warnings:
- •Ignore initial stiffness; forcing it can damage the shoe.
▸Pro Tips
- •Always fit shoes in the afternoon for realistic swelling simulation.
- •Invest in shoes with independent upper/lower closure for targeted pressure relief.
- •Use a bike fit mirror to visually check cleat alignment from behind.
- •For wide feet, consider brands like Lake or Northwave over standard narrow fits.
- •Apply talc powder inside new shoes to reduce friction during break-in.
- •Track fit changes seasonally—winter socks may require looser settings.
- •Pair with custom insoles for orthotic-level support without pro costs.
▸Common Mistakes to Avoid
- •Sizing based on street shoes: Cycling shoes are performance-oriented and narrower, leading to blisters—always use brand charts.
- •Ignoring cleat float: Zero-float setups cause knee pain; choose 6-9 degrees for natural movement.
- •Over-tightening everything: This compresses nerves, causing numbness—secure midfoot, leave toes free.
- •Skipping dynamic testing: Static fit feels good but fails on the road; always pedal-test.
- •Neglecting foot volume: Low-volume shoes on high arches create pressure—test with different socks.
▸Troubleshooting
Problem: Hot spots or blisters on long rides
Solution: Loosen forefoot straps and add chamois cream; reposition cleats forward 2-3mm if persistent. Seek a pro fit if unresolved.
Problem: Numbness in toes or forefoot
Solution: Reduce cleat angle or add float; ensure shoes aren't too narrow—try wider models or insoles.
Problem: Heel slippage during climbs
Solution: Tighten heel strap more and check for worn liners; replace if over 1,000km old.
Problem: Knee pain after fitting
Solution: Realign cleats to center the pedal axle under the ball of foot; consult a bike fitter for Q-factor issues.
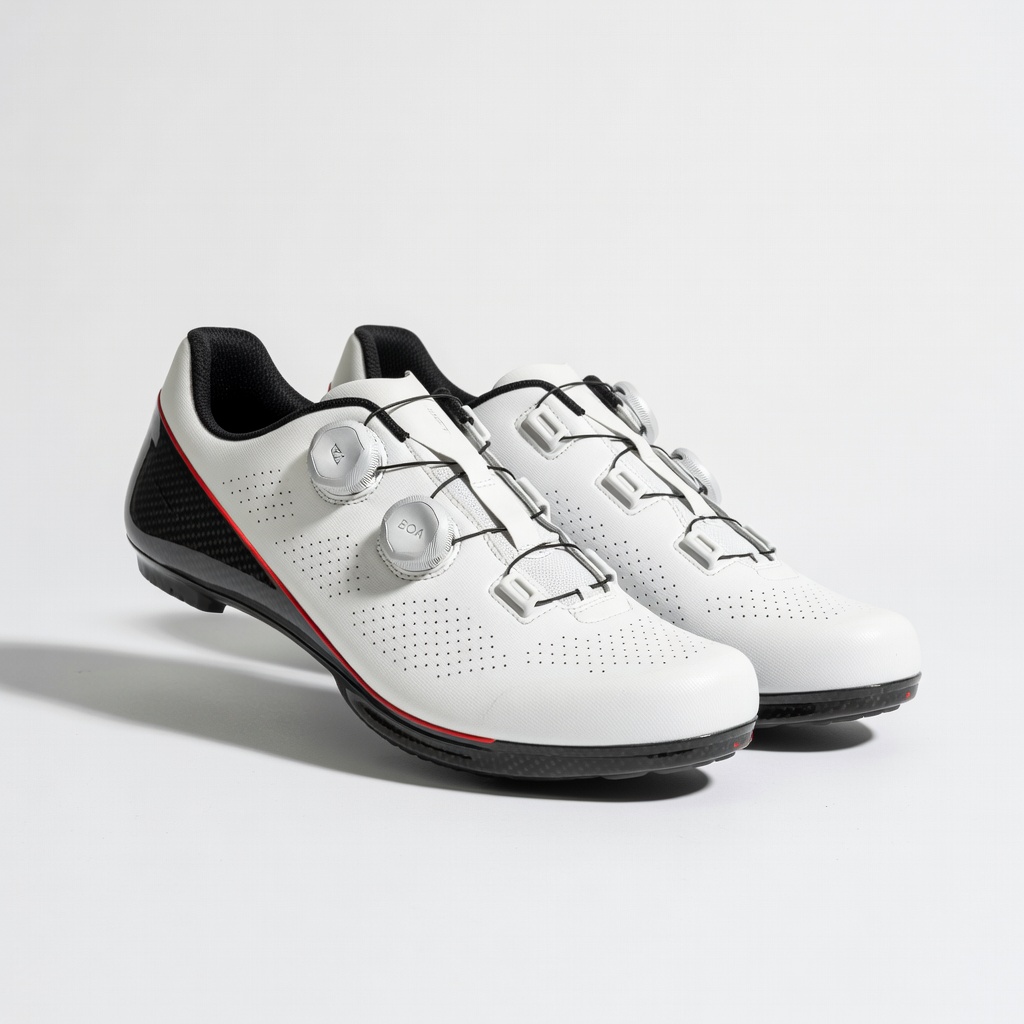
Shimano S-Phyre RC903 Road Bike Shoes
These offer precise BOA Li2 dials for customizable fit and a stiff carbon sole for optimal power transfer, ideal for intermediate riders seeking pro-level performance.
Best for: Use for high-intensity road rides where adjustable closure prevents hotspots during sprints or climbs.
Price Range: $400-$430
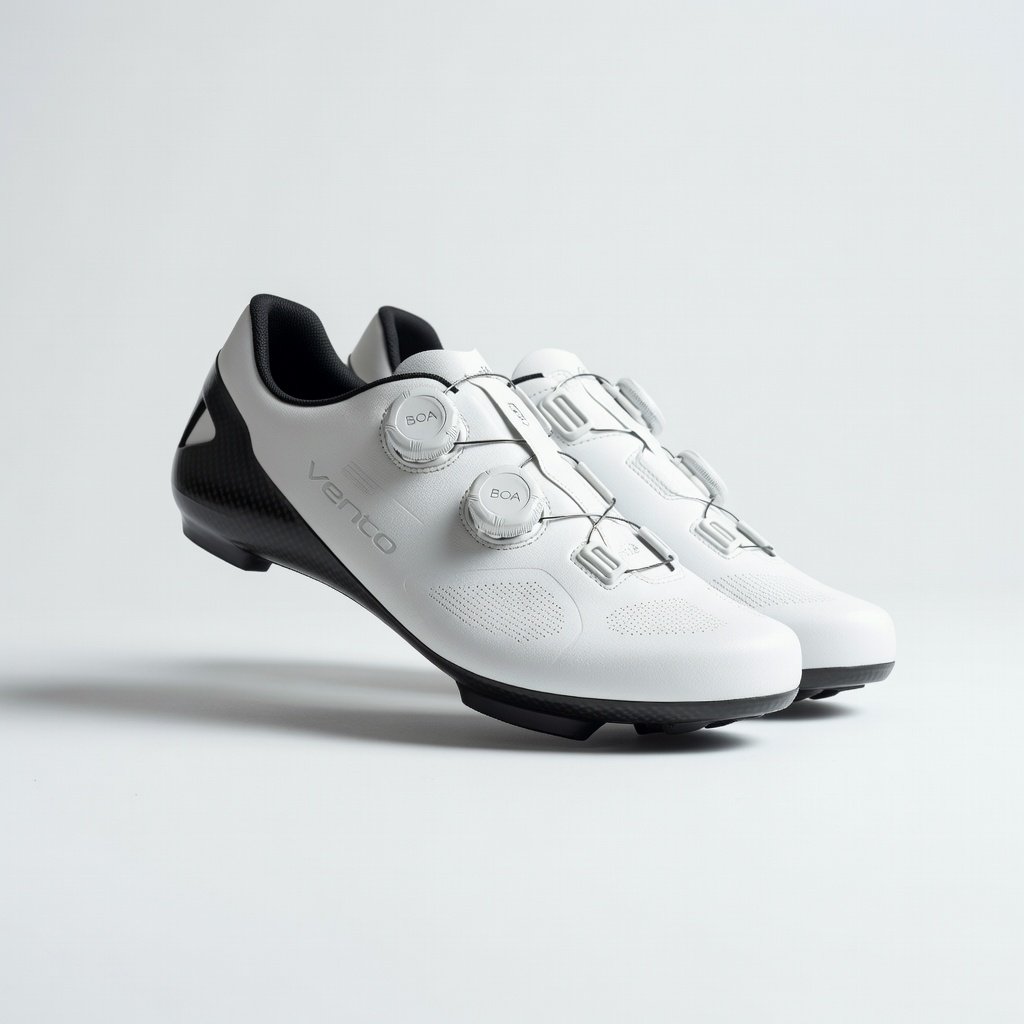
Fizik Vento Infinito Carbon 2 Shoes
Dynamic arch support and IPF surround system provide a locked-in heel and forefoot, reducing movement for efficient pedaling without pressure points.
Best for: Perfect for longer endurance rides where midfoot security is key to maintaining form over 50+ miles.
Price Range: $250-$300
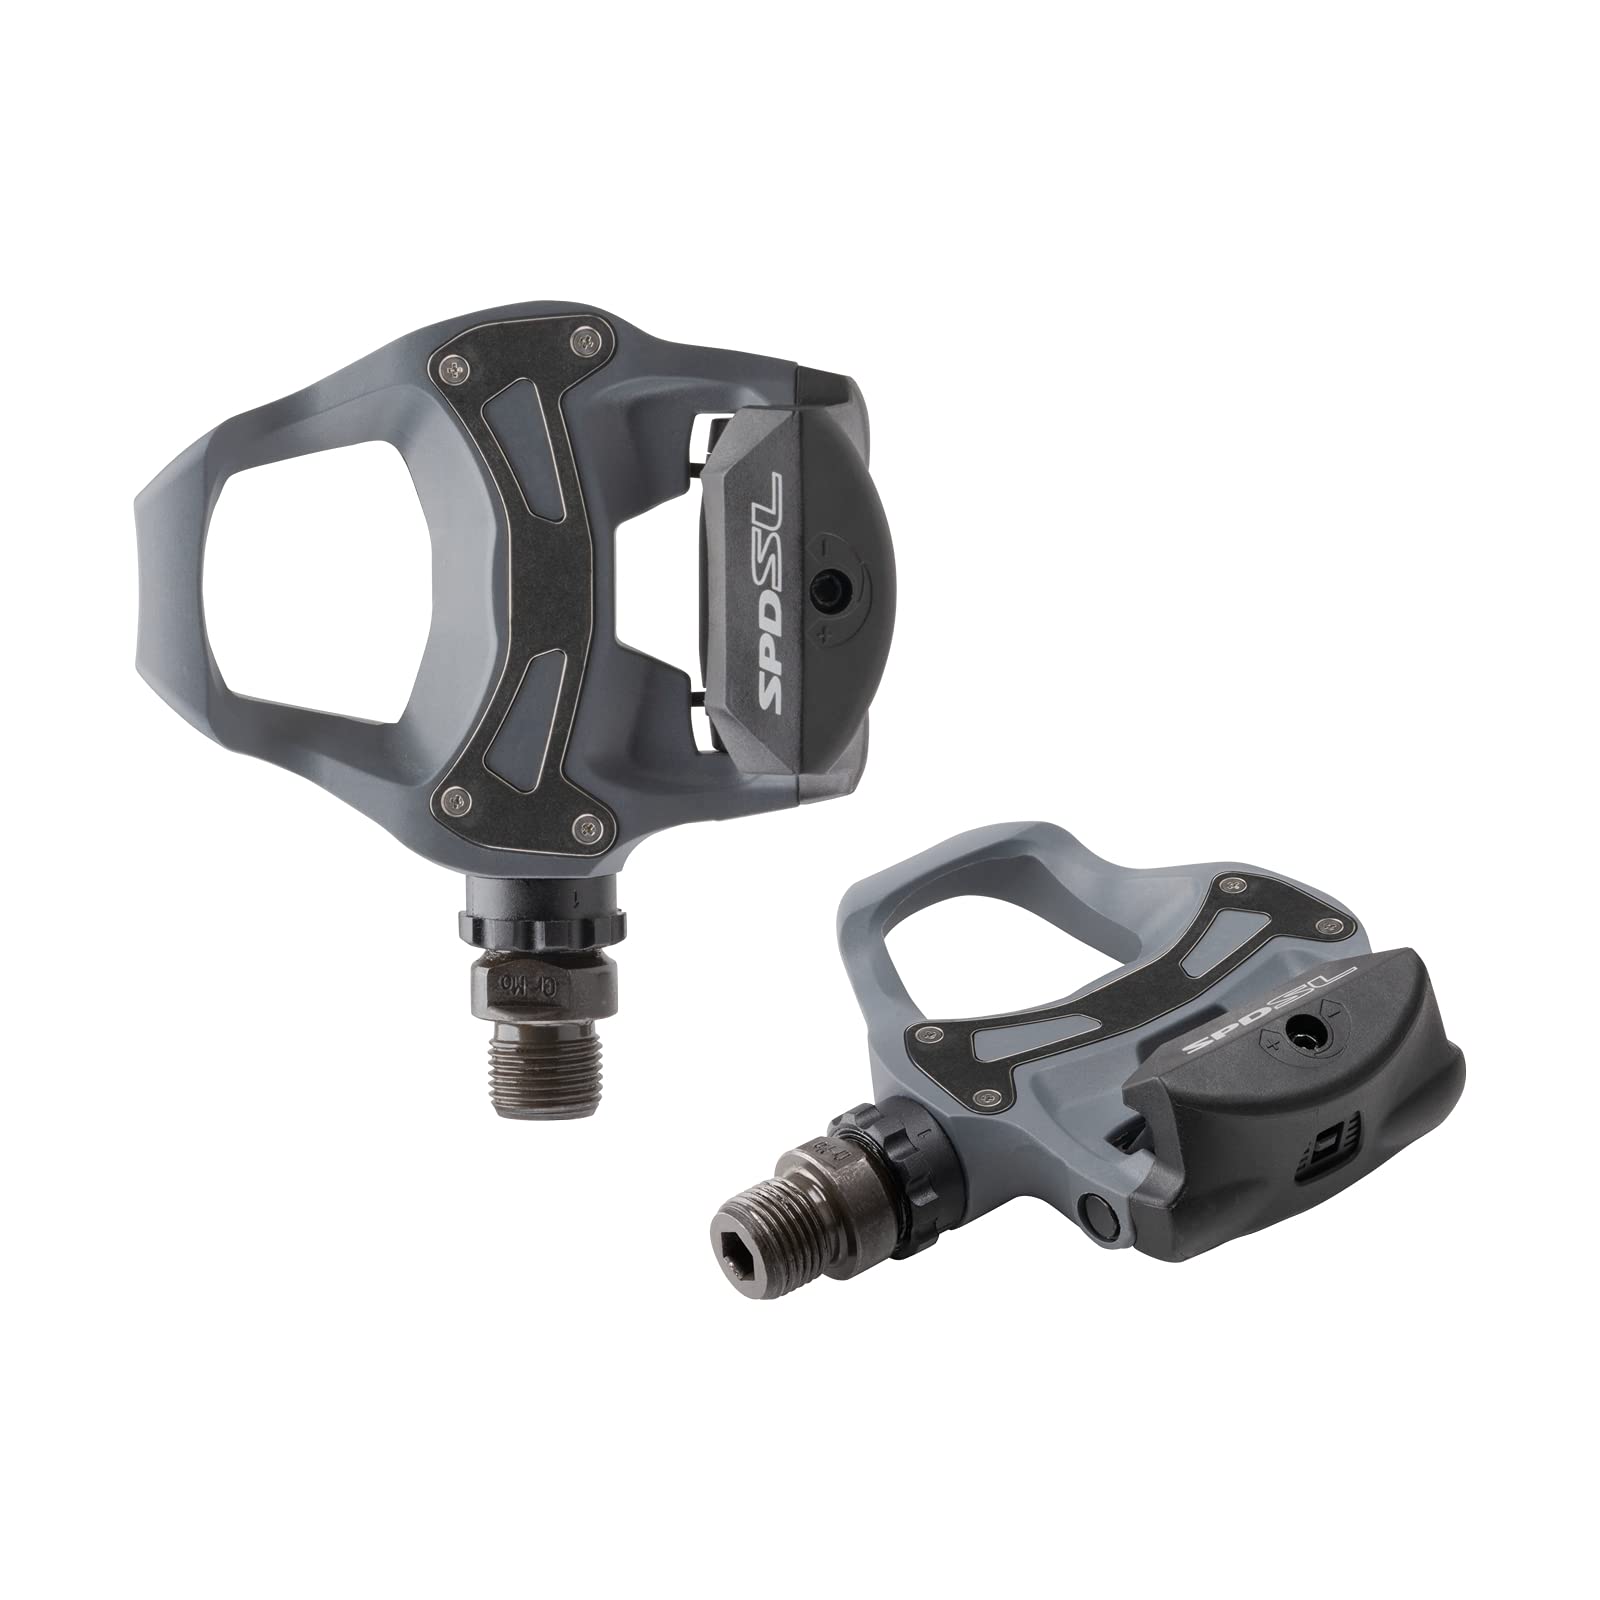
Shimano SPD-SL PD-R550 Cleats
Three-bolt design with 6-degree float allows natural foot movement, preventing strain while ensuring quick clip-in for road use.
Best for: Essential for new shoe setups or replacements to align with Shimano pedals for smooth engagement.
Price Range: $25-$35
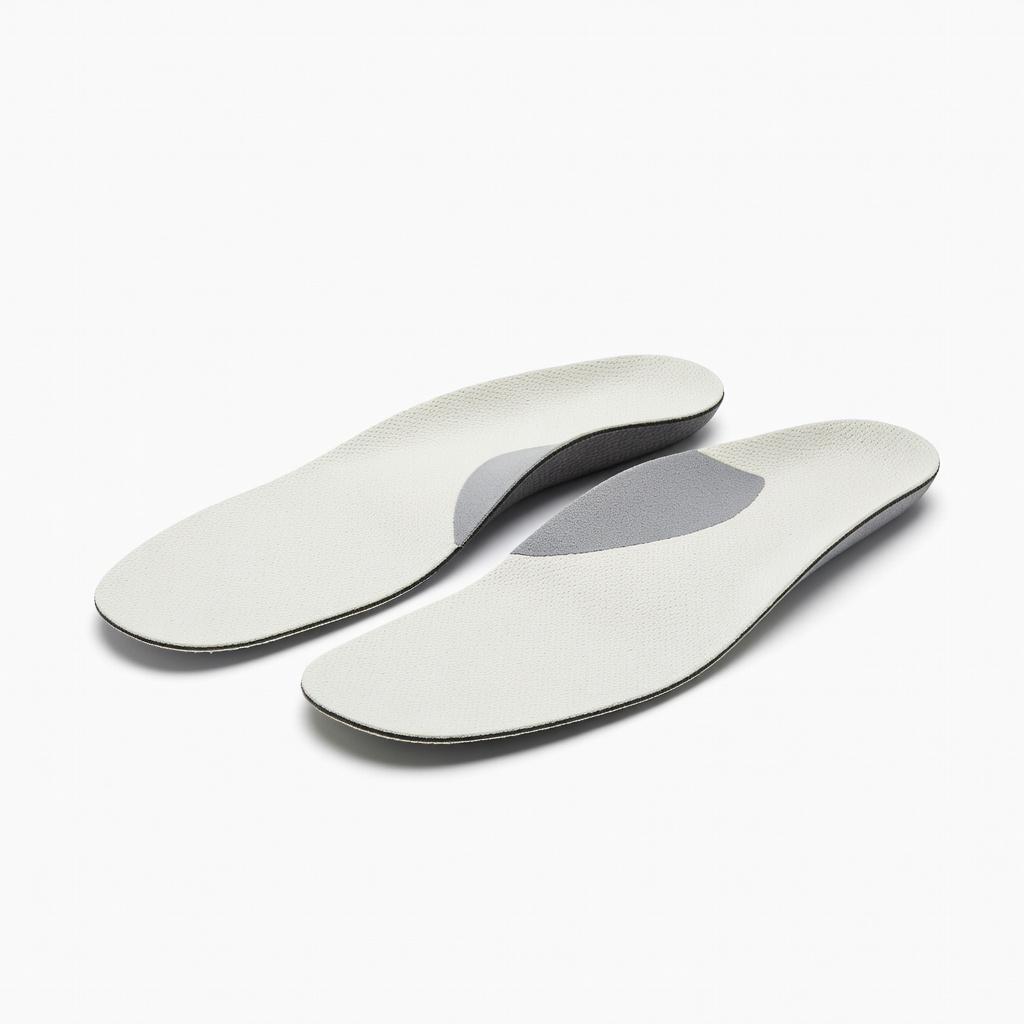
Superfeet Carbon Cycling Insoles
Lightweight carbon fiber stabilizer enhances arch support and energy return, customizing fit for varied foot shapes.
Best for: Add to any road shoe for those with high arches or needing extra cushioning on rough roads.
Price Range: $50-$60
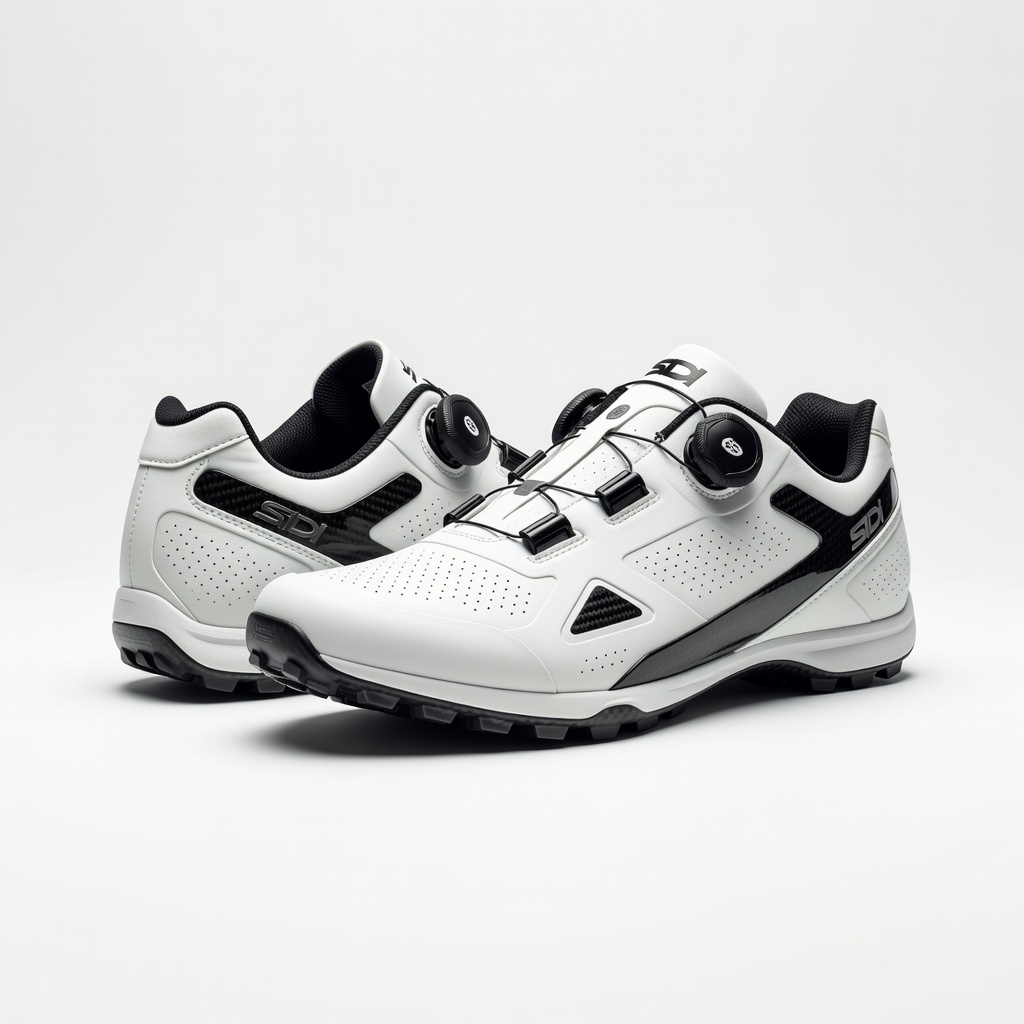
Sidi Shot 2 D3 Road Shoes
Adjustable vented system and replaceable heel pad offer durable, breathable fit for all-day comfort in varying conditions.
Best for: Budget-friendly premium option for intermediate cyclists doing mixed terrain or training rides.
Price Range: $450-$500