Tired of stubborn brake dust, road grime, and engine bay filth that regular washing won't touch? Abrasive brushes are game-changers for intermediate detailers, tackling embedded dirt without damaging paint or trim when used correctly. Poorly cleaned areas lead to corrosion and a dull appearance, but this method restores your ride to showroom condition.
In this guide, you'll learn a step-by-step process to detail your car focusing on high-impact zones like wheels, tires, engine bay, and undercarriage. Expect 2-4 hours total, depending on your vehicle's size and dirt level. No prior pro experience needed—just intermediate skills like basic car washing.
We'll cover prep, brushing techniques, rinsing, and finishing, with tips to avoid swirl marks or residue. By the end, your car will gleam with contaminant-free surfaces ready for waxing.
▸What You'll Need
- •Abrasive brushes (wheel-specific, engine bay, and crevice brushes—stiff nylon or boar's hair)
- •pH-neutral car soap or wheel cleaner (e.g., 1:10 dilution)
- •Degreaser for engine bay (citrus-based or P&S Brake Buster)
- •Pressure washer or garden hose with spray nozzle (min 40 PSI)
- •Microfiber drying towels (plush, 300+ GSM)
- •Protective gear: Nitrile gloves, safety goggles, respirator mask
- •Buckets (two: one with soap, one rinse)
- •Optional: Clay bar kit for final decontamination, spray wax
- •Extension pole for undercarriage access
Estimated Time: 2-4 hours (plus drying time)
Difficulty: intermediate
▸Step-by-Step Instructions
Step 1: Prepare Your Workspace and Vehicle
Park your car in a shaded, well-ventilated area on a flat surface. Cool the engine completely (wait 2+ hours after driving). Remove loose debris with compressed air or a blower.
Why it matters: Hot surfaces bake chemicals onto paint; shade prevents premature drying. Success: Car is cool, workspace clear, no water runoff issues.
Tape off sensitive areas like caliper lettering if using harsh cleaners.
💡 Tips:
- •Work in sections to avoid soap drying.
- •Use wheel chocks for safety.
⚠️ Warnings:
- •Never detail on hot surfaces—risks etching paint.
Step 2: Pre-Rinse the Entire Vehicle
Use a pressure washer or hose to thoroughly rinse wheels, tires, engine bay, and undercarriage. Focus on loosening dirt from crevices.
Why it matters: Removes loose grit to prevent scratches during brushing. Expect heavy runoff of mud and brake dust. Success: Surfaces visibly wet and prepped, no dry caked-on dirt.
💡 Tips:
- •Start top-down: roof to undercarriage.
- •Use a foam cannon for even coverage if available.
⚠️ Warnings:
- •Avoid high pressure (under 1500 PSI) on paint.
Step 3: Apply Wheel and Tire Cleaner
Spray a dedicated wheel cleaner (acid-free for coated wheels) generously on all four wheels, tires, and barrels. Agitate lightly with a soft brush first.
Why it matters: Activates chemicals to break down brake dust. Let dwell 3-5 minutes (watch for color change indicating dirt lift). Success: Cleaner foams and changes color.
💡 Tips:
- •Use separate brushes per wheel to avoid cross-contamination.
⚠️ Warnings:
- •Test cleaner on small area for uncoated alloys.
Step 4: Scrub Wheels with Abrasive Wheel Brushes
Dip an abrasive wheel brush (stiff nylon) in soapy water, then scrub spokes, barrels, and lug nuts in circular motions. Use a smaller crevice brush for tight spots.
Why it matters: Abrasive bristles cut through baked-on contaminants without scratching. Rinse brush frequently. Success: Brake dust gone, barrels shiny metal visible.
💡 Tips:
- •Brush direction: Away from calipers to fling debris.
⚠️ Warnings:
- •No wire brushes on painted/coated wheels—causes gouges.
Step 5: Clean Tires and Trim with Abrasive Brushes
Apply tire cleaner, then use a tire-specific abrasive brush to scrub sidewalls and inner beads. Hit plastic wheel trim too.
Why it matters: Restores black color, removes browning. Success: Tires uniform black, no white residue.
💡 Tips:
- •Twist brush for deep sidewall grooves.
Step 6: Degrease and Brush Engine Bay
Spray degreaser on engine components, plastic covers, and firewall. Use long-reach abrasive engine brushes to agitate.
Why it matters: Removes oil/grease buildup preventing corrosion. Avoid electronics; cover alternator/spark plugs with bags. Success: Grease dissolved, surfaces clean.
💡 Tips:
- •Use extension brushes for firewalls.
⚠️ Warnings:
- •Engine off, battery disconnected if needed.
Step 7: Brush Undercarriage and Rockers
From under the car (use ramps/jack stands safely), hose off then brush suspension, rockers, and exhaust with heavy-duty abrasive brushes.
Why it matters: Clears salt/road tar. Success: No visible mud clumps.
💡 Tips:
⚠️ Warnings:
- •Secure vehicle properly—never work under unsupported car.
Step 8: Rinse Thoroughly and Inspect
High-pressure rinse all areas top-down, ensuring no chemical residue. Dry with blower/microfiber.
Why it matters: Prevents water spots/streaks. Inspect for missed spots. Success: Water sheets off cleanly, no soap scum.
💡 Tips:
- •Two-bucket rinse for brushes.
Step 9: Final Dry and Protect
Towel dry, then apply tire dressing and quick wax/detailer spray.
Success: Showroom shine, protected surfaces.
💡 Tips:
- •Clay bar any high spots before wax.
▸Pro Tips
- •Always rinse brushes between dips to minimize grit transfer.
- •Use a brush spinner tool for faster wheel cleaning.
- •Work in 70-80°F temps for best chemical dwell.
- •Pair brushes with iron remover for wheels pre-brushing.
- •Extend brush life by soaking in Dawn dish soap post-use.
- •For EVs/hybrids, focus less on engine, more on underbody.
- •Document before/after photos for motivation.
▸Common Mistakes to Avoid
- •Using too much pressure or wire brushes on paint—causes scratches; stick to nylon/boar's hair.
- •Skipping pre-rinse—grit leads to holograms; always rinse first.
- •Overlooking dwell time—chemicals need 3-5 mins; impatience leaves residue.
- •Not protecting electronics in engine bay—cover everything.
- •Drying in direct sun—water spots form; shade or blower dry.
▸Troubleshooting
Problem: Fine scratches or swirls appear
Solution: Likely from dirty brushes; polish with compound next time. Prevent by frequent rinsing.
Problem: Chemical residue lingers
Solution: Rinse longer with sheeting water test. Use neutralizer if needed.
Problem: Brush bristles fray quickly
Solution: Upgrade to quality nylon; store dry. Replace if splayed.
Problem: Tires streak after dressing
Solution: Wipe excess; use water-based dressing. Buff after 10 mins.
Problem: Engine plastics dull
Solution: Follow with plastic restorer like 303 Aerospace. Seek pro if damaged.
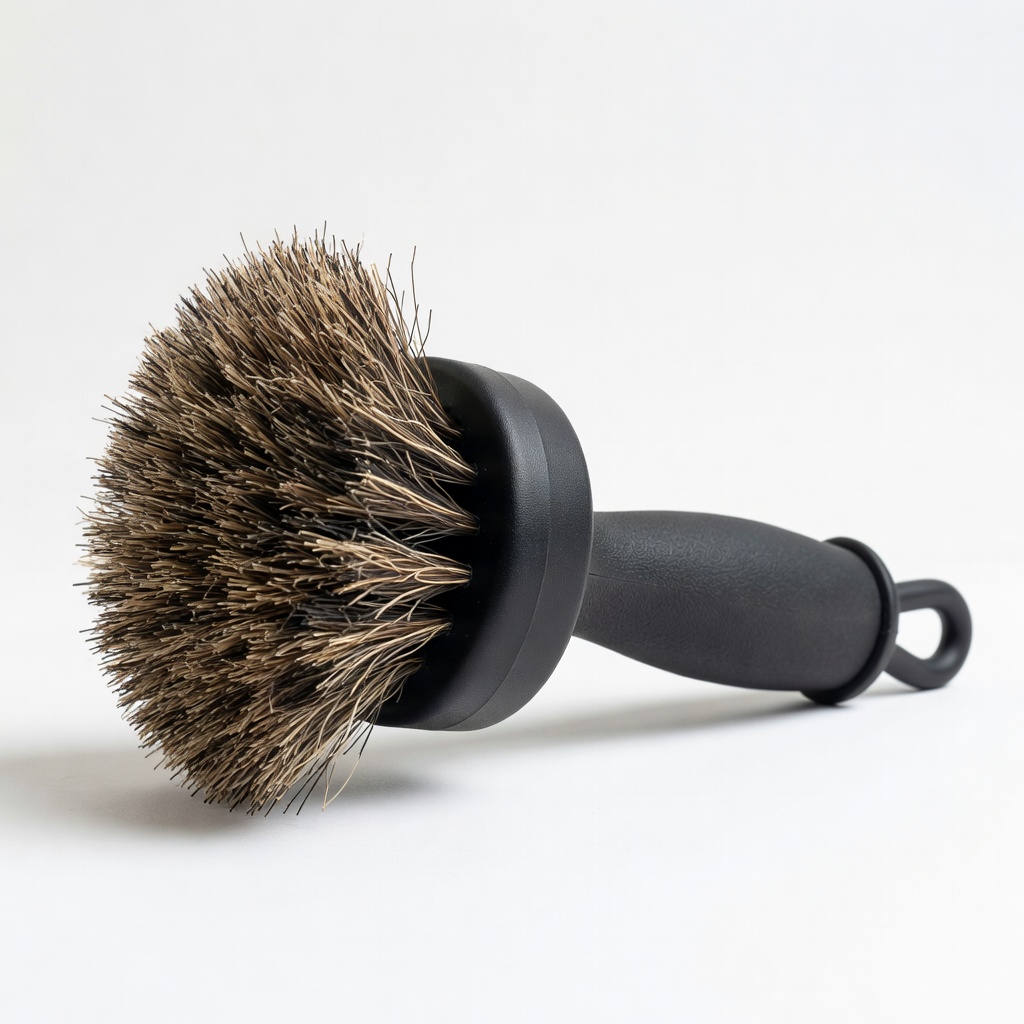
Chemical Guys ACC_301_16 Boar's Hair Wheel Brush
Premium natural bristles are semi-abrasive yet paint-safe, perfect for deep wheel cleaning without marring.
Best for: Ideal for alloy spokes and barrels during wheel detailing.
Price Range: $14.99
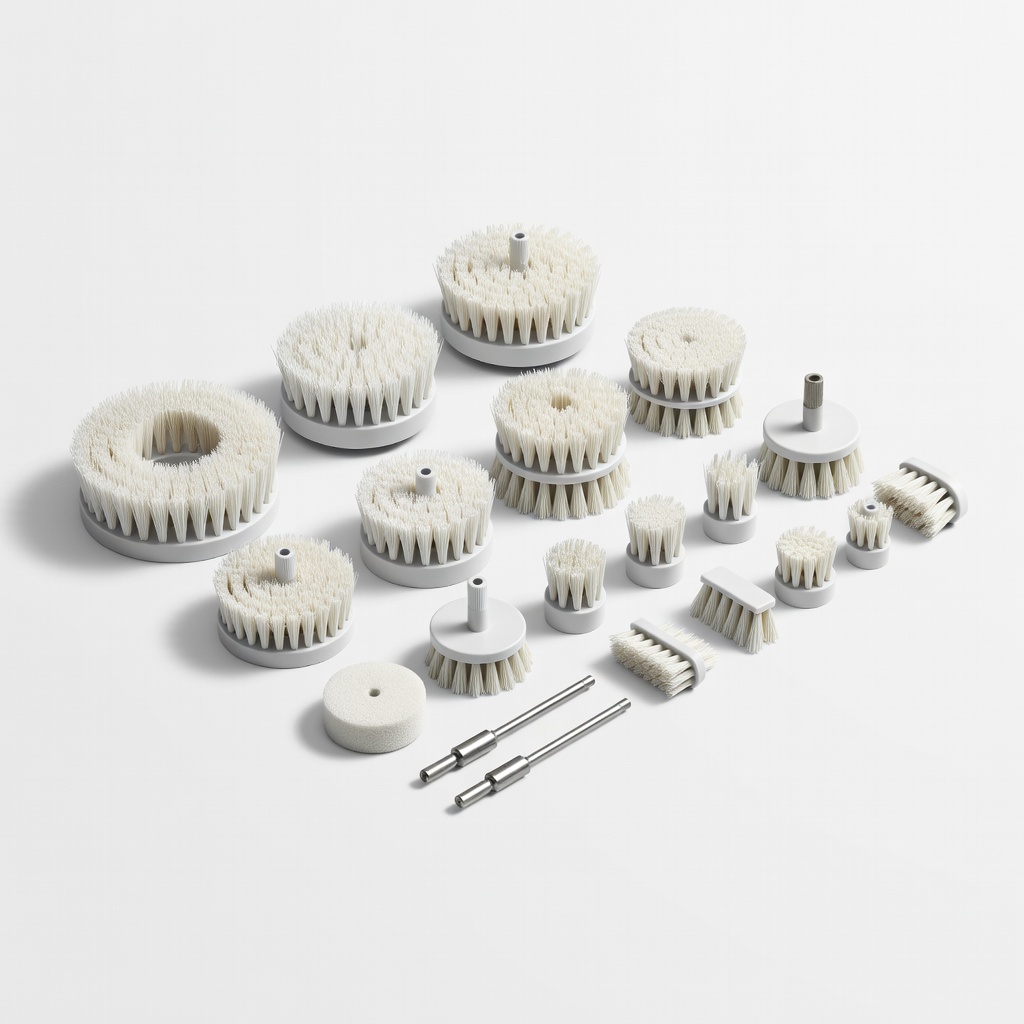
Holikme 17Piece Drill Brush Attachment Set
Power-assisted abrasive nylon brushes speed up engine bay and undercarriage scrubbing.
Best for: Attach to cordless drill for tough grime on plastic and metal surfaces.
Price Range: $15.99
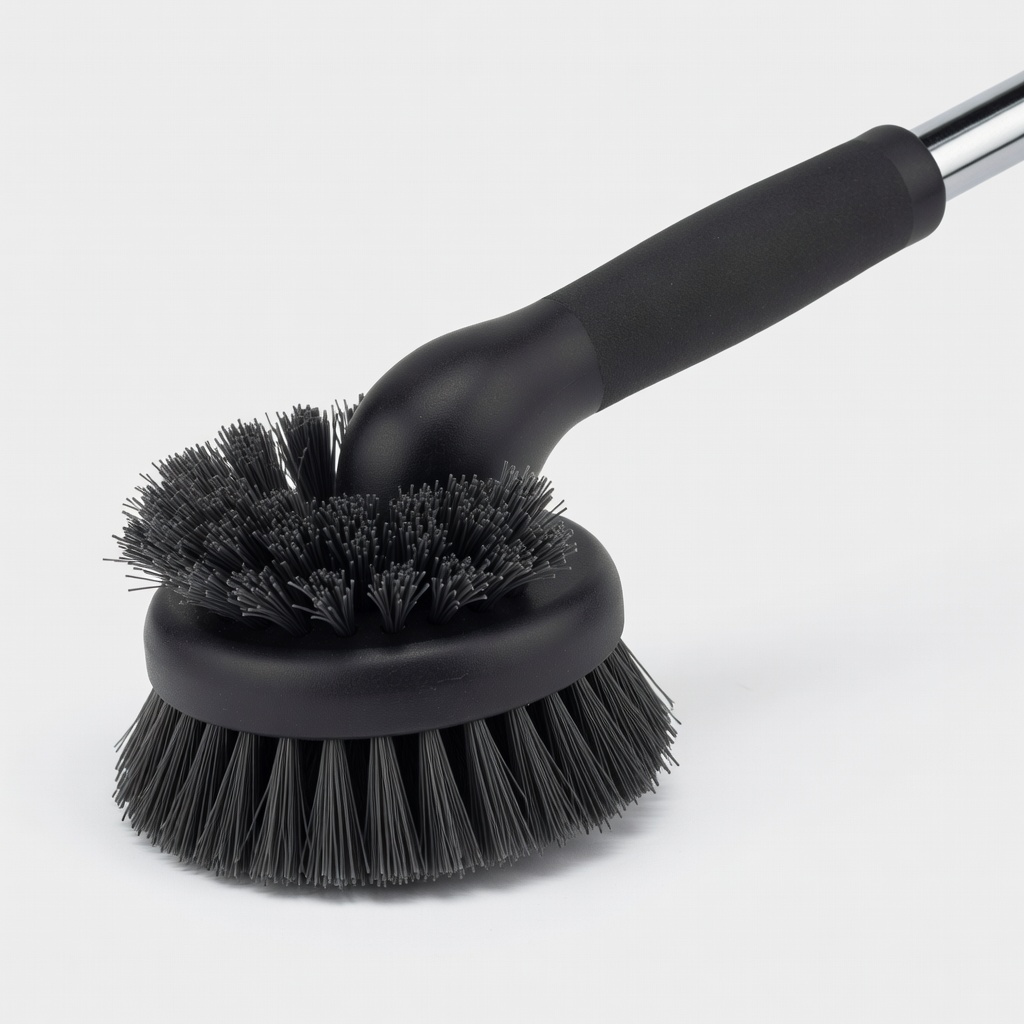
Mothers 35103 Speed Wheel Brush
Stiff, curved abrasive design excels in tight crevices without scratching.
Best for: Best for lug nuts, calipers, and tire sidewalls.
Price Range: $12.99
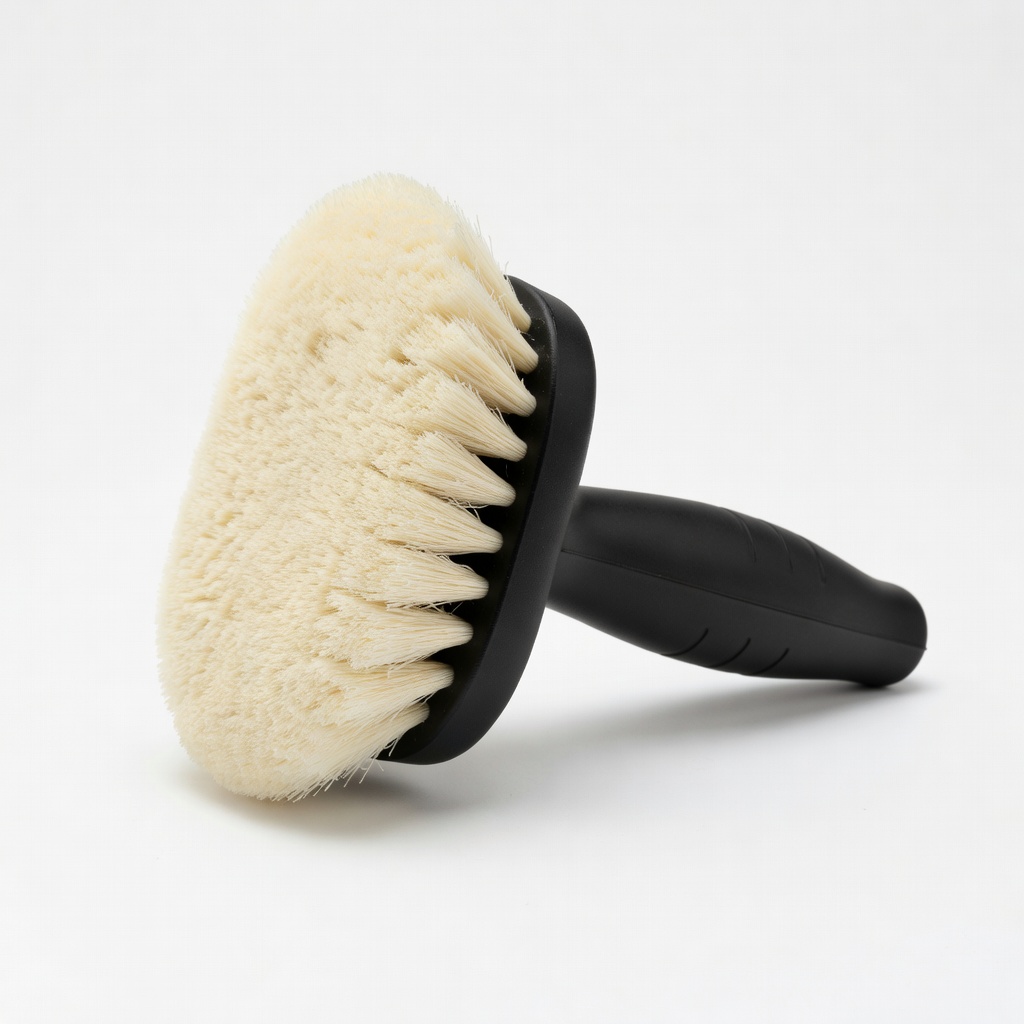
Chemical Guys TUFF Wool Tire Brush
Extra-stiff wool bristles cut through tire oxidation aggressively.
Best for: Heavy-duty tire sidewall prep before dressing.
Price Range: $9.99
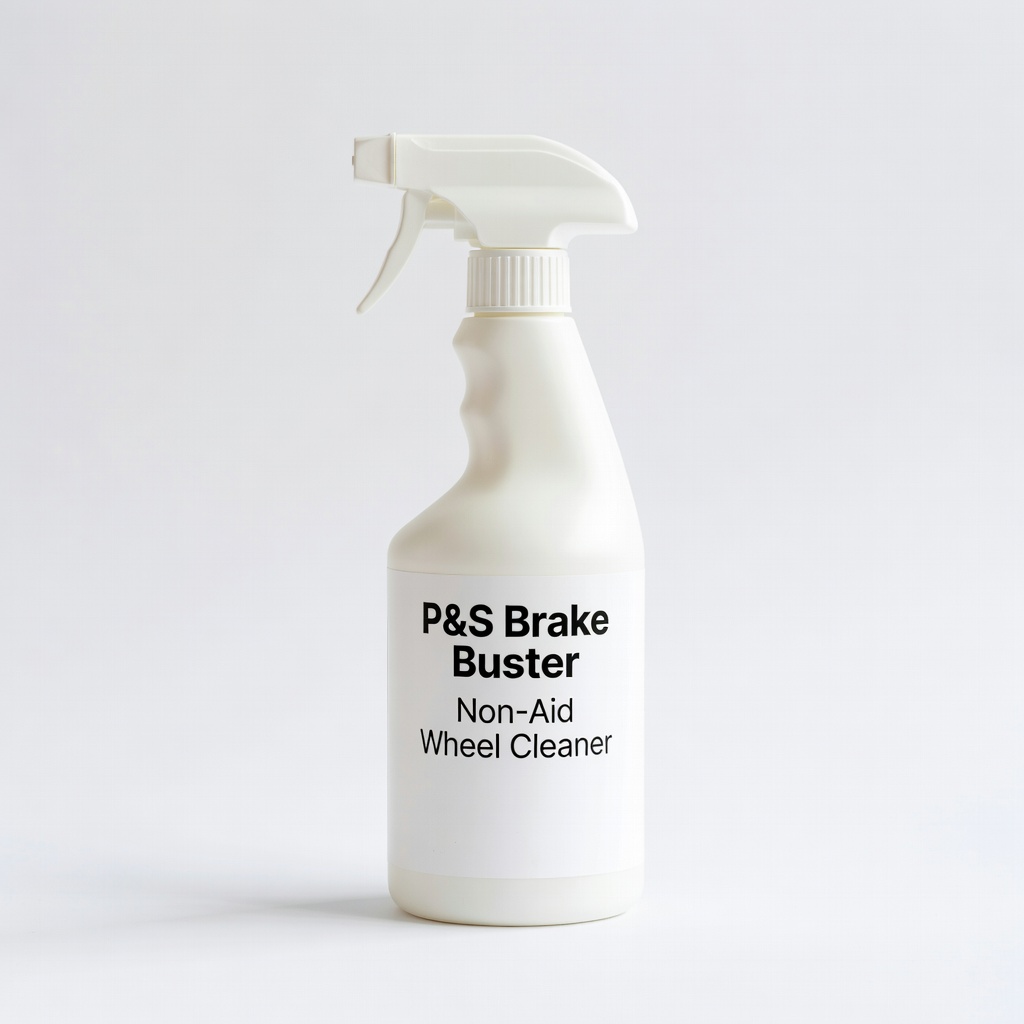
P&S Brake Buster Non-Acid Wheel Cleaner
Complements brushes by dissolving brake dust safely; gel formula clings to vertical surfaces.
Best for: Pre-brush application on wheels.
Price Range: $19.99