A clogged 3D printer nozzle is one of the most frustrating issues beginners face, causing failed prints, under-extrusion, and wasted filament. It happens when filament residue builds up inside the tiny 0.4mm opening, often from dust, low-quality filament, or improper temperatures. Don't worry—this is a common fix that doesn't require replacing parts right away.
In this guide, you'll learn a safe, step-by-step process using basic tools like a needle and cold pull technique. By the end, your nozzle will extrude filament cleanly, letting you resume printing hassle-free. The whole process takes 15-30 minutes and is perfect for beginners with printers like Ender 3 or Prusa models.
Expect simple actions with clear success checks at each stage. Always prioritize safety by powering off your printer first.
▸What You'll Need
- •Safety glasses (required)
- •Tweezers or needle-nose pliers (required)
- •Acupuncture needle or 0.35mm nozzle cleaning needle set (required—matches most 0.4mm nozzles)
- •Cleaning filament (e.g., nylon-based, optional but highly recommended for cold pulls)
- •Heat-resistant gloves (optional)
- •Brass wire brush (optional for exterior cleaning)
- •Printer's touchscreen or G-code sender for heating (built-in)
Estimated Time: 15-30 minutes
Difficulty: beginner
▸Step-by-Step Instructions
Step 1: Prepare Your Workspace and Safety Gear
Clear a stable, well-lit workspace away from flammable materials. Power off your 3D printer completely and unplug it to avoid electrical hazards. Put on safety glasses and heat-resistant gloves if handling hot parts.
Why it matters: Prevents burns, shocks, or damage to your printer. Success looks like: Printer is off, tools organized, you're protected.
💡 Tips:
- •Work on a heat-safe surface like a metal tray.
⚠️ Warnings:
- •Never clean a hot nozzle without powering off first.
Step 2: Disassemble the Hotend (If Needed)
For most printers like Creality Ender 3, loosen the nozzle with a wrench while cold (use the one included with your printer). If it's a quick-swap nozzle, simply unscrew it counterclockwise. Remove any bowden tube or PTFE liner if present for better access.
Why it matters: Gives direct access to the nozzle tip. Success looks like: Nozzle is removed cleanly without stripping threads.
💡 Tips:
- •Apply a drop of oil to threads beforehand for easier removal.
⚠️ Warnings:
- •Don't force it—if stuck, heat first (next step).
Step 3: Heat the Nozzle to Filament Melting Point
Power on the printer, go to the menu (Preheat PLA at 220°C or ABS at 250°C), and heat the nozzle for 2-3 minutes. This softens residue without fully melting new filament.
Why it matters: Cold cleaning pushes debris deeper; heat loosens it. Success looks like: Nozzle reaches target temp (check display), feels warm to touch.
💡 Tips:
- •Use your filament's recommended temp +20°C for stubborn clogs.
⚠️ Warnings:
- •Monitor closely—overheating warps metal.
Step 4: Poke Out Debris with Cleaning Needle
Insert the 0.35mm needle into the nozzle tip from the bottom while hot, pushing gently up through the orifice multiple times. Rotate slightly to break up buildup. Wipe away extruded gunk with a cloth.
Why it matters: Physically dislodges partial clogs. Success looks like: Filament residue emerges, needle passes fully through without resistance.
💡 Tips:
- •Do 10-15 pokes per session for thorough cleaning.
⚠️ Warnings:
- •Use correct needle size—too big damages nozzle.
Step 5: Perform a Cold Pull
Cut 10-15cm of cleaning filament (or your printer's filament type), insert into hot nozzle until it extrudes, then cool to 90-100°C. Once firm, pull firmly downward. Repeat 2-3 times.
Why it matters: Pulls out remaining filament strings like dental floss. Success looks like: Clean filament strand pulls out with no color streaks.
💡 Tips:
- •Nylon cleaning filament grips better—prime choice.
⚠️ Warnings:
- •Pull straight—twisting snaps filament.
Step 6: Reassemble and Clean Exterior
Let everything cool, reinstall nozzle (hand-tighten +1/4 turn), and brush off exterior residue with a brass brush.
Why it matters: Ensures secure fit and no external buildup. Success looks like: Hotend reassembled tightly, no visible gunk.
💡 Tips:
- •Check for level bed after reassembly.
Step 7: Test Extrusion and Print
Heat nozzle again, extrude 10-20mm filament via menu. Load fresh filament and run a small test print like a calibration cube.
Why it matters: Verifies full fix. Success looks like: Smooth, consistent extrusion and perfect first layer.
💡 Tips:
- •If still clogged, repeat steps 4-5.
⚠️ Warnings:
- •Abort if extrusion skips—clog persists.
▸Pro Tips
- •Prevent clogs by drying filament before use—store in a dry box.
- •Clean nozzle every 10-20 hours of printing or at filament changes.
- •Use high-quality filament to reduce residue buildup.
- •For frequent clogs, upgrade to hardened steel nozzles.
- •Heat nozzle during long pauses to prevent cooling jams.
- •Keep needles organized in a magnetic holder for quick access.
- •Log your cleaning schedule in a print app for maintenance tracking.
▸Common Mistakes to Avoid
- •Cleaning cold: Debris hardens and compacts—always heat first.
- •Wrong needle size: Oversized needles enlarge the orifice, ruining precision.
- •Over-tightening nozzle: Strips threads—use wrench sparingly.
- •Skipping cold pull: Leaves filament ghosts causing future clogs.
- •Ignoring printer model differences: Check manual for hotend-specific steps.
▸Troubleshooting
Problem: Needle won't pass through
Solution: Reheat to higher temp (240-260°C) and try again; soak nozzle in acetone overnight if brass.
Problem: Extrusion still inconsistent after cleaning
Solution: Replace nozzle entirely—clog may have damaged internal geometry.
Problem: Filament doesn't grip for cold pull
Solution: Use cleaning filament or roughen tip with needle first.
Problem: Nozzle won't unscrew
Solution: Heat to 250°C while loosening with two wrenches (one to hold heater block).
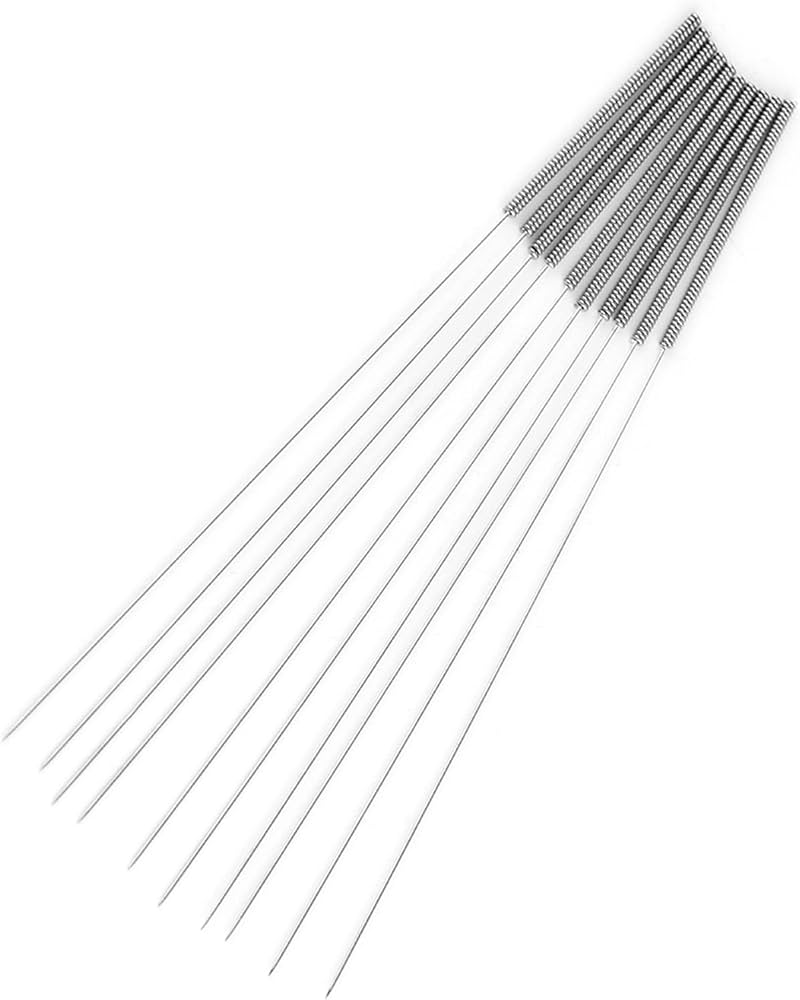
ELEGOO 3D Printer Nozzle Cleaning Needle Kit (10pcs)
Precision needles (0.3-0.5mm) perfectly sized for standard nozzles, durable steel construction.
Best for: Essential for poking method in steps 4—handles hot nozzles without bending.
Price Range: $8.99
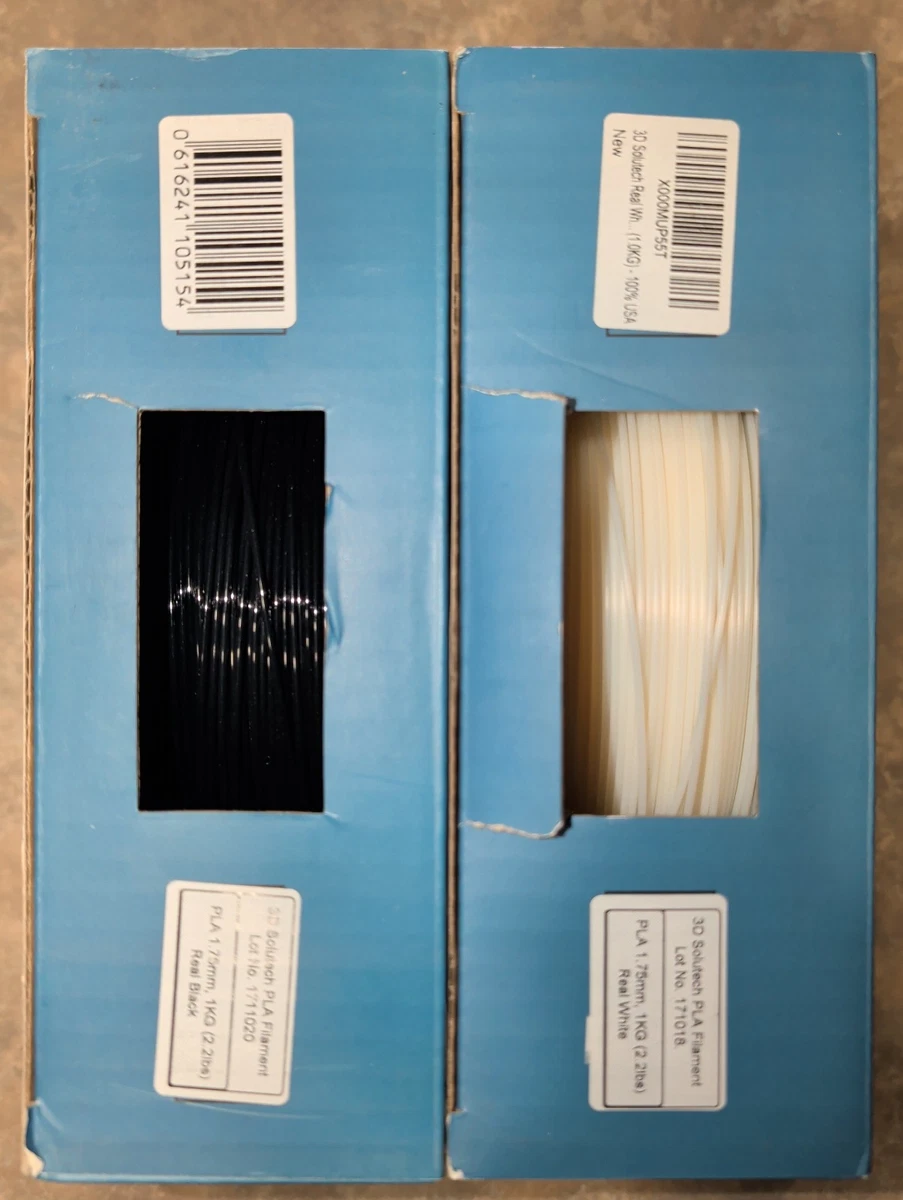
3D Solutech Nylon Cleaning Filament
Bonds aggressively to debris for superior cold pulls, dissolves residue effectively.
Best for: Ideal for step 5—use 1m per session for multiple pulls.
Price Range: $19.99
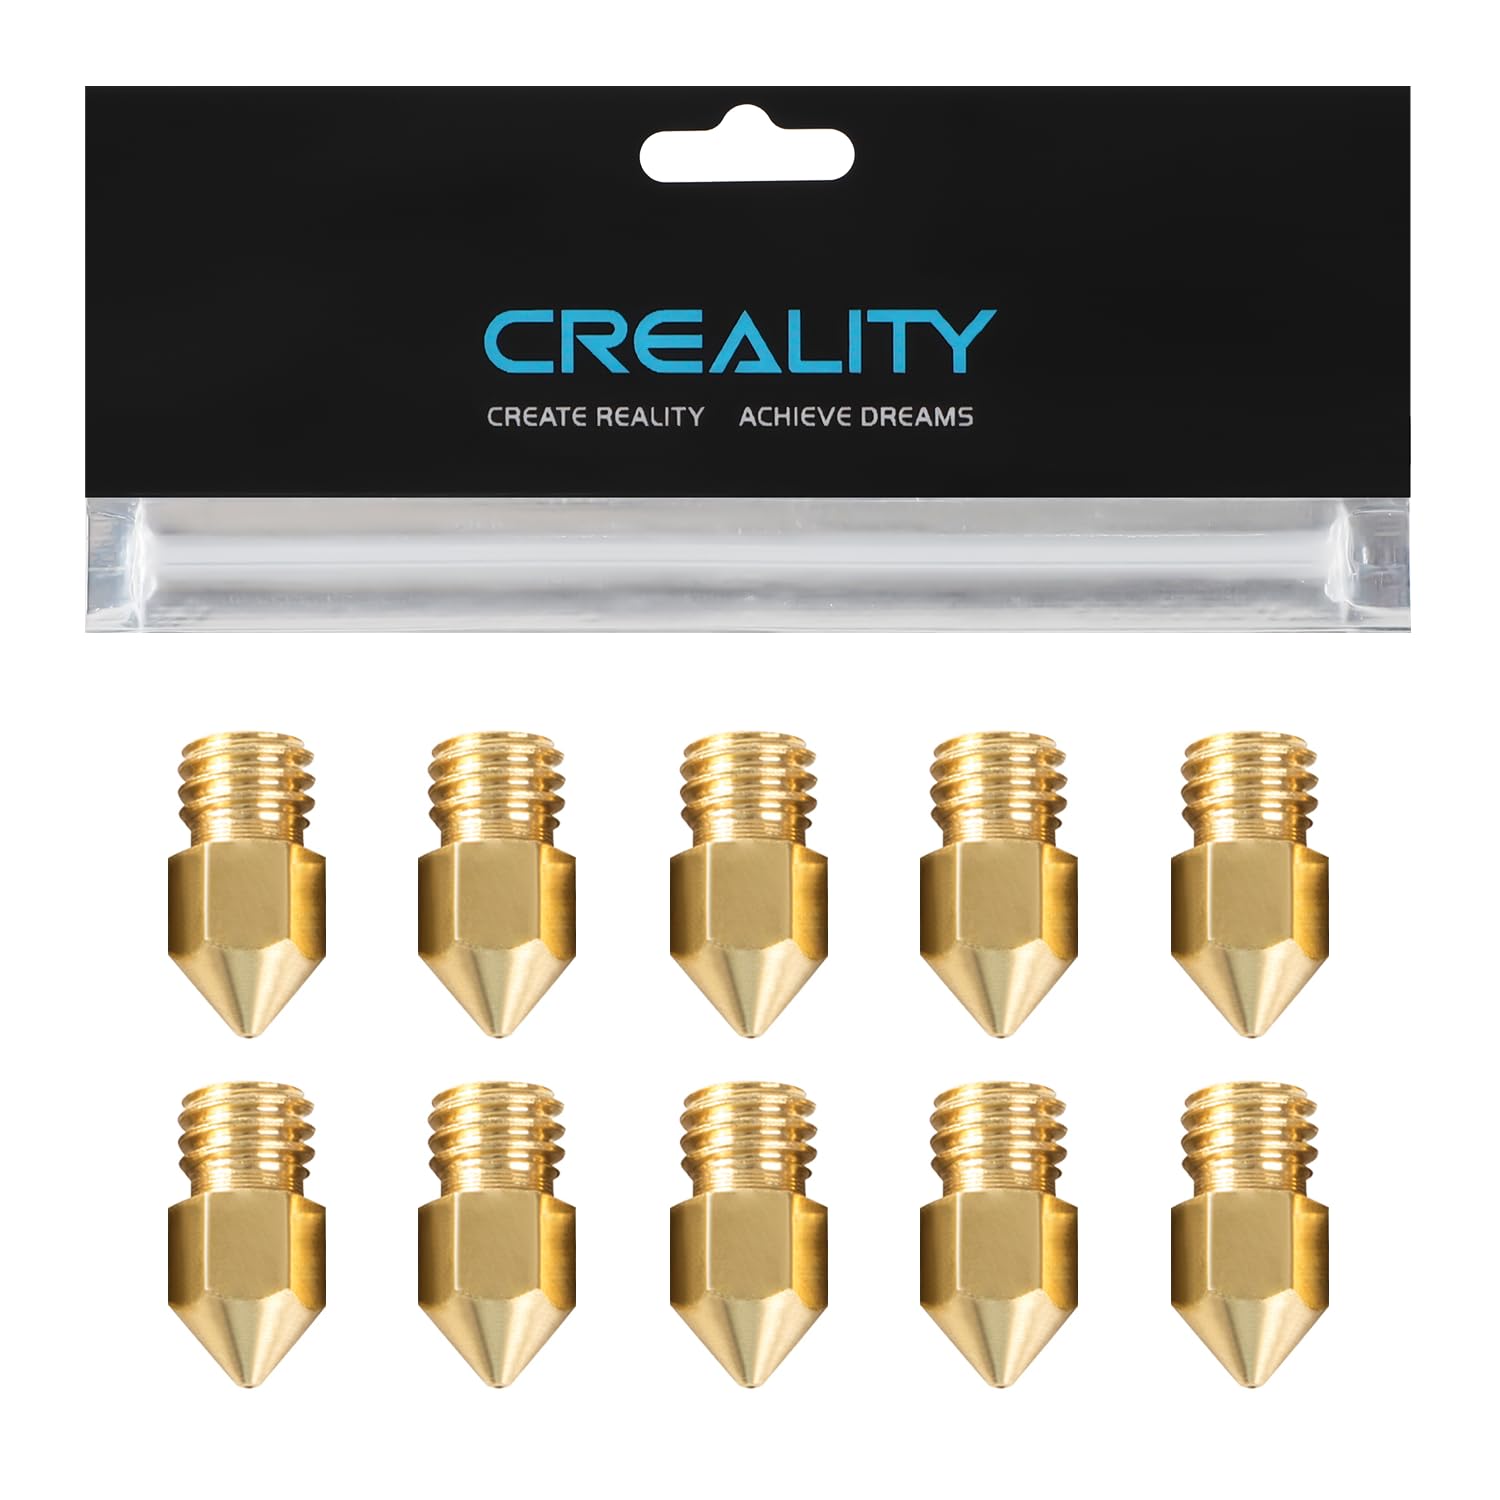
Creality Brass Nozzle 0.4mm (Pack of 5)
Exact OEM replacements, affordable for when cleaning fails.
Best for: Keep spares for quick swaps after stubborn clogs.
Price Range: $9.99
BIQU Nozzle Cleaning Kit with Brush
Includes needles, brushes, and wrench—complete beginner set.
Best for: All-in-one for steps 2-6, especially exterior cleaning.
Price Range: $12.99