
Nikon Prostaff 3S 8x42
Ideal for everyday park or trail birdwatching in varied lighting.
$150-$170
Nikon Prostaff 3S 8x42 Excellent clarity and lightweight design make it perfect for beginners seeking reliable performance without complexity.
Get the App
Better experience on mobile
Discover the key factors to select beginner-friendly binoculars that deliver clear views of birds without overwhelming specs or high costs.
Birdwatching can be a thrilling way to connect with nature, but choosing the wrong binoculars often leads to frustration—blurry images, heavy gear, or wasted money. As a beginner, you might feel overwhelmed by technical terms and endless options. This guide simplifies the process, helping you pick binoculars that enhance your hobby and spot that rare warbler with ease.
In this step-by-step tutorial, you'll learn the essential features to evaluate, from magnification to build quality, so you can make an informed decision. Whether you're heading to your local park or planning a nature trip, we'll cover everything needed to find the right pair. No prior knowledge required—this is designed for newcomers and takes just a short time to read and apply.
By the end, you'll know exactly what to look for and feel confident purchasing binoculars that fit your needs, budget, and comfort level. Expect a straightforward process that's more about smart choices than expert gear.
Estimated Time: 15-20 minutes to read and research initial options Difficulty: beginner
Start by evaluating where and how you'll use the binoculars. Are you birdwatching in dense forests, open wetlands, or urban parks? This determines key specs like field of view and portability.
Think about frequency of use—daily hikes or occasional outings? Beginners often overlook this, leading to gear that's too bulky for casual use. Success here looks like a clear list of priorities, such as lightweight for travel or waterproof for rainy days.
Why it matters: Matching binoculars to your lifestyle ensures comfort and enjoyment, preventing quick abandonment of the hobby.
💡 Tips:
⚠️ Warnings:
Magnification, shown as the first number in specs (e.g., 8x), enlarges distant objects. For birdwatching, 7x to 10x is ideal—8x is a sweet spot for beginners as it balances zoom without excessive shake.
Higher magnification narrows the field of view, making it harder to track fast-moving birds. Expect steady hands for 10x; anything over narrows your scan too much. Success: You can identify a model's stability for handheld use.
This step matters because improper magnification leads to frustration—too low and birds look tiny; too high and the image shakes.
💡 Tips:
⚠️ Warnings:
The second number (e.g., 42 in 8x42) indicates lens size, affecting light gathering and brightness. Larger lenses (40-50mm) excel in low light, like dawn birding, but add weight.
For beginners, 42mm offers a good balance—bright views without bulk. In bright daylight, smaller lenses suffice, but dim forests demand more. Success: Models that promise clear, vibrant images in varied lighting.
Why it matters: Poor light transmission means dull, hard-to-identify birds, ruining the experience.
💡 Tips:
⚠️ Warnings:
Prisms (roof or porro) straighten the image; roof prisms are compact and waterproof, ideal for birding. Lens coatings reduce glare and boost clarity—look for 'fully multi-coated'.
Quality glass minimizes color distortion, crucial for spotting subtle bird plumage. Beginners should prioritize BAK-4 prisms over BK-7 for sharper edges. Expect crisp, color-true views as success.
This ensures durable, high-performance optics that last years, avoiding fuzzy or yellowish images from cheap builds.
💡 Tips:
⚠️ Warnings:
Eye relief (distance from eye to lens) is vital for glasses wearers—aim for 15mm+. Focus mechanisms: Center focus is user-friendly for quick adjustments on moving birds.
Waterproof/fogproof models (nitrogen-purged) handle outdoor conditions. Success: Binoculars that adjust easily without removing glasses, staying clear in humidity.
These features make viewing comfortable and reliable, preventing eye strain or moisture issues during long sessions.
💡 Tips:
⚠️ Warnings:
Birdwatching involves hours of holding, so under 1.5 lbs is beginner-friendly. Compact designs fit in pockets; rubber armor adds grip and protection.
Test for balance—uneven weight tires arms quickly. Success: Gear that feels natural to hold, strap-compatible for neck carry.
Prioritizing this prevents physical discomfort, keeping focus on birds rather than strain.
💡 Tips:
⚠️ Warnings:
Beginner binoculars range $100-$300; allocate for quality over quantity. Factor in warranty (lifetime on optics is common).
Cheap (<$50) often disappoint with poor durability. Success: Options within budget that check most boxes.
Budgeting ensures value—invest in trusted brands to avoid replacements.
💡 Tips:
⚠️ Warnings:
Read user reviews on sites like Amazon or Birdforum for real feedback. Key metrics: Clarity scores, durability in field tests.
If possible, visit stores to handle and view through them. Success: Shortlist of 2-3 models with high ratings (4+ stars).
This validates choices, catching flaws like loose hinges missed in specs.
💡 Tips:
⚠️ Warnings:
Buy from reputable sellers with returns. Unbox and calibrate (adjust diopters for eyes).
Success: First bird spotted clearly, confirming your choice. Register warranty immediately.
This finalizes your setup, turning knowledge into joyful birdwatching adventures.
💡 Tips:
⚠️ Warnings:
Problem: Binoculars fog up in cold weather
Solution: Ensure they're nitrogen-purged; if not, use anti-fog inserts or store in a warm pocket before use. Seek replacement if persistent.
Problem: Image is blurry at edges
Solution: Check for cheap glass—return and upgrade to fully multi-coated lenses. Clean thoroughly first.
Problem: Hard to focus quickly on moving birds
Solution: Practice with center-focus models; if diopter is misadjusted, reset for each eye. Professional calibration if needed.
Problem: Buyer's remorse after purchase
Solution: Use return policies (30 days typical); revisit your needs list to confirm fit. Consult birding forums for reassurance.
Excellent clarity and lightweight design make it perfect for beginners seeking reliable performance without complexity.
Best for: Ideal for everyday park or trail birdwatching in varied lighting.
Price Range: $150-$170
HD glass provides sharp, color-accurate views with a lifetime warranty, offering great value for entry-level birders.
Best for: Best for low-light dawn watches or forested areas needing wide field of view.
Price Range: $200-$220
Budget-friendly with multi-coated optics and waterproof build, easy for newbies to handle and trust outdoors.
Best for: Great starter for urban or casual birding on a tight budget.
Price Range: $120-$140
Extra-low dispersion glass reduces distortion, with ergonomic grip for comfortable extended use.
Best for: Suited for longer hikes where weight and clarity matter most.
Price Range: $250-$280
Affordable, ultra-light option for absolute beginners testing the hobby.
Best for: Pocketable for short, casual outings before upgrading.
Price Range: $25-$35
Ideal for everyday park or trail birdwatching in varied lighting.
Nikon Prostaff 3S 8x42 Excellent clarity and lightweight design make it perfect for beginners seeking reliable performance without complexity.
Best for low-light dawn watches or forested areas needing wide field of view.
Vortex Diamondback HD 8x42 HD glass provides sharp, color-accurate views with a lifetime warranty, offering great value for entry-level birders.

Great starter for urban or casual birding on a tight budget.
Celestron Nature DX 8x42 Budget-friendly with multi-coated optics and waterproof build, easy for newbies to handle and trust outdoors.
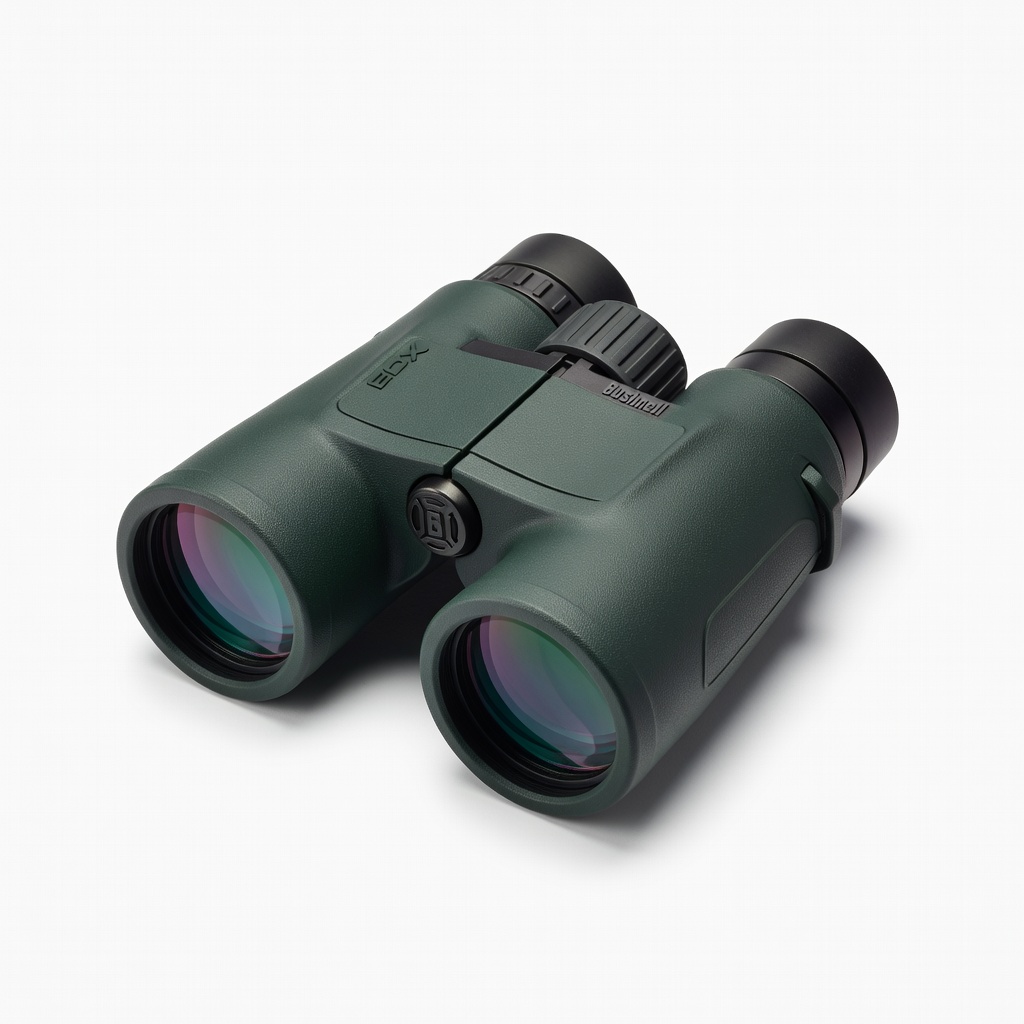
Suited for longer hikes where weight and clarity matter most.
Bushnell Engage EDX 8x42 Extra-low dispersion glass reduces distortion, with ergonomic grip for comfortable extended use.

Pocketable for short, casual outings before upgrading.
Occer 12x25 Compact Binoculars Affordable, ultra-light option for absolute beginners testing the hobby.