Choosing the wrong abrasive for metal polishing can turn a shiny project into a scratched disaster, wasting time and materials. Whether you're restoring vintage car parts, crafting jewelry, or finishing industrial components, the right abrasive ensures efficiency and professional results. This guide breaks down the key factors for intermediate polishers.
You'll learn the types of abrasives, grit progressions, matching to metals, and testing methods to get mirror-like finishes. Expect a straightforward process that's quick to grasp but rewards practice—no advanced tools needed, just 30-45 minutes of focused reading and testing.
By the end, you'll confidently select abrasives that cut fast, finish smooth, and prevent common pitfalls like holograms or burning.
▸What You'll Need
- •Sample pieces of your metal (required for testing)
- •Magnifying loupe or 10x magnifier (to inspect surface finish)
- •Assortment of abrasive samples or access to a supplier catalog (required)
- •Safety gear: nitrile gloves, safety goggles, dust mask (required)
- •Polishing tool like orbital sander, angle grinder, or hand block (optional but recommended)
- •Water spray bottle for wet sanding (optional)
Estimated Time: 30-45 minutes
Difficulty: intermediate
▸Step-by-Step Instructions
Step 1: Identify Your Metal Type and Initial Condition
Start by determining the metal you're polishing—stainless steel, aluminum, brass, or steel behave differently under abrasives. Softer metals like aluminum scratch easily with aggressive grits, while harder ones like stainless need tougher abrasives.
Examine the surface: Is it rough (under 400 grit scratches), medium (800-1500 grit), or fine (2000+)? Use a loupe to spot deep gouges or oxidation. This sets your starting grit—never skip to polishing if scratches are visible.
Why it matters: Mismatched abrasives lead to prolonged work or damage. Expect to classify your surface in 5 minutes.
💡 Tips:
- •Take photos before/after for reference.
- •Clean metal with degreaser first to reveal true condition.
⚠️ Warnings:
- •Avoid assuming all metals polish the same—test on scrap.
Step 2: Define Your Desired Finish Level
Decide on satin (matte, 400-800 grit), brushed (800-2000), or mirror (3000+ grit to compounds). Mirror finishes require fine progression; satin needs coarser for texture.
Analogy: Think of grits like sandpaper coarseness—coarse removes material fast but leaves marks, fine refines to shine. Match to project: automotive parts often need mirror, tools get brushed.
This step guides grit selection and prevents over-polishing soft metals.
💡 Tips:
- •Mirror? Plan 8-10 grit steps. Satin? 3-5 steps.
Step 3: Understand Grit Sizes and Progression Rules
Grits range from coarse (60-220 for heavy removal) to ultra-fine (2000-12000 for polishing). Always progress by doubling: 400 → 800 → 2000, etc., to remove prior scratches.
FEPA (European) or CAMI (US) standards vary—use FEPA P-grits for precision (P800 ≈ CAMI 1000). Why? Proper progression eliminates swirl marks.
Expect even pressure; test progression on scrap.
⚠️ Warnings:
- •Never jump grits (e.g., 220 to 2000)—scratches persist!
Step 4: Select the Abrasive Material Type
Common types: Aluminum Oxide (versatile, for steel/brass), Silicon Carbide (wet sanding, aluminum), Ceramic (fast cut, long life for hard metals), Diamond (ultra-fine, exotics like titanium).
Choose based on metal hardness—silicon carbide self-sharpens for soft metals. Analogy: Oxide is a reliable all-rounder; diamond is precision surgery.
This ensures durability and speed without clogging.
💡 Tips:
- •Ceramic for high-volume work—lasts 2x longer.
Step 5: Pick the Abrasive Form and Backing
Match form to tool: Sheets/rolls for hand/block, discs for sanders, belts for grinders, sponges/pads for contours. Backing: Paper (flexible), cloth (durable), film (uniform).
Why? Wrong backing tears or unevenly polishes. For curves, use radial discs or flap wheels.
Expect tool compatibility to halve effort.
Step 6: Decide Wet vs. Dry and Speed Factors
Wet: Reduces heat/clogging for fine grits (>1000) on soft metals. Dry: Faster for coarse, with dust extraction.
Consider RPM: Low (1500-3000) for fine, high (6000+) for coarse. Pressure: Light for polishing.
Prevents burning (discoloration) on aluminum.
⚠️ Warnings:
- •Dry fine grits clog fast—use anti-loading types.
Step 7: Test on Scrap and Evaluate Results
Apply 2x2" test patches per grit. Inspect under light/loupe for scratches. Refine choices.
Iterate: If holograms appear, go finer or wet sand. This validates your selection before full project.
Achieve confidence in 10 minutes.
💡 Tips:
- •Use marker dye to visualize scratch removal.
▸Pro Tips
- •Always buy 20-50% extra abrasives—they wear faster than expected.
- •Store in dry, airtight containers to prevent moisture damage.
- •Use lubricant like soapy water for wet sanding to extend grit life 2x.
- •Progress grits in even multiples for fastest results.
- •Invest in hook-and-loop systems for quick changes.
- •Label test samples with grit/form for future reference.
- •Combine abrasives with compounds for hybrid polishing.
▸Common Mistakes to Avoid
- •Skipping grit progression: Leaves deep scratches visible under light—always double grits.
- •Using dry abrasives on heat-sensitive metals: Causes burning/discoloration—switch to wet.
- •Ignoring metal type: Aggressive grits gouge soft aluminum—start finer on non-ferrous.
- •Overlooking backing quality: Cheap paper tears, slowing work—choose cloth/film.
- •High pressure on fine grits: Creates uneven holograms—use light touch.
▸Troubleshooting
Problem: Persistent scratches after progression
Solution: Revert two grits back and re-sand evenly; ensure full coverage.
Problem: Abrasives clogging quickly
Solution: Switch to anti-loading types or wet method; clean frequently.
Problem: Holograms or swirl marks
Solution: Use finer grit (P3000+), lower speed, or orbital motion.
Problem: Metal burning or blueing
Solution: Reduce pressure/RPM, add coolant; use ceramic for heat resistance.
Problem: Uneven finish
Solution: Check tool balance; sand in multiple directions.
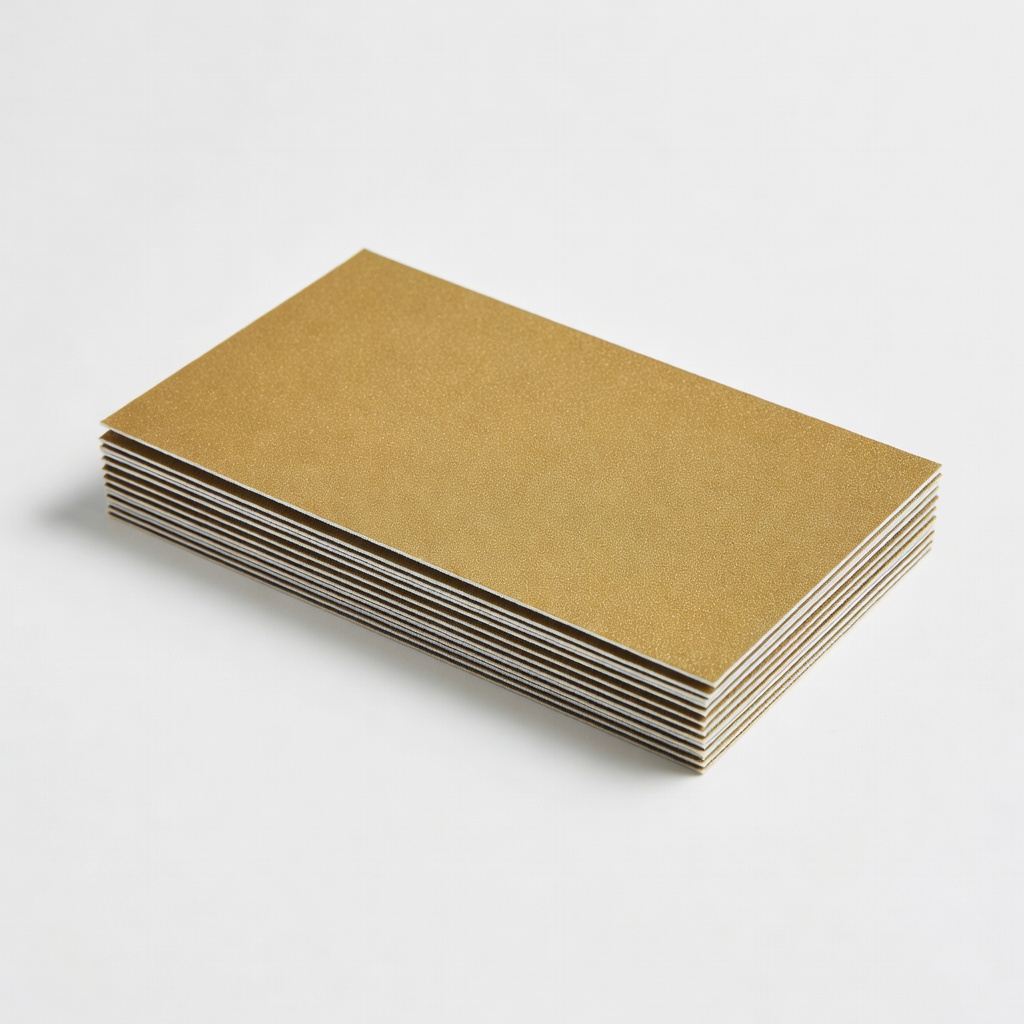
3M 7340 Gold Fre-Cut P3000 Wet/Dry Sandpaper Sheets (5-Pack)
Premium silicon carbide for fine wet polishing; self-sharpens and cuts fast without loading.
Best for: Mirror finishing aluminum/stainless; ideal for hand or machine.
Price Range: $12-15
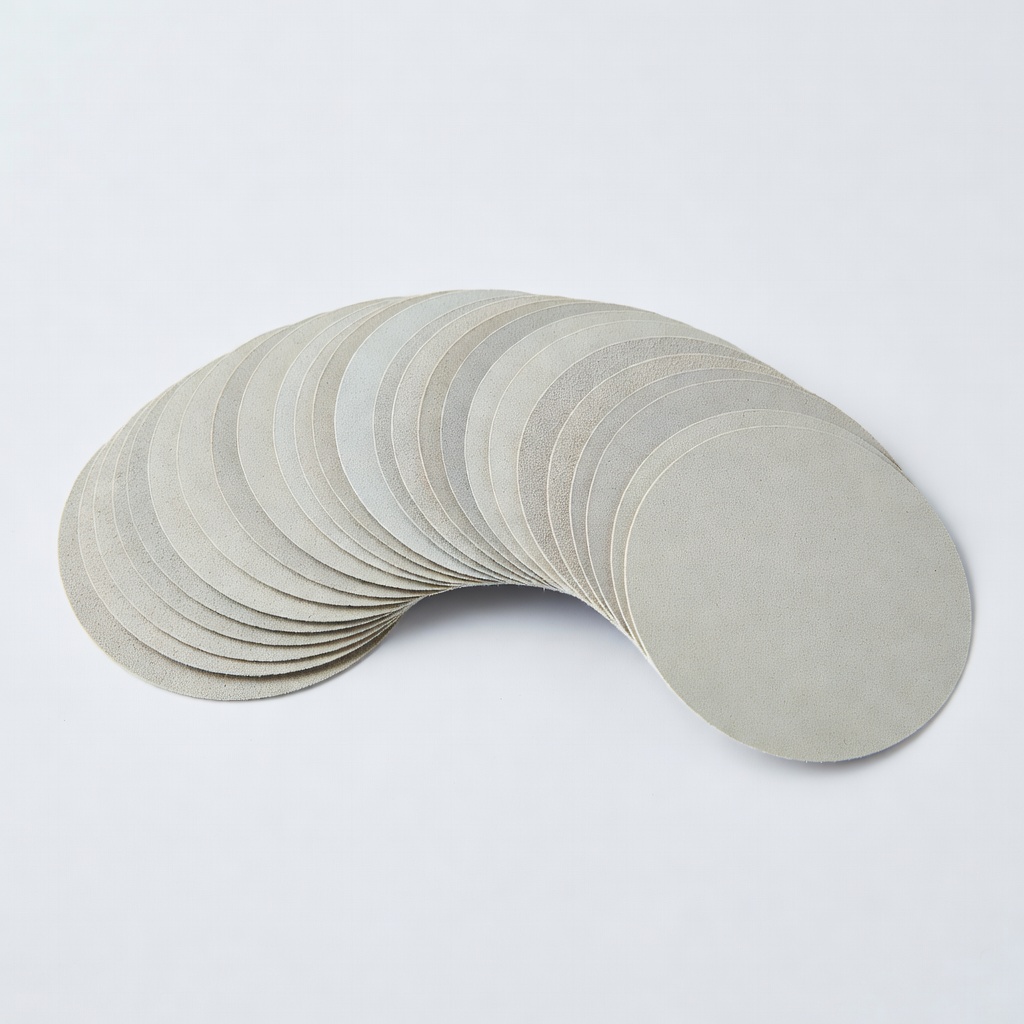
SPTA 5-Inch Wet Dry Sandpaper Assortment (400-3000 Grit, 30 Sheets)
Affordable progression kit with waterproof paper; perfect for testing multiple grits.
Best for: Full polish jobs on car parts or jewelry; wet/dry versatility.
Price Range: $14.99
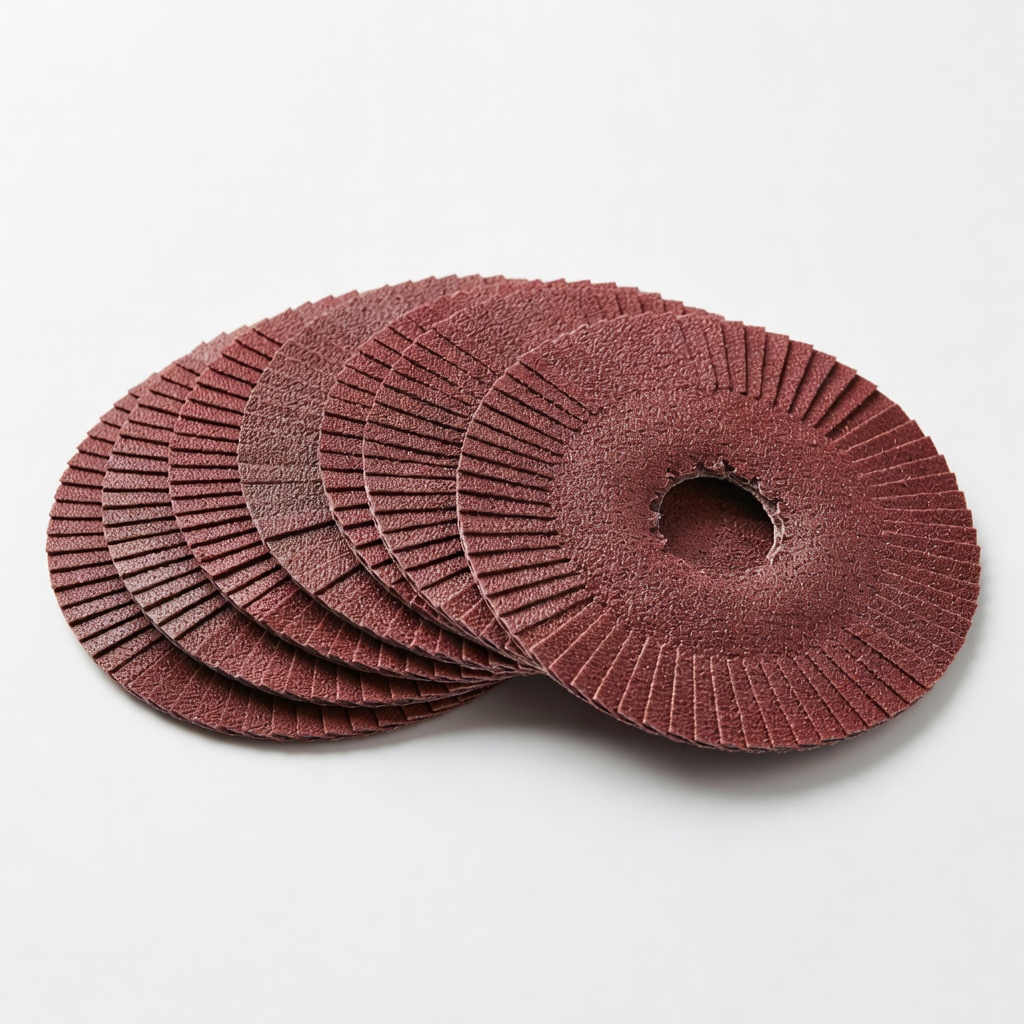
3M Cubitron II 984F Hookit Clean Sanding Discs (36+ Grit Options)
Ceramic precision abrasives with laser-cut pattern for dust-free, fast cutting on hard metals.
Best for: High-speed orbital sanders for professional steel/brass work.
Price Range: $25-40 per pack
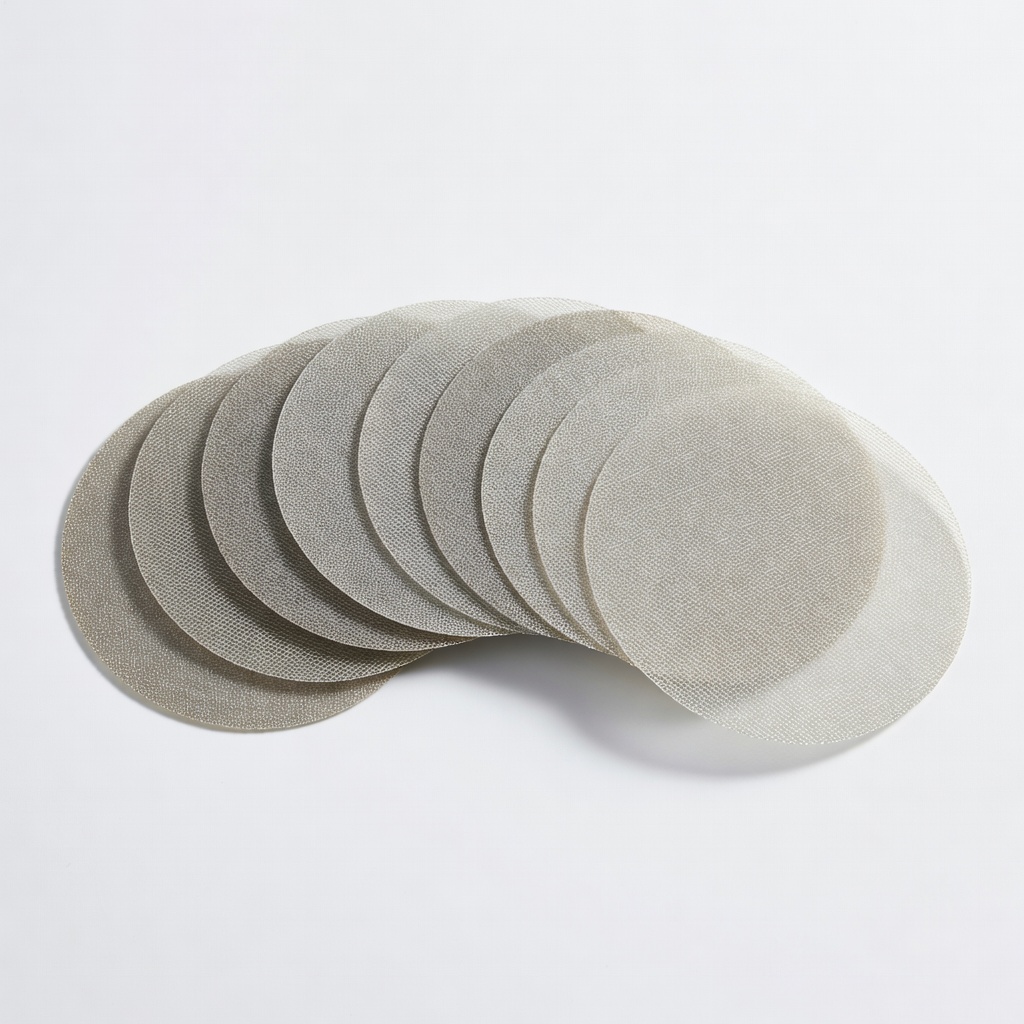
Mirka Abranet Dust-Free Net Sandpaper Discs (P800-P2000)
Mesh design captures 95% dust; long-lasting for dry sanding without vacuum.
Best for: Brushed finishes in workshops; contours well.
Price Range: $20-30
Dura-Gold 3-Inch Roloc Discs (Assortment 80-3000 Grit)
Triangular shape for edges/corners; quick-change system saves time.
Best for: Detail polishing on tools or frames; all metals.
Price Range: $18-25