The incline dumbbell press is a staple for upper chest development, but the wrong bench can sabotage your form, limit your range of motion, or even pose a safety risk. With dozens of adjustable benches on the market, choosing one that supports proper incline pressing requires understanding back pad dimensions, seat angle, stability, and weight capacity. This guide breaks down every critical factor so you can confidently pick a bench that fits your body, your training style, and your budget—without wasting money on features you don't need.
▸What You'll Need
- •Understanding of your preferred incline angle range (typically 15–45 degrees for upper chest)
- •Knowledge of your height and torso length (to evaluate pad length and seat position)
- •A rough budget in mind ($150–$600+ for quality adjustable benches)
- •Access to user reviews and spec sheets from reputable brands
Estimated Time: 30–45 minutes to read and apply the criteria to your search
Difficulty: intermediate
▸Step-by-Step Instructions
Step 1: Understand the Key Bench Types for Incline Press
Not all adjustable benches are created equal. For incline dumbbell press, you typically need an adjustable bench that allows a back angle of at least 45 degrees (many go to 80+). The two main types are: FID benches (Flat, Incline, Decline) and adjustable flat/incline benches (no decline). FID benches usually have a separate seat pad that moves with the back, which is crucial for incline work because it maintains proper hip positioning. Some budget benches have a one-piece pad that tilts—these often leave a gap between your glutes and the pad, reducing stability. For incline dumbbell press, a bench with a gapped seat (separate seat and back pads) is preferable because it allows a natural hip angle and better leg drive. Also consider whether the bench is a free-standing unit or an attachment for a rack. Free-standing benches are more common; rack-attached benches (like those from Rep Fitness or Rogue) offer superior stability but require a compatible power rack.
💡 Tips:
- •Look for benches described as 'FID' if you also want decline capability.
- •Measure the length of the back pad – at least 45 inches for tall users to support your entire back.
⚠️ Warnings:
- •Avoid cheap benches with a single-piece tilting seat that slides your hips forward on incline – this compromises form.
Step 2: Evaluate Back Pad Length and Width
During incline pressing, your entire back, from shoulders to glutes, should be supported. A short back pad (under 40 inches) will leave your lower back unsupported, leading to arching or instability. Aim for a back pad length of at least 44–46 inches for most users. Pad width also matters: wider pads (12–12.5 inches) provide more stability for heavy dumbbells, but if you have narrower shoulders, a 10–11 inch pad might allow better shoulder blade retraction. Sit on the bench at a 45-degree incline and ensure your head rests on the pad without your glutes slipping off the front. Also check the pad thickness – 2–3 inches of high-density foam is ideal; too thin and you'll feel the frame, too thick and it can compress unevenly.
💡 Tips:
- •If you're over 6 feet tall, look for benches with a 50+ inch back pad or consider a 'tall' version.
- •Measure your own torso from shoulder to hip to estimate needed pad length.
⚠️ Warnings:
- •Beware of benches that list 'overall length' instead of back pad length – the overall includes the seat.
Step 3: Check the Seat Angle and Position
A common issue with many adjustable benches is that the seat remains parallel to the ground even when the back is inclined, causing you to slide forward during heavy presses. The ideal setup is a bench with a seat that also tilts upward slightly (like 10–20 degrees) when the back is raised. This 'tilt seat' keeps your hips engaged and prevents sliding. Some benches allow you to adjust the seat angle independently – that's even better. Also ensure the seat is long enough (12–15 inches) to support your thighs without cutting off circulation. Test by sitting on the bench at a 30-degree incline: your feet should be flat on the floor with hips slightly flexed, not forced into a 90-degree angle.
💡 Tips:
- •Look for 'seat angle adjustment' or 'contoured seat' in product descriptions.
- •If the seat doesn't tilt, consider using a rolled-up towel under your hips to maintain position.
⚠️ Warnings:
- •Some benches have a seat that is too short, causing your hamstrings to hang off – this reduces leg drive.
Step 4: Verify Weight Capacity and Stability
Incline dumbbell press often involves heavy loads (especially if you're intermediate). The bench must support not only your body weight plus the dumbbells but also the dynamic load when you press. Look for a minimum weight capacity of 600–1000 lbs for heavy training. But capacity isn't everything – stability is king. A wobbling bench is dangerous. Check the frame gauge: 11–14 gauge steel is standard for durability. Also look at the footprint – wider bases (e.g., 24 inches between front and rear feet) provide better lateral stability. Some benches have stabilizer bars that connect the front and rear legs; these reduce side-to-side sway. Read user reviews for mentions of 'rocking' or 'shaky' on high incline.
💡 Tips:
- •If you plan to use over 100 lb dumbbells, consider a bench with a weight capacity of 1000+ lbs and a wide footprint.
- •The floor material matters – rubber feet prevent slipping and protect flooring.
⚠️ Warnings:
- •Don't trust the weight capacity alone – a bench might hold 1000 lbs static but wobble under dynamic load.
Step 5: Assess Adjustment Mechanism and Ladder Positions
For incline pressing, you'll want precise angle adjustments, typically between 15 and 45 degrees. Most benches use either a pull-pin ladder (more common) or a gas shock system. Pull-pin ladders offer discrete increments (every 10 degrees) and are rock-solid. Gas shocks allow stepless adjustment but can fail over time. Ensure the ladder or mechanism allows a position around 30–45 degrees for upper chest; many benches skip from 30 to 45, but having a 37.5 or 40-degree slot is ideal for some lifters. Check that the adjustment is easy to operate one-handed while holding a dumbbell (or at least from a seated position). Some bench designs require you to stand up to change angles – a hassle during a superset.
💡 Tips:
- •Test the adjustment mechanism for smoothness – any sticking or grinding indicates poor manufacturing.
- •Look for a bench with at least 5–7 back angle positions.
⚠️ Warnings:
- •Gas shock systems can lose pressure over time – cheaper ones may fail within a year.
Step 6: Consider Padding Density and Durability
The foam density affects both comfort and stability. High-density foam (around 50 ILD or higher) resists compression over time and provides a firm surface for heavy pressing. Softer foam might feel comfortable initially but will cause 'hammocking' – the dumbbells feel unstable as your body sinks in. Look for benches using closed-cell foam or multi-layer foam. Also check the upholstery: heavy-duty vinyl or marine-grade vinyl is durable and easy to clean. Avoid benches with thin leather-like coverings that peel quickly. If you train in a garage or humid environment, look for vinyl with UV protection.
💡 Tips:
- •Sit on the bench before buying if possible – your sit bones shouldn't bottom out.
- •Check user reviews for 'foam deteriorating' or 'cover peeling' after a year.
⚠️ Warnings:
- •Cheap benches often use low-density foam (20–30 ILD) that deforms permanently within months.
Step 7: Evaluate Wheel and Transport Features
If your home gym has limited space, you'll likely move the bench between exercises. A bench with rear-mounted wheels and a lifting handle makes it easy to roll around. Check the wheel size – larger wheels (4 inches) roll over mats and thresholds better than small ones. Also see if the bench stands upright on its end for storage. Even if you don't plan to move it often, the ability to tilt and roll reduces wear on the legs and floor. Some benches have caster wheels on the front too, but those can roll during heavy pressing – avoid that.
💡 Tips:
- •Look for a bench that is balanced when tilted onto its wheels – some designs tip over easily.
- •A transport handle near the seat makes moving easier than reaching for the back pad.
⚠️ Warnings:
- •Benches with cheap plastic wheels may crack; look for polyurethane or rubber wheels.
Step 8: Match the Bench to Your Training Environment
Consider your floor type: if you have rubber flooring, a bench with rubber feet will grip well. On carpet, you may need a heavier bench to prevent shifting. Also think about the bench height – most are 17–18 inches high in flat position, which matches standard power racks. If you plan to use the bench with a rack for rack pulls or squats, ensure the bench height is compatible. For incline dumbbell press alone, height is less critical, but a bench that is too low will make it hard to leg drive, and too high can cause unstable foot placement. Finally, check the overall width of the bench – if your space is narrow, a compact bench (like the Rep AB-3000) might fit better than a wide one (like the Rogue Adjustable Bench 3.0).
💡 Tips:
- •Measure your dumbbell rack height – you need clearance to unrack dumbbells in an incline position.
- •If you train near a wall, allow at least 2 feet of space behind the bench for the backrest to recline.
⚠️ Warnings:
- •Don't assume all benches fit in standard 'bench-only' spots – check collapsed dimensions if you store vertically.
▸Pro Tips
- •Prioritize bench stability over adjustability – a rock-solid bench at only three angles beats a wobbly one with nine angles.
- •Look for benches with a 'wide' foot design (like a triangle base) for better lateral stability during incline work.
- •If you're between sizes, go for the longer back pad – you can always adjust your position, but you can't add support.
- •Check the bolt quality – many budget benches use metric bolts that can loosen over time; apply threadlocker if needed.
- •Consider buying a bench pad from a third-party upholsterer if you want firmer foam without buying a whole new bench (only for some models).
- •Read multiple reviews specifically about incline dumbbell pressing – generic reviews may miss sliding or stability issues.
▸Common Mistakes to Avoid
- •Buying a bench based on flat bench performance only to find it slides forward on incline – test or read incline-specific reviews.
- •Ignoring the seat-to-pad gap: a large gap (over 2 inches) can cause lower back rounding on incline.
- •Assuming all adjustable benches have a seat that tilts – many don’t, leading to discomfort on higher inclines.
- •Choosing a bench with too-low weight capacity for heavy dumbbells (e.g., 300 lbs capacity when you press 100+ lbs dumbbells).
- •Overlooking the importance of pad width – too narrow can compromise stability for broader shoulders.
▸Troubleshooting
Problem: Bench wobbles side-to-side during incline press
Solution: Check if all bolts are tightened. If the frame twists, add a stabilizer bar (if pin-compatible) or place a thin rubber mat under the legs to increase friction. Some benches allow you to lightly widen the stance by bending the feet slightly (not recommended for steel).
Problem: I slide down the bench during incline presses
Solution: Ensure the seat is tilted upward. If not, place a wedge or folded towel under your hips. Also check your foot placement – you should be driving through your heels, not your toes. A non-slip bench cover can help.
Problem: Back pad angle doesn't go low enough (e.g., only drops to 15 degrees)
Solution: If you need a lower incline (like 10 degrees for volume work), look for a bench with a 'negative' angle setting or one that goes flat. Some gas-shock benches allow a lower range if adjusted differently.
Problem: Adjustment pin is hard to pull or insert
Solution: Lubricate the pin with dry PTFE spray. Also check if the holes are misaligned – if bent, you may need to disassemble and realign the ladder frame.
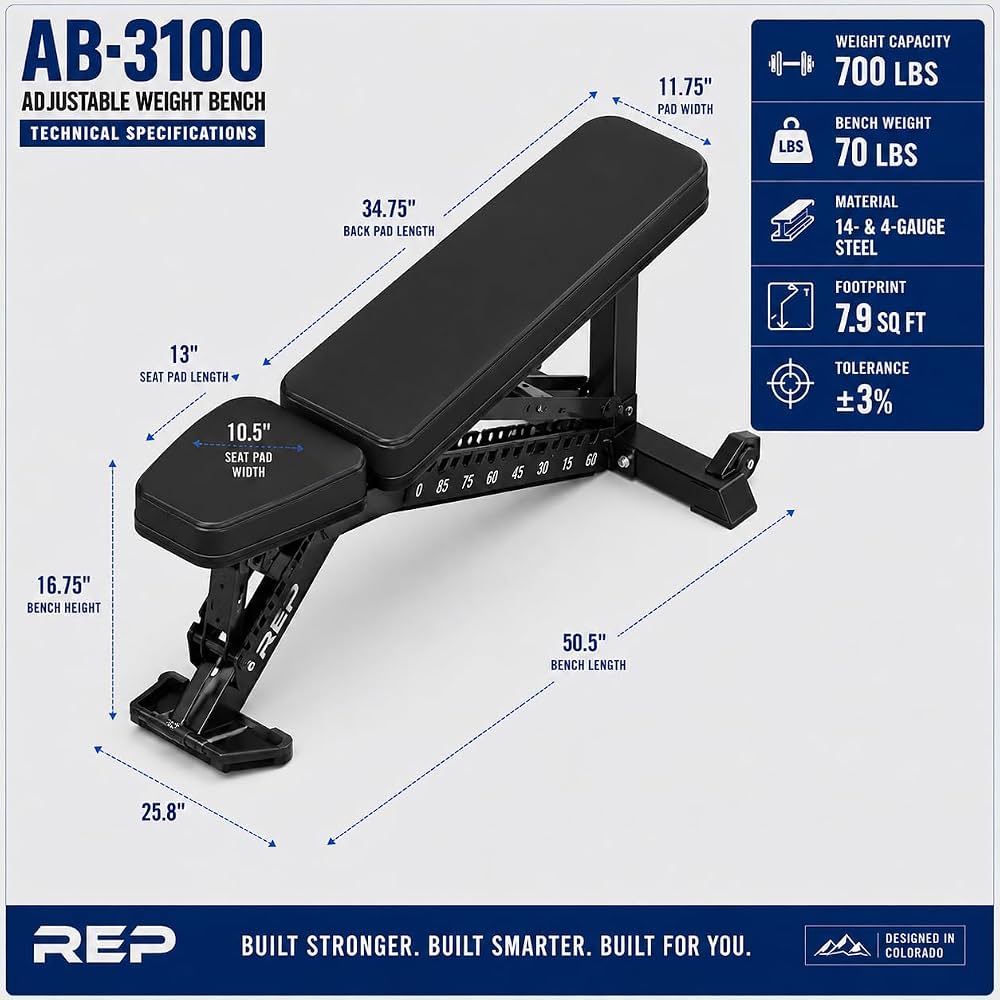
REP AB-3100 Adjustable Weight Bench
Excellent balance of back pad length (46"), wide pad (12.5"), and a tilting seat that prevents sliding. High-density foam and 1000 lb capacity make it ideal for heavy incline dumbbell press. Often considered the best value in the intermediate category.
Best for: For intermediate lifters who want a stable, long-lasting bench with precise angle adjustments (including a 40° slot) under $400.
Price Range: $300–$400
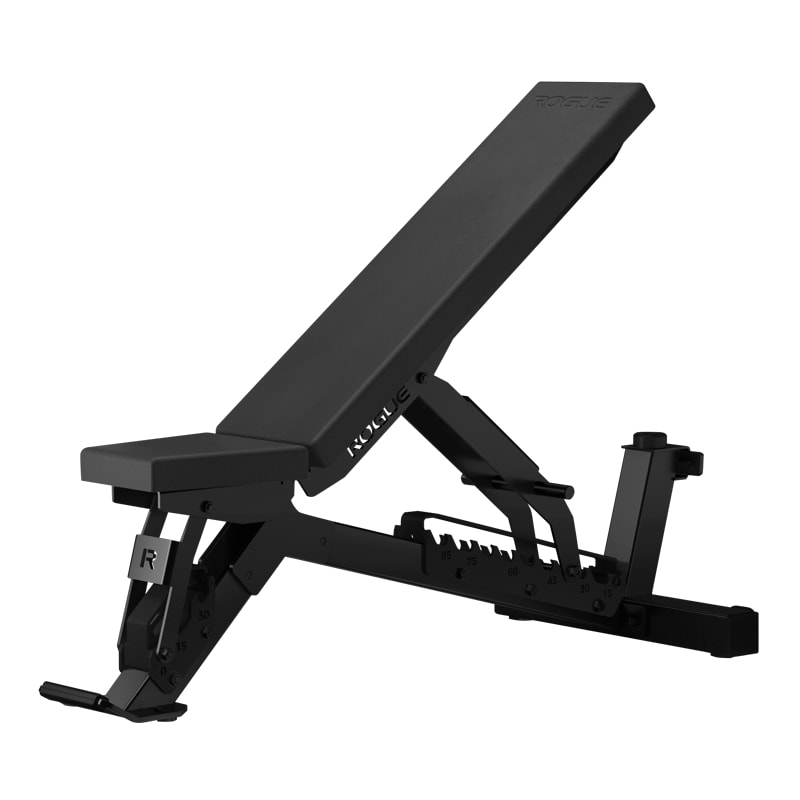
Rogue Adjustable Bench 3.0
Premium build with 11-gauge steel, three-inch thick pad, and a massive 1,500 lb capacity. The seat tilts independently, and the back pad is 51 inches long. Exceptional stability due to wide footprint and stabilizer crossbars.
Best for: For advanced lifters or those pressing very heavy dumbbells (120+ lbs) who need no-compromise stability and durability.
Price Range: $500–$650
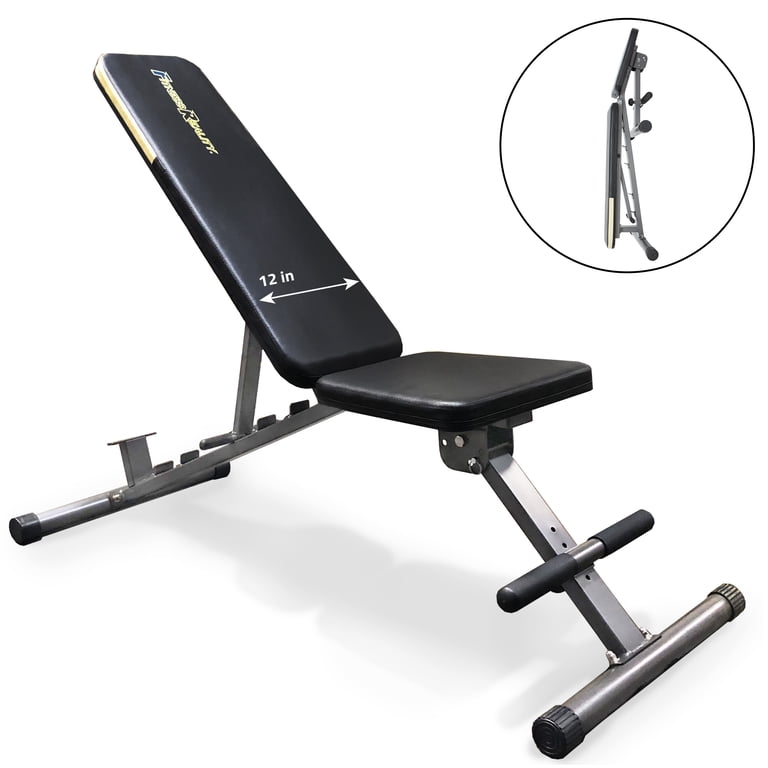
Fitness Reality 1000 Super Max Adjustable Bench
Budget-friendly option with a tilting seat and back pad length of 46 inches. Supports 1000 lbs and has a wide 12-inch pad. Good for intermediates who don't want to spend over $200.
Best for: For home gym users on a tight budget who still want proper incline pressing features without major sacrifices.
Price Range: $150–$200
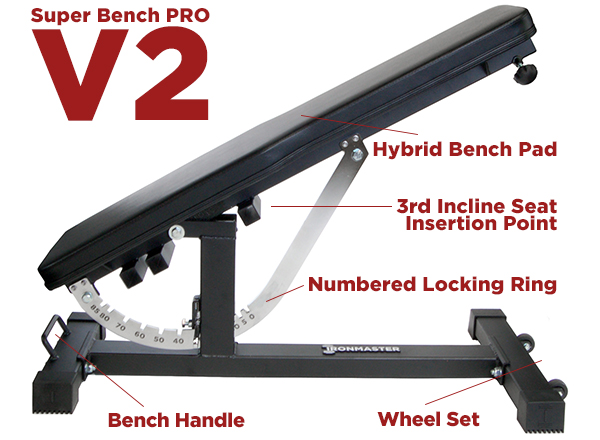
Ironmaster Super Bench PRO
Unique design with a heavy-duty steel frame and extremely high-density foam (like a commercial bench). The optional seat attachment adds tilt. Known for being rock-solid at any angle. Has a reputation for longevity.
Best for: For lifters who want a modular system with add-ons (like leg curl/extension) and prioritize a firm, supportive pad for incline pressing.
Price Range: $450–$600