
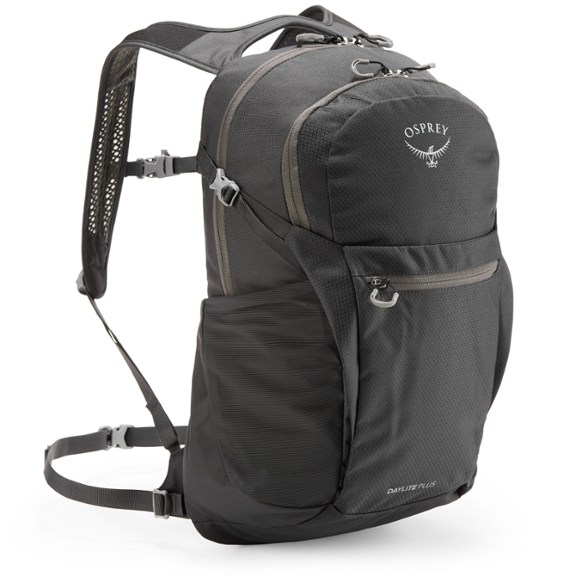
Osprey Daylite
For minimal day hikes or as a summit pack; also pairs with travel backpacks.
$55–$70
Osprey Daylite Classic 13L daypack that attaches to larger Osprey packs, offers decent comfort, and comes with Osprey's All Mighty Guarantee.
Get the App
Better experience on mobile
A beginner-friendly guide to finding the perfect daypack for comfort, fit, and features.
Choosing the right backpack for day hiking can be overwhelming, especially with so many options on the market. A poorly fitting or oversized pack can turn a pleasant hike into a painful experience. This guide will walk you through everything you need to consider—capacity, fit, features, and budget—so you can confidently pick a daypack that suits your adventures. By the end, you'll know exactly what to look for and how to test a pack before buying.
Estimated Time: 15–30 minutes of research (plus try-on time if visiting a store) Difficulty: beginner
Before you start comparing packs, think about what kind of day hiking you'll do. Are you a fair-weather wanderer or a year-round trekker? Do you carry a lot of gear (camera, extra layers, snacks for a group) or minimal essentials (water, bars, phone)? The more gear you expect to carry, the larger the pack you'll need. Also consider if you'll be using the pack for other activities like travel or school—versatility can be a bonus.
💡 Tips:
Day hiking packs typically range from 10 to 30 liters. For most day hikes, 15–25 liters is ideal. If you carry only water, snacks, and a light jacket, a 15L pack works. For all-day adventures with extra layers, lunch, and a rain shell, go for 20–25L. Avoid packs over 30L for simple day hikes—they encourage overpacking and may be too large for comfort.
💡 Tips:
⚠️ Warnings:
A backpack's fit is determined by your torso length, not your height. To measure, have a friend find the C7 vertebra (the bony bump at the base of your neck when you tilt your head forward). Measure from that spot down to the point at your hip bones (iliac crest). That distance is your torso length. Most daypacks come in sizes S/M/L based on torso length. A proper fit ensures the hip belt sits on your hips, not your waist, transferring weight to your legs.
💡 Tips:
⚠️ Warnings:
The hip belt is the most important comfort feature for daypacks over 15 liters. It should wrap around your hip bones and be padded enough to carry the load. Shoulder straps should be curved to follow your torso and have sternum straps to connect them. When you adjust the pack, the hip belt should bear about 80% of the weight, not your shoulders. Test the pack with weight (ask a store attendant for sandbags) to feel the fit.
💡 Tips:
⚠️ Warnings:
Consider how you like to organize gear. Do you want a brain (top pocket), side mesh pockets for water bottles, a front pocket for quick access, or a separate compartment for a hydration sleeve? Many daypacks now include a hydration bladder sleeve and a hose port. Also think about access: top-loading packs are common, but panel-loading (like a suitcase) can be easier for packing and retrieving items.
💡 Tips:
⚠️ Warnings:
Daypacks typically weigh between 1 and 3 pounds. Lighter is better for comfort, but durability and features matter too. Nylon (especially ripstop) is common; Cordura is more durable but heavier. If you plan on scrambling or bushwhacking, a rugged fabric might be worth the extra ounces. For mostly trail walking, a lighter pack suffices. Check the denier rating (e.g., 210D or 420D) for durability.
💡 Tips:
⚠️ Warnings:
The suspension system includes the back panel, frame (if any), and how the pack sits against your body. Many daypacks use a foam back panel or a wire frame to transfer load. Ventilation is key to avoid a sweaty back: look for mesh panels, trampoline-style backs (like Osprey's AirSpeed), or channels that allow air to flow. Try the pack on and see if you feel hot spots or if it feels like a sweaty oven.
💡 Tips:
⚠️ Warnings:
Day hiking packs range from $30 to $200+. Entry-level packs from brands like Teton Sports or Outdoor Products are affordable but may lack comfort. Mid-range packs ($60–$120) from REI, Deuter, Osprey, or Gregory offer great value with good warranty and comfort. High-end packs ($150+) often feature lighter materials, better suspension, and superior fit. Decide how often you'll hike and what features matter most to you.
💡 Tips:
⚠️ Warnings:
Before buying, read customer reviews on multiple sites to get a sense of real-world performance. Look for comments about fit, durability, and how the pack handles weight. Also check the manufacturer's warranty: Osprey offers an All Mighty Guarantee (repair any damage for any reason), while Deuter and Gregory have limited lifetime warranties. A good warranty can make a pack a long-term investment.
💡 Tips:
⚠️ Warnings:
After considering all the factors, narrow down your choices to 2–3 models. Visit a store to try them on with weight if possible. Walk around, simulate reaching for water, and adjust all the straps. If buying online, order from a retailer with free returns. Once you have your pack, take it on a short hike to confirm it works for you. With the right daypack, every hike becomes more enjoyable.
💡 Tips:
⚠️ Warnings:
Problem: The hip belt sits on my waist instead of my hips.
Solution: Your pack is likely too small or the torso length is too short. Try a larger size or a model with adjustable torso.
Problem: The pack feels heavy even when empty.
Solution: Check the pack's base weight—some models are heavier due to extra padding or frame; consider ultralight options if weight is a concern.
Problem: My shoulders hurt after a short hike.
Solution: The hip belt may not be tight enough or the pack is overloaded. Re-adjust the hip belt to carry 80% of the weight, and tighten the load-lifters.
Classic 13L daypack that attaches to larger Osprey packs, offers decent comfort, and comes with Osprey's All Mighty Guarantee.
Best for: For minimal day hikes or as a summit pack; also pairs with travel backpacks.
Price Range: $55–$70
Lightweight (about 1 lb), excellent ventilation with AirStrip back system, and a good balance of features for moderate day hikes.
Best for: For fast-paced hiking or trail running where weight matters.
Price Range: $90–$120
Versatile 25L pack with adjustable torso, hydration sleeve, and a comfortable suspension system—great value for the price.
Best for: All-around day hiking, especially for longer trips where you need extra capacity.
Price Range: $70–$90
24L pack with a ventilated back panel, load-lifter straps, and a padded hip belt; offers great comfort and organization.
Best for: For day hikes where you carry moderate gear (extra layers, lunch, camera).
Price Range: $120–$150
Popular 22L pack with a trampoline back panel (AirScape), adjustable fit, and a built-in rain cover; ideal for technical day hikes.
Best for: For hikers who need reliable comfort and ventilation on rugged terrain.
Price Range: $120–$160
For minimal day hikes or as a summit pack; also pairs with travel backpacks.
Osprey Daylite Classic 13L daypack that attaches to larger Osprey packs, offers decent comfort, and comes with Osprey's All Mighty Guarantee.
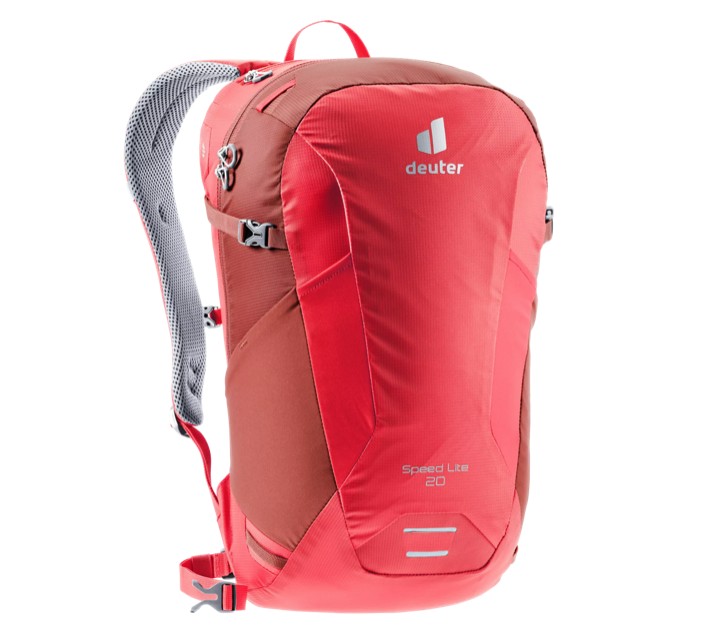
For fast-paced hiking or trail running where weight matters.
Deuter Speed Lite 20 Lightweight (about 1 lb), excellent ventilation with AirStrip back system, and a good balance of features for moderate day hikes.
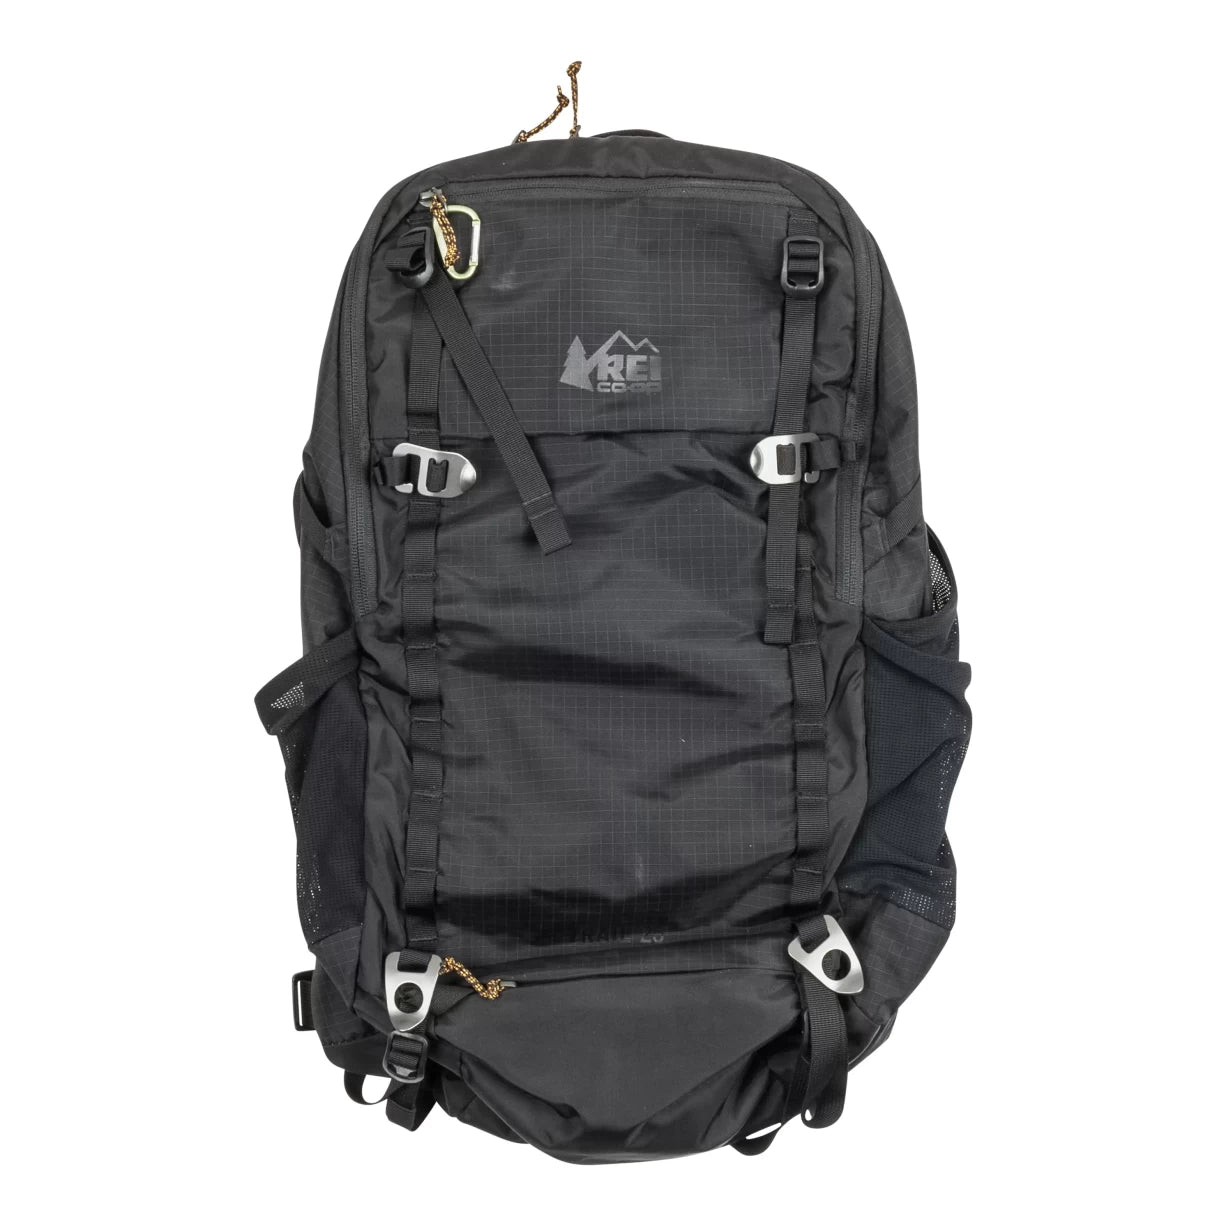
All-around day hiking, especially for longer trips where you need extra capacity.
REI Co-op Trail 25 Pack Versatile 25L pack with adjustable torso, hydration sleeve, and a comfortable suspension system—great value for the price.
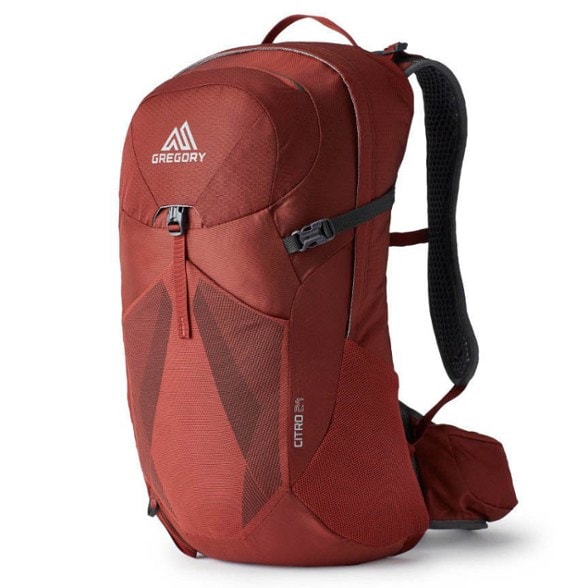
For day hikes where you carry moderate gear (extra layers, lunch, camera).
Gregory Citro 24 24L pack with a ventilated back panel, load-lifter straps, and a padded hip belt; offers great comfort and organization.
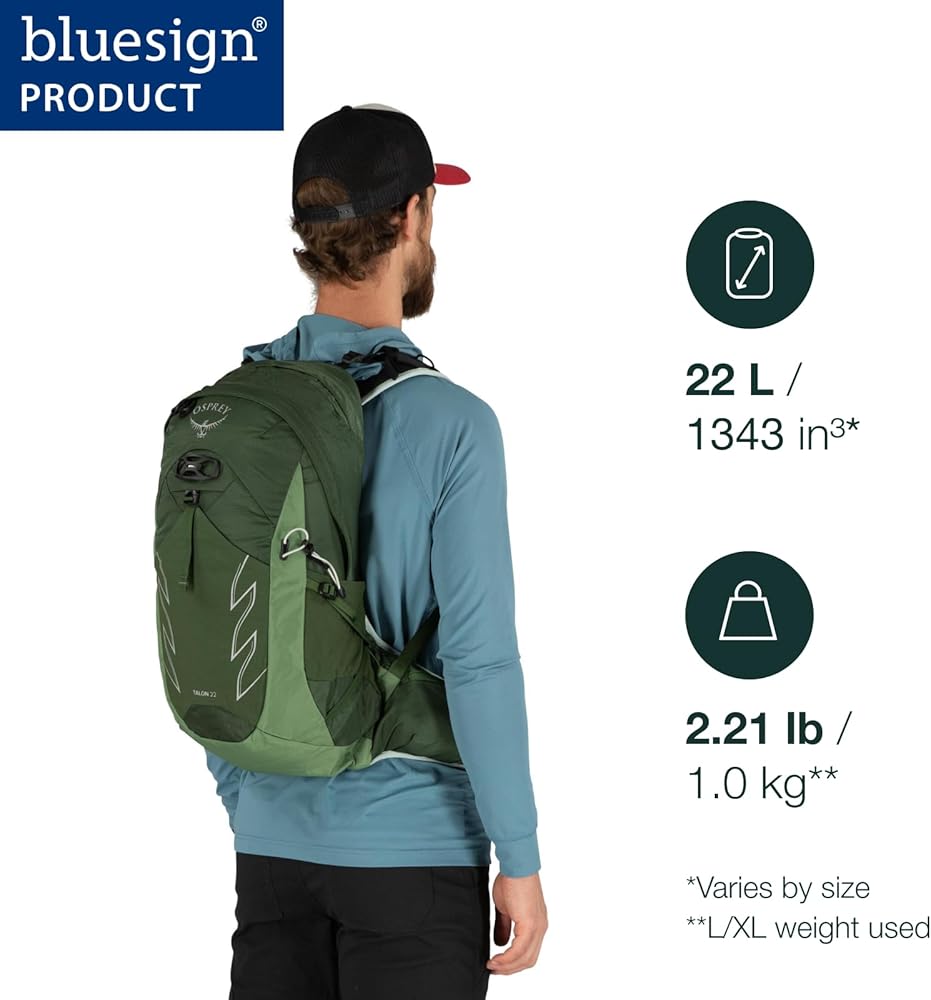
For hikers who need reliable comfort and ventilation on rugged terrain.
Osprey Talon 22 Popular 22L pack with a trampoline back panel (AirScape), adjustable fit, and a built-in rain cover; ideal for technical day hikes.