If you're a beginner photo editor, nothing is more frustrating than spending hours perfecting an image only to find it looks washed out or overly saturated when viewed elsewhere. Proper monitor calibration ensures your colors are true-to-life, helping you make reliable adjustments that translate well to prints or other screens. Without it, your workflow can lead to inconsistent results and wasted time.
In this guide, you'll learn how to calibrate your monitor using free software and optional hardware for the best accuracy. We'll cover the essentials step by step, from preparation to verification. The process is straightforward for beginners, requiring no advanced technical knowledge, and should take about 30-45 minutes to complete.
▸What You'll Need
- •A computer connected to the monitor you want to calibrate (Windows, macOS, or Linux)
- •Monitor with adjustable settings (brightness, contrast, color temperature)
- •Calibration software: DisplayCAL (free, open-source) or built-in OS tools like Windows Display Color Calibration
- •Optional but recommended: Hardware colorimeter (e.g., X-Rite i1Display Pro) for precise measurements
- •A dimly lit room to avoid external light interference
Estimated Time: 30-45 minutes
Difficulty: beginner
▸Step-by-Step Instructions
Step 1: Prepare Your Workspace
Start by setting up an ideal environment for calibration. Choose a room with controlled lighting—dim or indirect light is best to prevent glare or color casts from windows or lamps. Turn off overhead lights if possible and close blinds. Position your monitor away from direct sunlight or colorful walls that could reflect onto the screen.
Why does this matter? External light can skew your perception of colors during calibration, leading to inaccurate settings. Expect a neutral setup that mimics typical viewing conditions for photo editing. This step ensures the calibration reflects real-world use.
Once ready, power on your monitor and let it warm up for at least 30 minutes. This stabilizes the display's internal components for consistent output.
💡 Tips:
- •Use a desk lamp with a neutral bulb if you need more light, avoiding warm-toned LEDs.
⚠️ Warnings:
- •Avoid calibrating in bright daylight; it can make your screen appear dimmer than it is.
Step 2: Reset Monitor to Factory Settings
Access your monitor's on-screen display (OSD) menu using the physical buttons on the bezel. Navigate to the settings or reset option and restore the monitor to its default factory calibration. This clears any previous custom adjustments that might interfere.
This step is crucial because custom tweaks from games or videos can alter color profiles, making calibration unreliable. After resetting, your screen should look neutral—neither too vibrant nor dull. If your monitor model has a 'standard' or 'sRGB' mode, select that as a starting point for photo editing accuracy.
💡 Tips:
- •Refer to your monitor's manual (downloadable from the manufacturer's site if needed) for exact button sequences.
⚠️ Warnings:
- •Don't skip this if you've changed settings before; it can lead to compounded errors.
Step 3: Install Calibration Software
Download and install free calibration software like DisplayCAL from its official website (displaycal.net). For beginners, the built-in tools in Windows (search 'Calibrate display color') or macOS (System Preferences > Displays > Color > Calibrate) work if you don't have hardware. Run the installer and follow the prompts to set it up.
Software guides you through automated tests, measuring your screen's output against standards like sRGB for photo editing. Expect a simple interface with options for gamma (2.2), white point (6500K), and brightness (around 120 cd/m²). This ensures colors match industry standards used by printers and web displays.
💡 Tips:
- •If using DisplayCAL, pair it with an ArgyllCMS profile for more control without a device.
⚠️ Warnings:
- •Download only from trusted sources to avoid malware.
Step 4: Connect Hardware Calibrator (If Using)
If you have a colorimeter like the X-Rite i1Display Pro, plug it into your computer's USB port. The software should detect it automatically. Place the device on the monitor's center, ensuring it's flat against the screen with no gaps.
Hardware provides objective measurements by reading light output, far more accurate than eye-based methods. You'll see the software launch a measurement mode, displaying color patches. Success looks like smooth progression without errors— the device captures data to create a custom ICC profile.
💡 Tips:
- •Clean the calibrator's sensor with a microfiber cloth before use for precise readings.
⚠️ Warnings:
- •Don't touch the sensor during measurements; vibrations can cause inaccuracies.
Step 5: Run the Calibration Process
Launch the software and start the calibration wizard. Adjust brightness and contrast manually first to comfortable levels (use the software's guidelines). Then, follow on-screen instructions: the program will display test patterns for you to adjust sliders for gamma, white point, and color balance until they match.
This step fine-tunes your monitor to photo editing standards, reducing issues like color shifts. Expect 10-20 minutes of interactive adjustments; the screen will flicker through patches. At the end, the software generates and installs an ICC profile.
For hardware users, the device measures automatically—sit back and let it run.
💡 Tips:
- •Take breaks if your eyes strain; accuracy improves with a rested gaze.
⚠️ Warnings:
- •Avoid multitasking; focus ensures better adjustments.
Step 6: Verify and Apply the Profile
After calibration, test the profile using built-in verification in the software or view a known reference image (like a grayscale chart). Colors should appear neutral, with no tinting in grays or whites. Set the new ICC profile as default in your OS settings (Windows: Color Management; macOS: Displays).
Verification confirms accuracy—your edits will now match output devices. If everything looks balanced, you're done; recalibrate every 2-4 weeks for maintenance.
💡 Tips:
- •Use free test images from sites like Lagom.nl for quick checks.
⚠️ Warnings:
- •If colors seem off, repeat from step 2; don't force mismatched profiles.
▸Pro Tips
- •Calibrate in the same lighting you'll edit in to match your daily workflow.
- •Aim for 120 cd/m² brightness for print matching; lower for web-only editing.
- •Update your graphics drivers before starting for stable display output.
- •Label your ICC profiles with dates to track changes over time.
- •Combine with room lighting calibration using neutral gray walls for ultimate accuracy.
- •For laptops, use an external monitor for editing and calibrate both separately.
- •Save multiple profiles (e.g., one for photo, one for video) and switch as needed.
▸Common Mistakes to Avoid
- •Calibrating in poor lighting: This leads to over-bright settings; always use a dim, controlled space.
- •Skipping the warm-up period: Monitors need time to stabilize; rushing causes inconsistent results.
- •Ignoring hardware correction: Eye-only methods are subjective and less accurate for pros; invest in a device if editing seriously.
- •Not resetting to defaults first: Previous settings compound errors, making calibration futile.
- •Forgetting to set as default profile: Your OS might revert to generic settings, undoing the work.
▸Troubleshooting
Problem: Software doesn't detect the colorimeter
Solution: Check USB connections and drivers; restart the computer and reinstall software. Ensure compatibility with your OS.
Problem: Colors look off after calibration
Solution: Re-run the process in a darker room or check for firmware updates on your monitor. Verify the ICC profile is active in OS settings.
Problem: Screen is too dim or bright post-calibration
Solution: Adjust hardware brightness first in the next session; software can't override extreme hardware limits. Seek manufacturer support if persistent.
Problem: Calibration fails midway
Solution: Close other apps interfering with display; if hardware issue, clean the device or test on another port. Professional repair if defective.
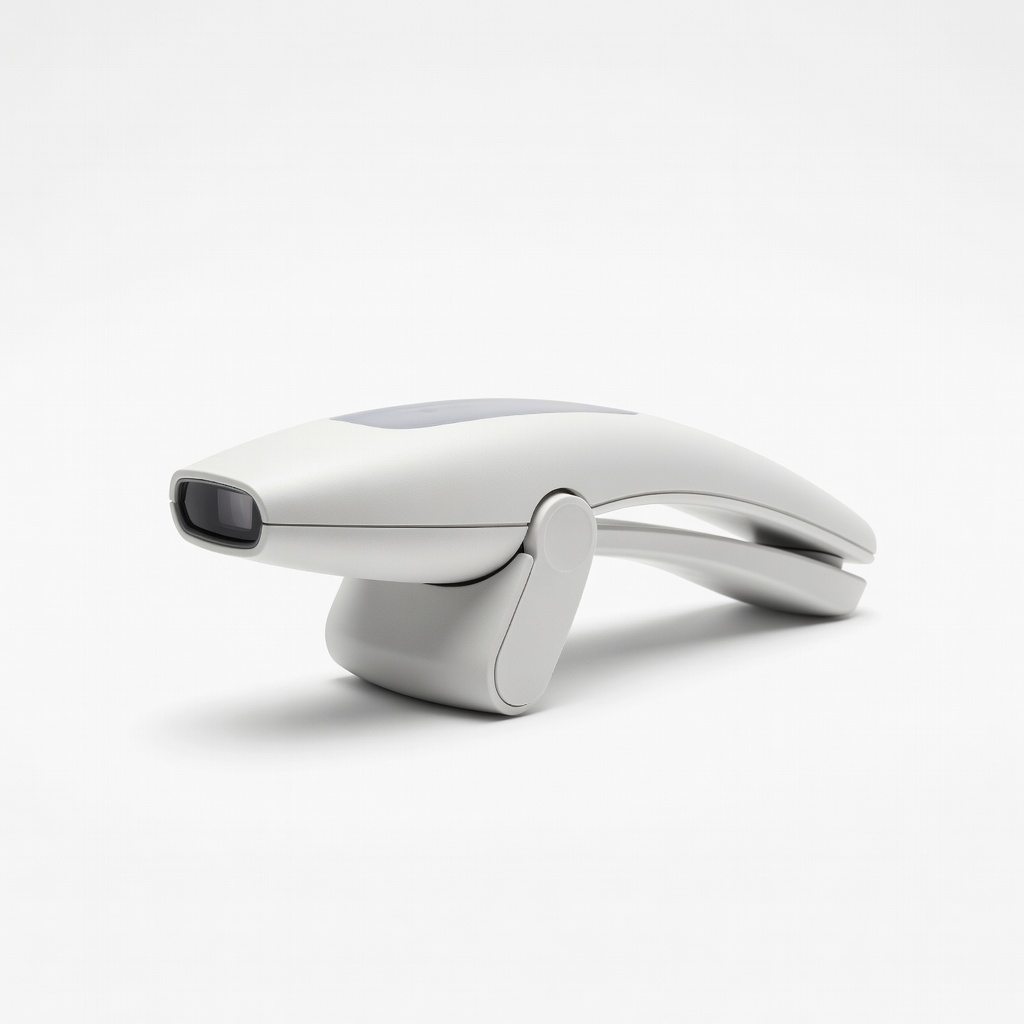
X-Rite i1Display Pro
This professional-grade colorimeter provides precise measurements for accurate color profiles, essential for serious photo editing.
Best for: Ideal for beginners upgrading to hardware calibration; use with DisplayCAL for custom profiles in editing workflows.
Price Range: $150-200
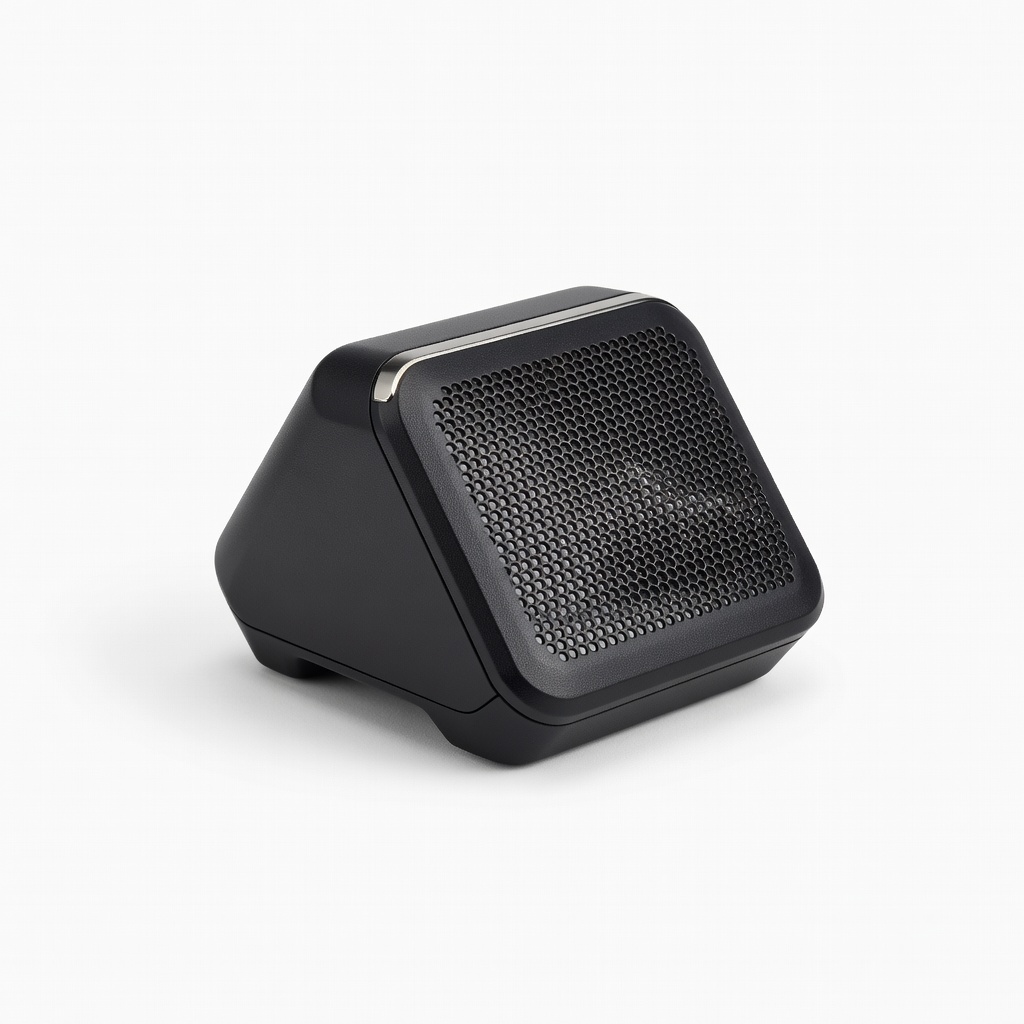
Datacolor SpyderX Pro
User-friendly with intuitive software, it quickly calibrates monitors and includes lens calibration for photographers.
Best for: Great for entry-level users needing fast setup; perfect for calibrating before editing sessions.
Price Range: $130-170
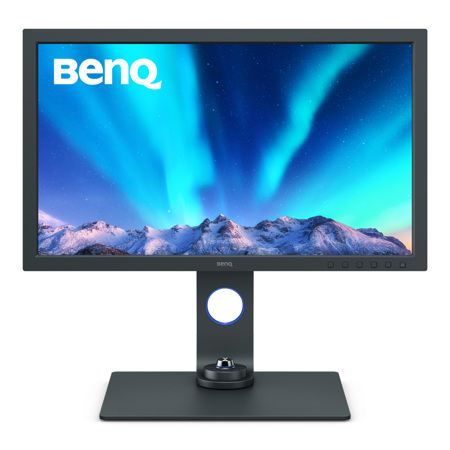
BenQ SW271C Photo Editing Monitor
Factory-calibrated with 99% Adobe RGB coverage, it minimizes the need for frequent recalibration and has hardware uniformity.
Best for: For those buying a new monitor; pair with a colorimeter for ongoing tweaks in professional photo work.
Price Range: $800-1000
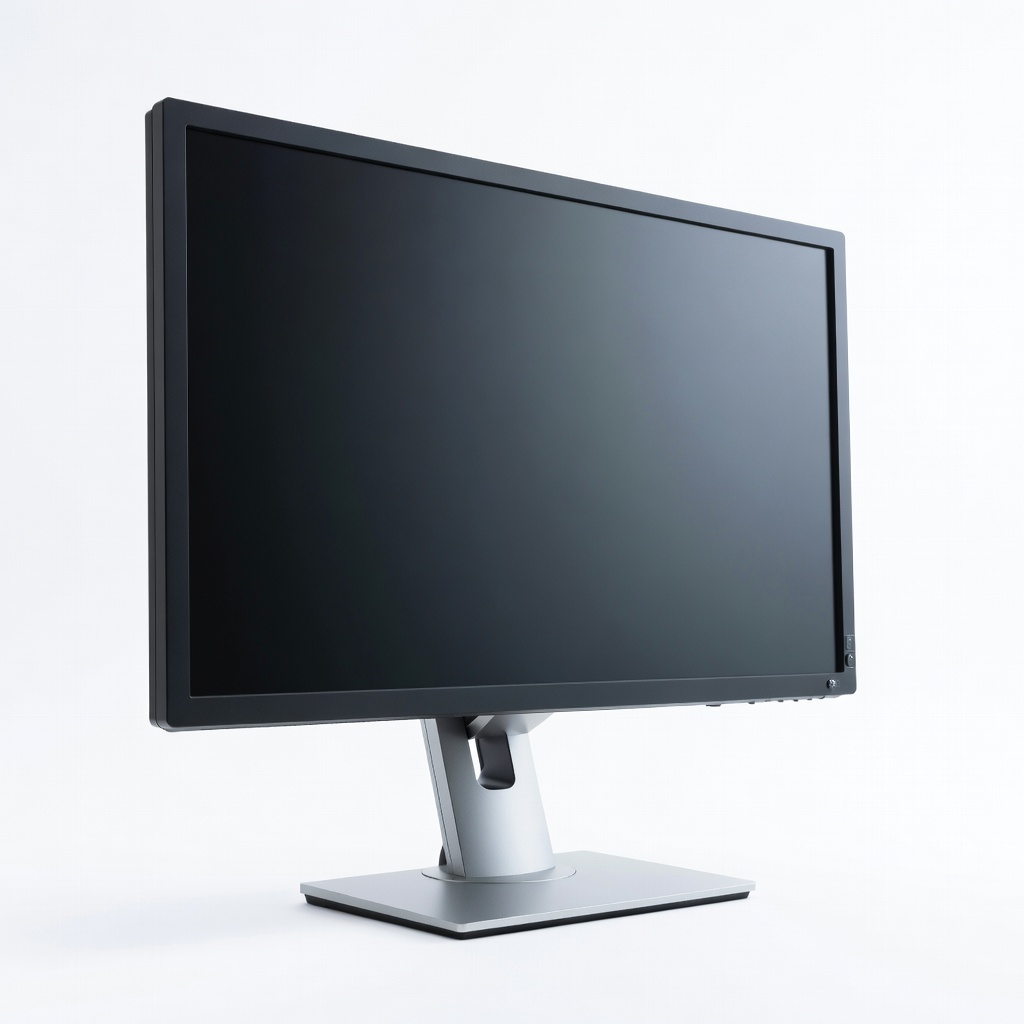
EIZO ColorEdge CG279X
Built-in calibration sensor and hood reduce external factors, ensuring long-term accuracy for color-critical tasks.
Best for: Advanced beginner setups where self-calibration is key; use for studio photo editing without extra devices.
Price Range: $2000-2500
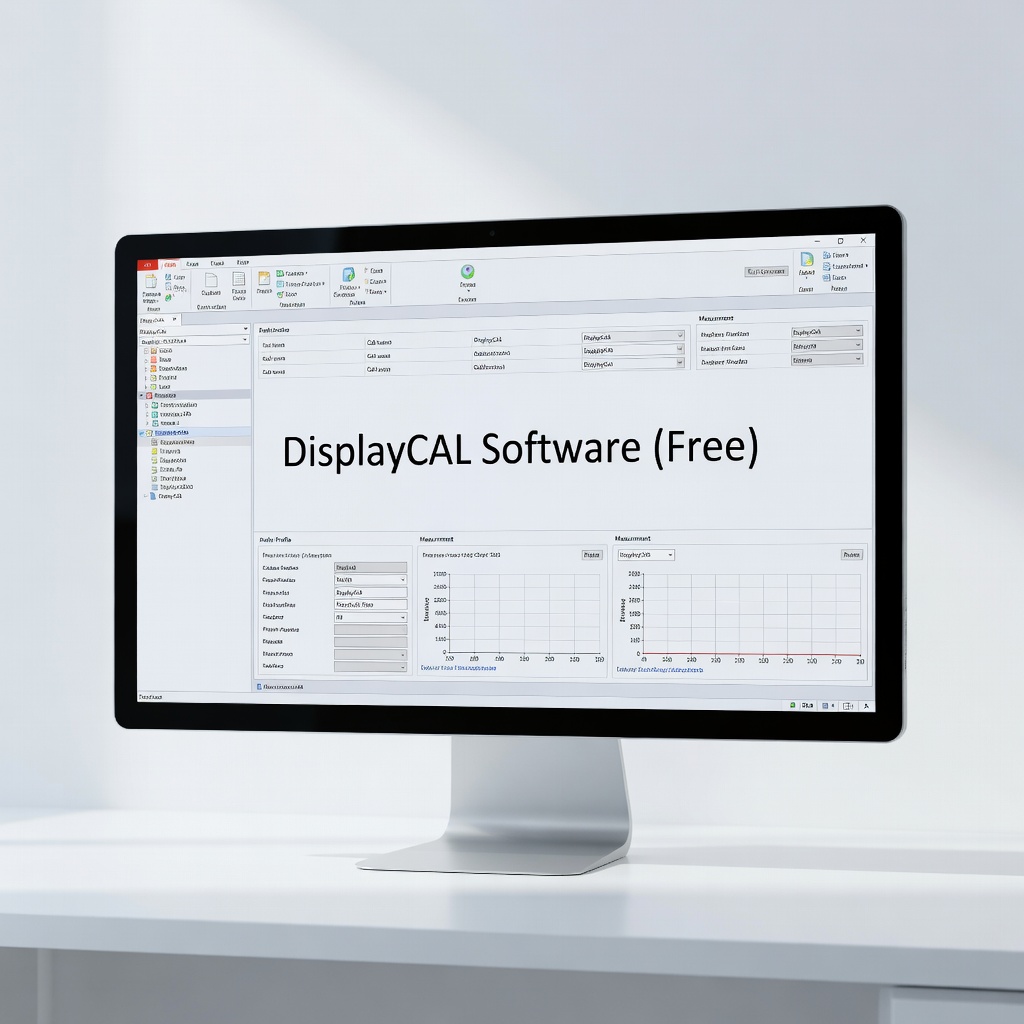
DisplayCAL Software (Free)
Open-source tool that's highly customizable and works with most colorimeters, offering more control than built-in OS tools.
Best for: Budget option for software-only or hardware-assisted calibration; essential for Linux users.
Price Range: Free