
VIVOSUN 10x20.75'' Seedling Heat Mat
Under your bin for veggies/herbs needing 75°F soil.
$15.99
VIVOSUN 10x20.75'' Seedling Heat Mat Provides consistent bottom heat essential for 20-30% faster germination in cool homes.
Get the App
Better experience on mobile
Create a simple, effective setup to germinate seeds successfully with household items and boost your gardening yields.
Starting plants from seeds at home saves money and gives you control over your garden's growth, but many beginners struggle with inconsistent germination due to poor moisture, temperature, or light. This guide solves that by showing you how to build a DIY plant germination station that mimics ideal conditions.
You'll learn to assemble a low-cost station using recycled materials and optional upgrades, perfect for vegetables, herbs, or flowers. The process is straightforward, requiring no advanced skills—just basic assembly.
Expect to spend 30-45 minutes building, with germination visible in 3-14 days depending on seeds. It's beginner-friendly and scalable for windowsills or shelves.
Estimated Time: 30-45 minutes to build + 1-2 weeks for germination Difficulty: beginner
Collect all items from the 'What You Need' list. Rinse the plastic bin and lid with mild soap and water, then dry thoroughly. This creates a clean environment to prevent mold.
Why it matters: Sterility reduces disease risk like damping-off. Expect a clean, ready-to-assemble station.
Image description: Photo of organized materials on a table: plastic bin, soil bag, seeds, spray bottle, heat mat.
💡 Tips:
⚠️ Warnings:
Place 1-inch layer of small rocks or gravel at the bin bottom. This prevents waterlogging, which drowns roots.
Why it matters: Excess moisture causes rot. You'll see improved airflow and healthier roots.
Skip if using seed trays with built-in drainage.
💡 Tips:
Moisten the seed mix slightly (like a wrung-out sponge) and fill bin to 2-3 inches deep, leaving space for seeds and lid. Gently firm the surface.
Why it matters: Proper moisture ensures even germination. Surface should be level and crumbly.
Pro tip: Use a sifter for fine texture.
Poke small holes (1/4-inch deep) with toothpick, spacing seeds per packet instructions (e.g., 1-2 inches apart). Drop 2-3 seeds per hole, cover lightly, and label varieties.
Why it matters: Correct depth prevents weak sprouts. Success: Seeds snugly buried, labels clear.
Use tweezers for tiny seeds.
💡 Tips:
⚠️ Warnings:
Mist soil evenly with spray bottle until damp. Place lid on loosely to create a mini-greenhouse effect, trapping humidity.
Why it matters: 70-80% humidity speeds germination. Expect condensation inside—sign of success.
Vent lid daily if too wet.
Place bin on heat mat (set to 70-85°F) or warm spot. Plug in if using; monitor with thermometer.
Why it matters: Warmth (not direct sun) triggers enzymes. Roots grow fast; check soil temp.
💡 Tips:
Position under grow light (12-16 hours/day) 2-4 inches above, or bright window. Elevate if needed.
Why it matters: Light prevents leggy seedlings. Expect sturdy green sprouts.
⚠️ Warnings:
Check daily: Mist if dry, vent lid when sprouts emerge (day 3-14). Thin seedlings to strongest.
Why it matters: Consistent care yields 80%+ success. Harden off before transplanting outdoors.
💡 Tips:
Problem: No germination after 2 weeks
Solution: Check temp (70-85°F), moisture, fresh seeds. Reseed if needed.
Problem: Mold or damping-off
Solution: Improve airflow: Vent lid more, reduce water, use fungicide spray.
Problem: Leggy seedlings
Solution: Increase light intensity/duration; lower light closer.
Problem: Yellowing leaves
Solution: Overwatering or nutrient lack; let dry slightly, fertilize lightly.
Provides consistent bottom heat essential for 20-30% faster germination in cool homes.
Best for: Under your bin for veggies/herbs needing 75°F soil.
Price Range: $15.99
Sterile, lightweight mix prevents diseases and drains perfectly for tiny roots.
Best for: Filling your station; peat-free for eco-friendliness.
Price Range: $12.99
Full-spectrum light mimics sun, preventing weak stems on windowsill setups.
Best for: Over station for 16-hour days; dimmable for seedlings.
Price Range: $59.99
Modular trays fit perfectly in bins, with vents for humidity control.
Best for: Upgrade from loose soil for easier transplanting.
Price Range: $19.99
Accurate readings prevent over/under-watering pitfalls.
Best for: Daily checks without guessing wetness.
Price Range: $12.99
Under your bin for veggies/herbs needing 75°F soil.
VIVOSUN 10x20.75'' Seedling Heat Mat Provides consistent bottom heat essential for 20-30% faster germination in cool homes.
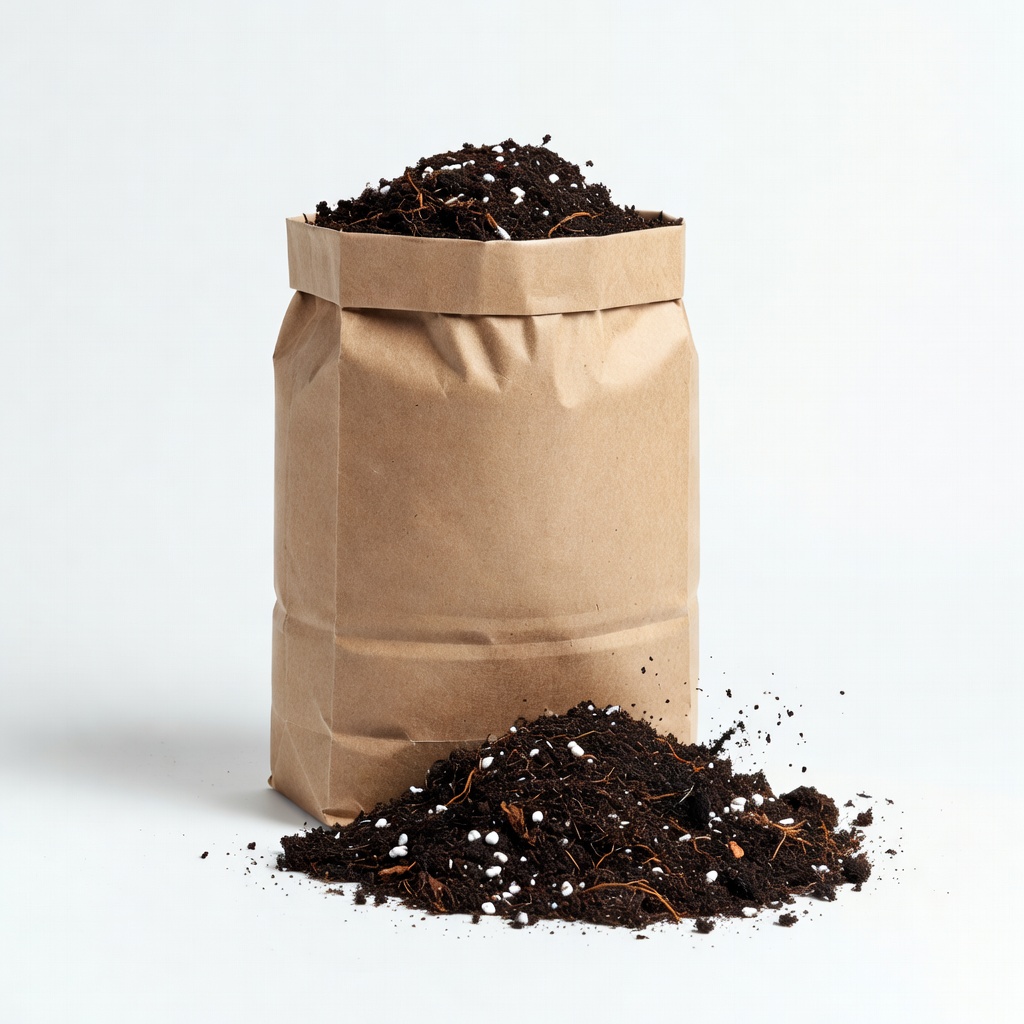
Filling your station; peat-free for eco-friendliness.
Espoma Organic Seed Starter Premium Potting Mix Sterile, lightweight mix prevents diseases and drains perfectly for tiny roots.
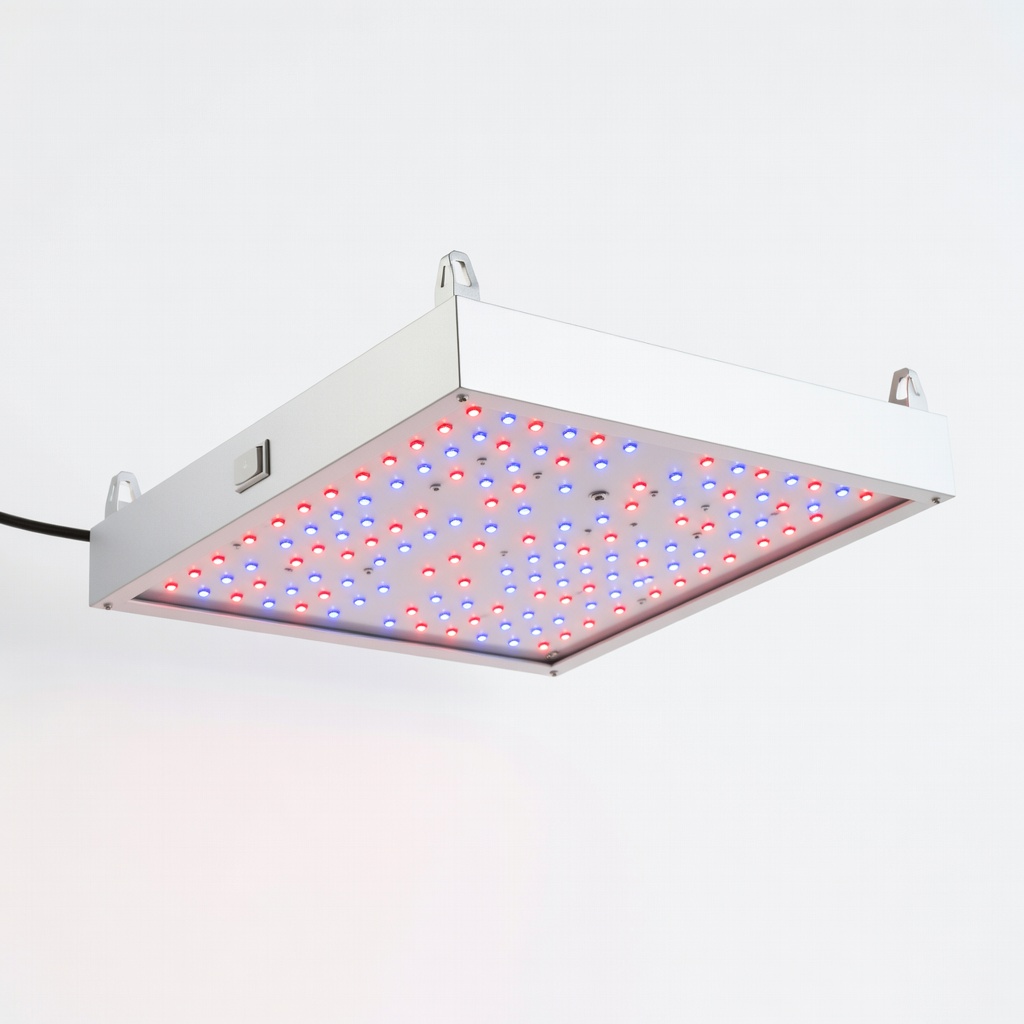
Over station for 16-hour days; dimmable for seedlings.
Mars Hydro TS-600 LED Grow Light Full-spectrum light mimics sun, preventing weak stems on windowsill setups.
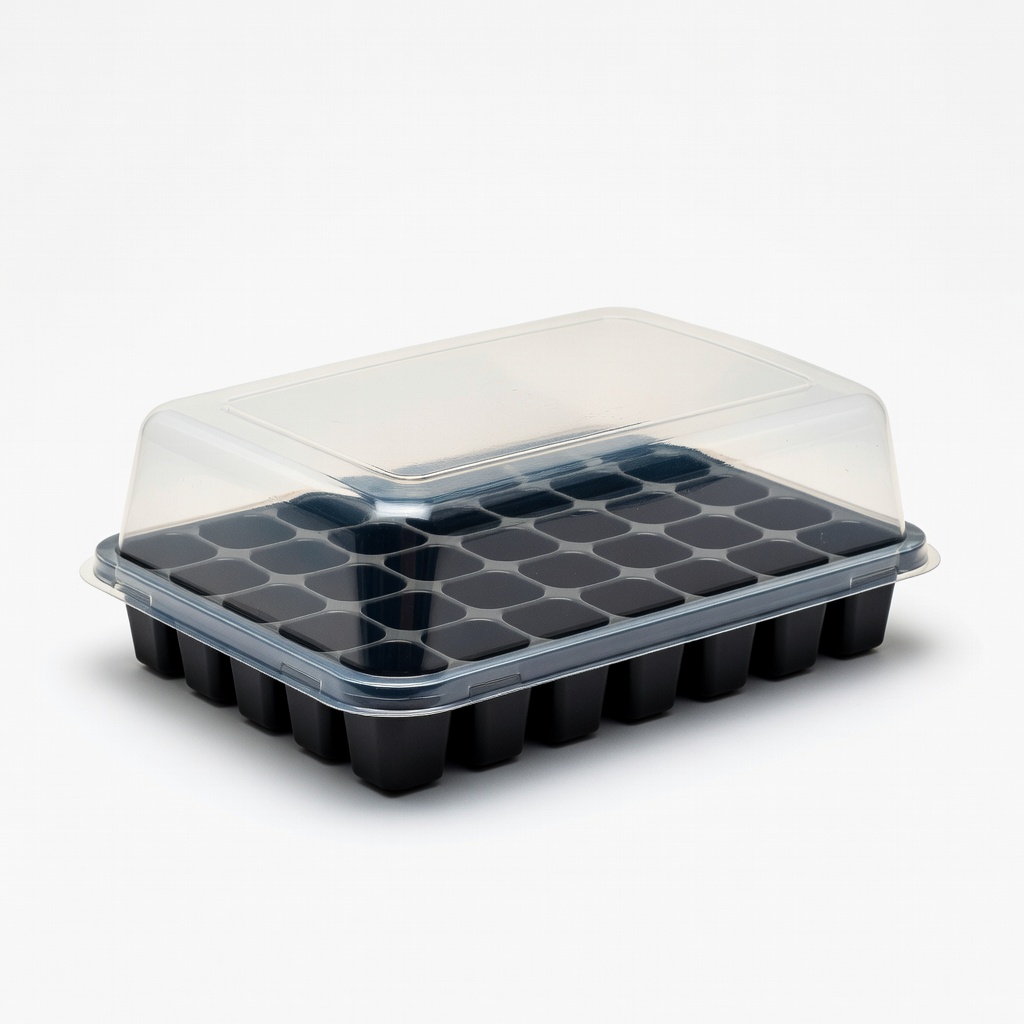
Upgrade from loose soil for easier transplanting.
Burpee Seed Starting Tray with Dome Modular trays fit perfectly in bins, with vents for humidity control.
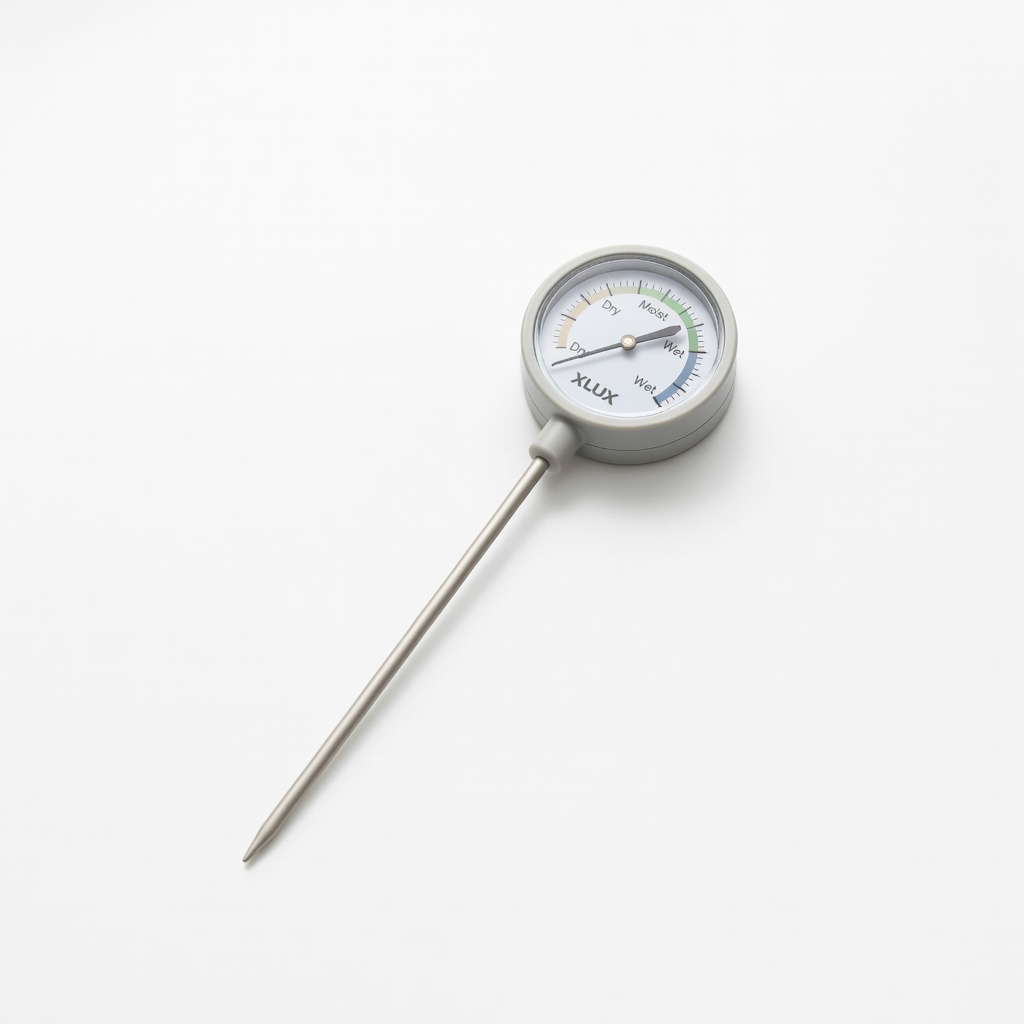
Daily checks without guessing wetness.
XLUX Soil Moisture Meter Accurate readings prevent over/under-watering pitfalls.