Tired of lugging heavy loads of hay, fertilizer, or tools across your farm by hand or with unreliable wheelbarrows? Custom agricultural material transport carts solve this by providing sturdy, high-capacity hauling solutions tailored to your needs. These DIY carts can carry 500-1000 lbs easily, navigate rough terrain, and cost under $300 to build versus $500+ for commercial ones.
In this guide, you'll learn to construct a 4ft x 6ft flatbed cart with 2ft sides using basic metalworking skills. We'll cover planning, assembly, and testing in clear steps. Perfect for intermediate DIYers with welding or bolting experience.
Expect 6-8 hours total over 1-2 days, including drying times if painting. No advanced engineering required—just precise measuring and safe fabrication.
▸What You'll Need
- •1" x 1" x 1/8" thick steel square tubing (40 linear feet total)
- •Two 1" diameter steel axles (48" long each)
- •Four 16" x 4" pneumatic wheels with 1" bore hubs (load-rated 400 lbs each)
- •3/4" marine-grade plywood (4ft x 6ft sheet for base, optional sides)
- •1/2" bolts, nuts, and washers (50-pack assorted)
- •Welding supplies (MIG welder, wire, flux) OR heavy-duty bolt kits for no-weld build
- •Tools: Tape measure, marker, angle grinder with cutoff wheels, clamps, drill with metal bits, safety gear (gloves, goggles, welding helmet)
- •Optional: Spray paint for rust protection, hitch coupler for tractor towing
Estimated Time: 6-8 hours over 1-2 days
Difficulty: intermediate
▸Step-by-Step Instructions
Step 1: Design and Measure Your Cart
Start by sketching your cart on paper. For a standard farm hauler: 4ft wide x 6ft long base, 2ft high sides, two axles spaced 4ft apart for stability. Calculate materials: cut list includes 4x 6ft longs, 6x 4ft crossbars, 8x 2ft uprights.
Measure and mark all tubing precisely using a tape measure and permanent marker. Why it matters: Accurate cuts prevent wobbly frames and weak points. Double-check math—err on overlong for trimming.
What success looks like: A detailed cut list and marked tubing ready for cutting.
💡 Tips:
- •Use graph paper for scale drawings.
- •Scale up for larger loads (e.g., 5ft wide).
⚠️ Warnings:
- •Don't skip measurements—1/4" errors compound into instability.
Step 2: Cut the Frame Tubing
Secure tubing in a vise or with clamps. Use an angle grinder with a metal cutoff wheel to make straight cuts per your list. Wear full safety gear—sparks fly!
Deburr edges with the grinder for clean welds/bolts. Why: Smooth edges ensure strong joints and safety. Grind slowly to avoid warping thin metal.
Success: All pieces cut square, edges smooth, no burns on hands.
💡 Tips:
- •Cut slightly long and trim for perfection.
- •Keep a fire extinguisher nearby.
⚠️ Warnings:
- •Never cut without eye/face protection—metal shards are dangerous.
Step 3: Assemble the Base Frame
Lay out two 6ft longs parallel, 4ft apart. Clamp 4ft crossbars at ends and center. Tack weld corners if welding (or pre-drill and bolt tightly).
Check square with a framing square or diagonal measurements (equal diagonals = square). This base supports the plywood floor.
Success: Rigid rectangular base, level on flat ground.
💡 Tips:
- •Clamp everything before welding to hold alignment.
⚠️ Warnings:
- •Uneven frame leads to wheel binding—measure diagonals twice.
Step 4: Install Axles and Mount Wheels
Position axles perpendicular under base, 1ft from each end, centered. Weld or U-bolt axles securely to frame underside.
Slide wheels onto axles, secure with cotter pins or axle nuts. Spin-test for free movement. Why: Proper axle placement balances load on rough farm terrain.
Success: Cart rolls smoothly 360 degrees, no play in wheels.
💡 Tips:
- •Grease axles before wheel install for longevity.
⚠️ Warnings:
- •Undersized axles snap under load—use 1" min diameter.
Step 5: Build and Attach Sides
Weld/bolt 2ft uprights at corners and mid-sides. Connect tops with horizontals for gates. Cut plywood to fit base and sides, screw down.
Reinforce corners with diagonal braces. Sides contain loose materials like gravel or feed.
Success: Enclosed bed holds test load (e.g., 200 lbs dirt) without spilling.
💡 Tips:
- •Hinge one side panel for easy dumping.
⚠️ Warnings:
- •Overload during test—start at 50% capacity.
Step 6: Add Handles and Finishing Touches
Attach 4-5ft tow handles angled at 45 degrees to front crossbar. Optional: Weld hitch receiver for tractor.
Grind welds smooth, prime, and paint for rust resistance. Let dry 24 hours.
Success: Professional finish, easy to maneuver by hand or tow.
💡 Tips:
- •Use foam grips on handles for comfort.
⚠️ Warnings:
- •Skip painting? Rust in months outdoors.
Step 7: Test and Adjust
Load incrementally to 500 lbs, roll over farm terrain. Check for wobbles, noises.
Tighten all fasteners, re-grease wheels. Iterate as needed.
Success: Handles full load stably, no issues after 1/4 mile test.
💡 Tips:
⚠️ Warnings:
- •Never exceed rated wheel capacity.
▸Pro Tips
- •Pre-bend tubing for rounded corners using a pipe bender—smoother ride.
- •Galvanize frame before assembly for extra corrosion resistance in wet areas.
- •Build modular: Design detachable beds for quick swaps.
- •Use ratchet straps on sides for oversized loads like logs.
- •Scale for ATV hitch—add swivel caster for maneuverability.
- •Batch-cut all pieces first to save tool setup time.
- •Invest in a magnetic welding clamp set for perfect 90-degree holds.
▸Common Mistakes to Avoid
- •Imprecise cuts leading to non-square frame: Always measure diagonals.
- •Weak axle mounts snapping under load: Over-weld or double-bolt.
- •Skipping rust protection: Paint every exposed surface.
- •Undersized wheels bogging in mud: Choose 16"+ pneumatic.
- •No load testing: Start empty, add weight gradually.
▸Troubleshooting
Problem: Wheels bind or drag
Solution: Check axle alignment and squareness; grind burrs; ensure bearings are greased.
Problem: Frame flexes under load
Solution: Add center crossbraces; upgrade to 1/4" wall tubing.
Problem: Rust after weeks
Solution: Apply zinc primer before paint; store under cover.
Problem: Tow handle too low/high
Solution: Adjust angle during weld; cut and re-weld if needed.
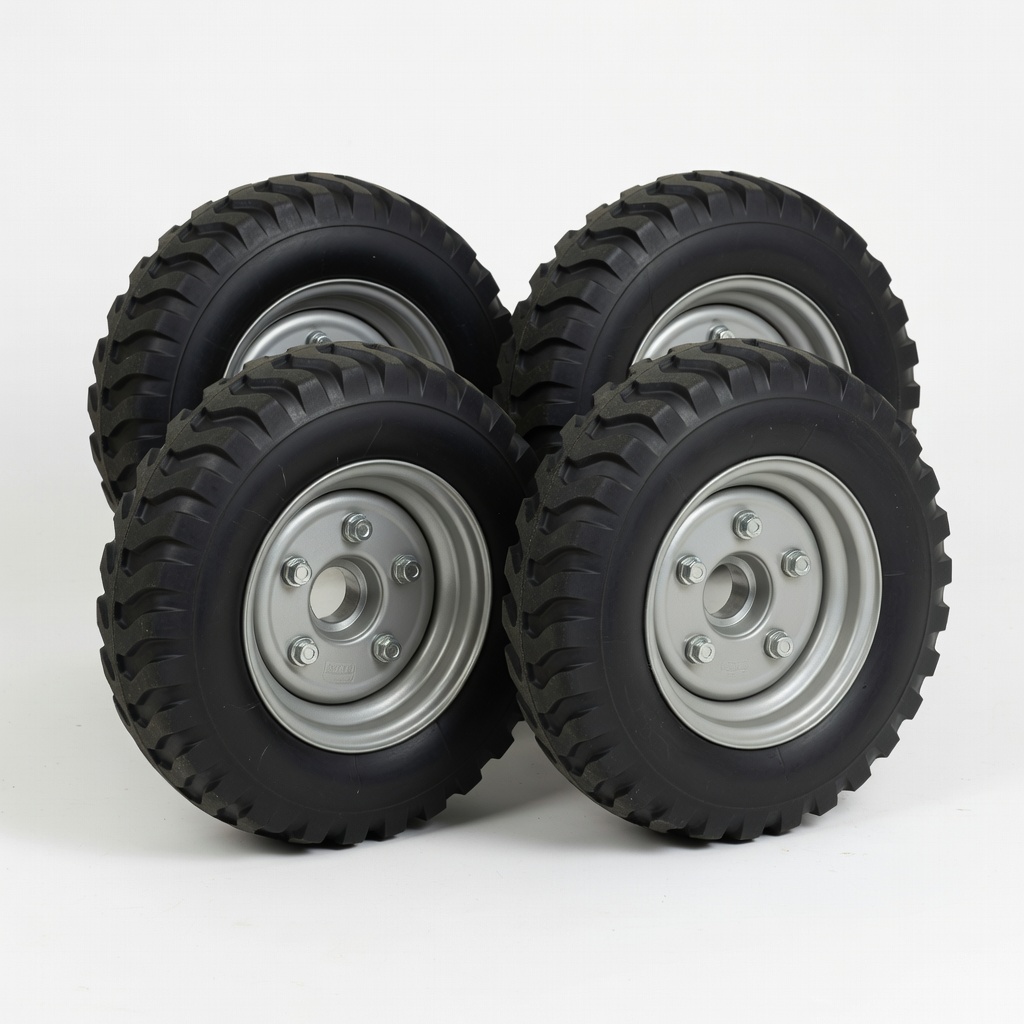
VEVOR 13x5.00-6 Pneumatic Wheel (4-Pack)
Heavy-duty, puncture-resistant tires perfect for farm terrain with 330 lb capacity each.
Best for: Mounting stable wheels that handle mud, gravel, and 1000+ lb total loads.
Price Range: $79.99
YESWELDER MIG-205DS MIG Welder
Portable, beginner-friendly welder with strong arc for clean steel frame joints.
Best for: Welding frame and axles securely without pro shop costs.
Price Range: $299.99
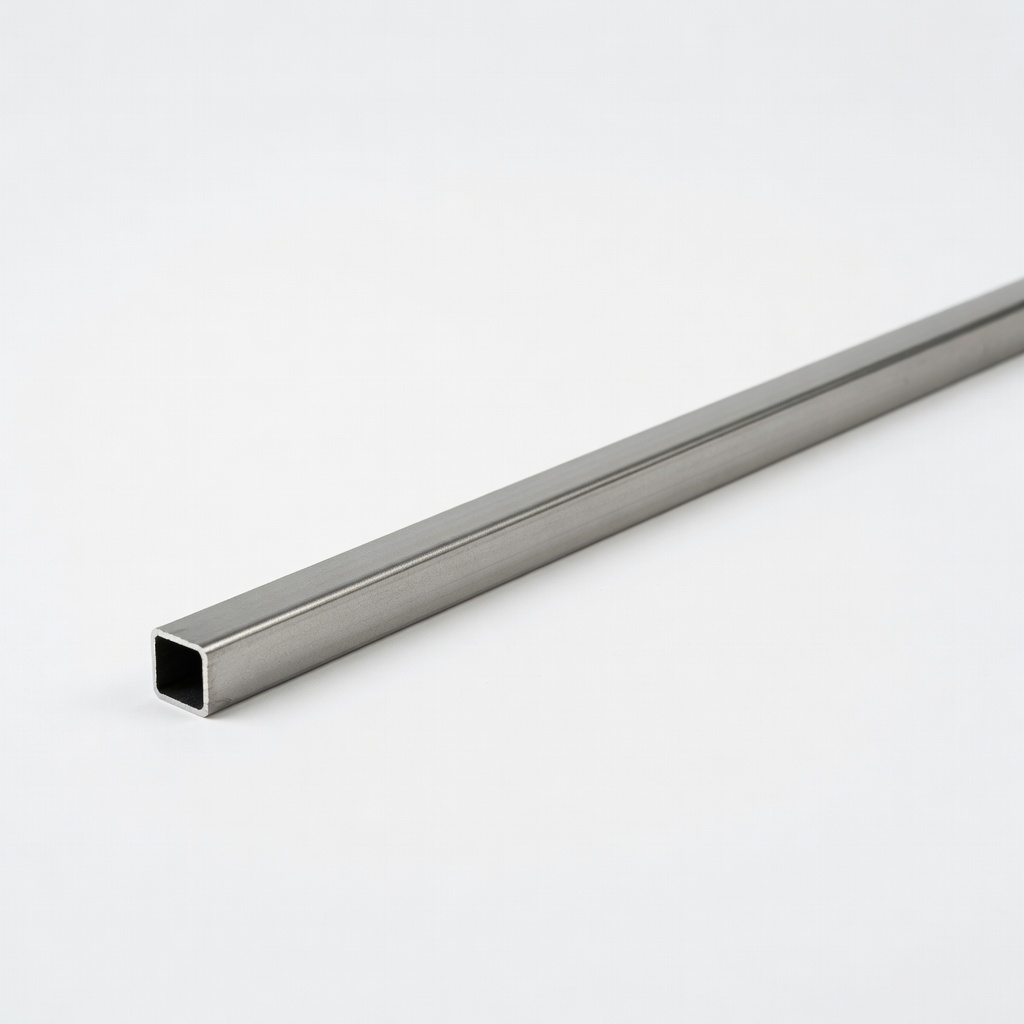
Speedaire 1 in. x 1 in. x .083 Wall Steel Square Tubing (20 ft)
High-strength, pre-cut lengths ideal for rust-resistant frames.
Best for: Primary structural material for base and sides.
Price Range: $50-$70
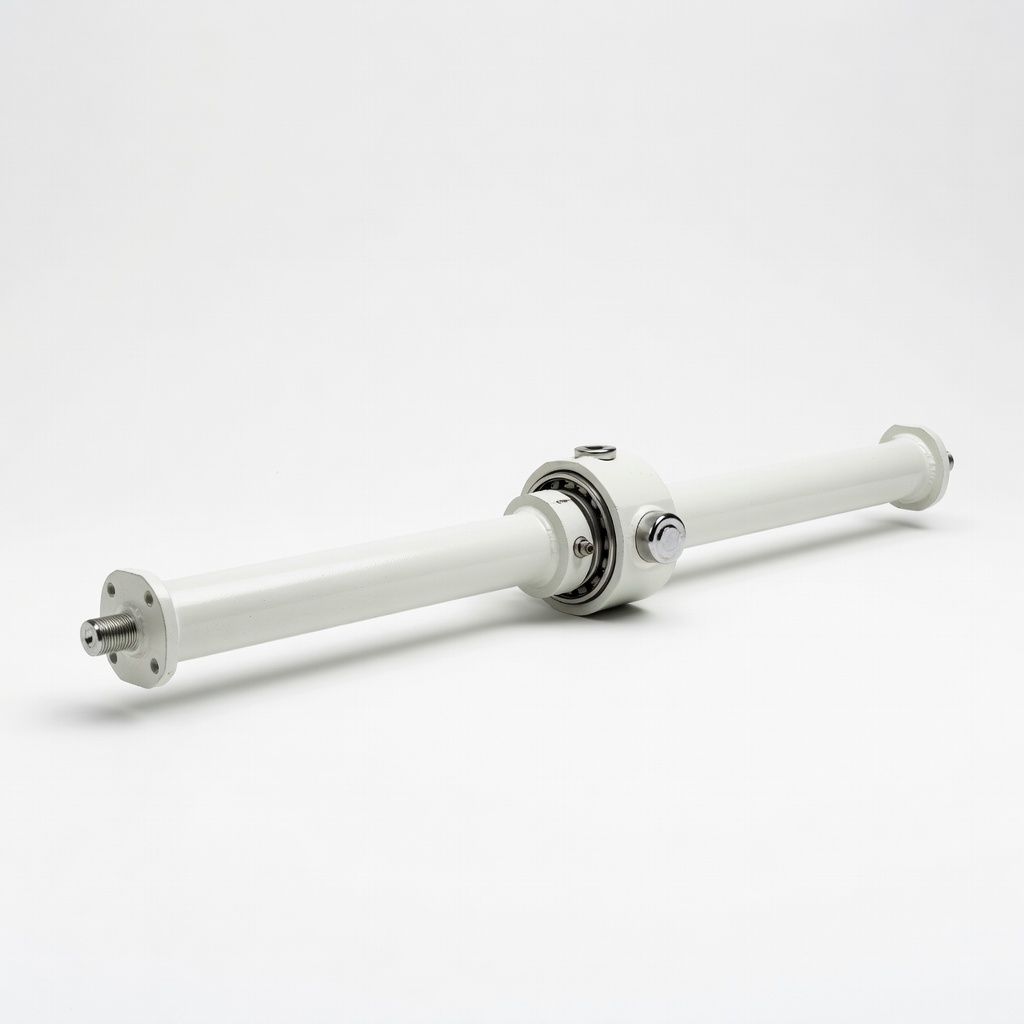
Abba Patio 48 in. Trailer Axle
Pre-assembled 1" dia axle with bearings, rated 700 lbs.
Best for: Drop-in axle installation for balanced dual-wheel setup.
Price Range: $45.99
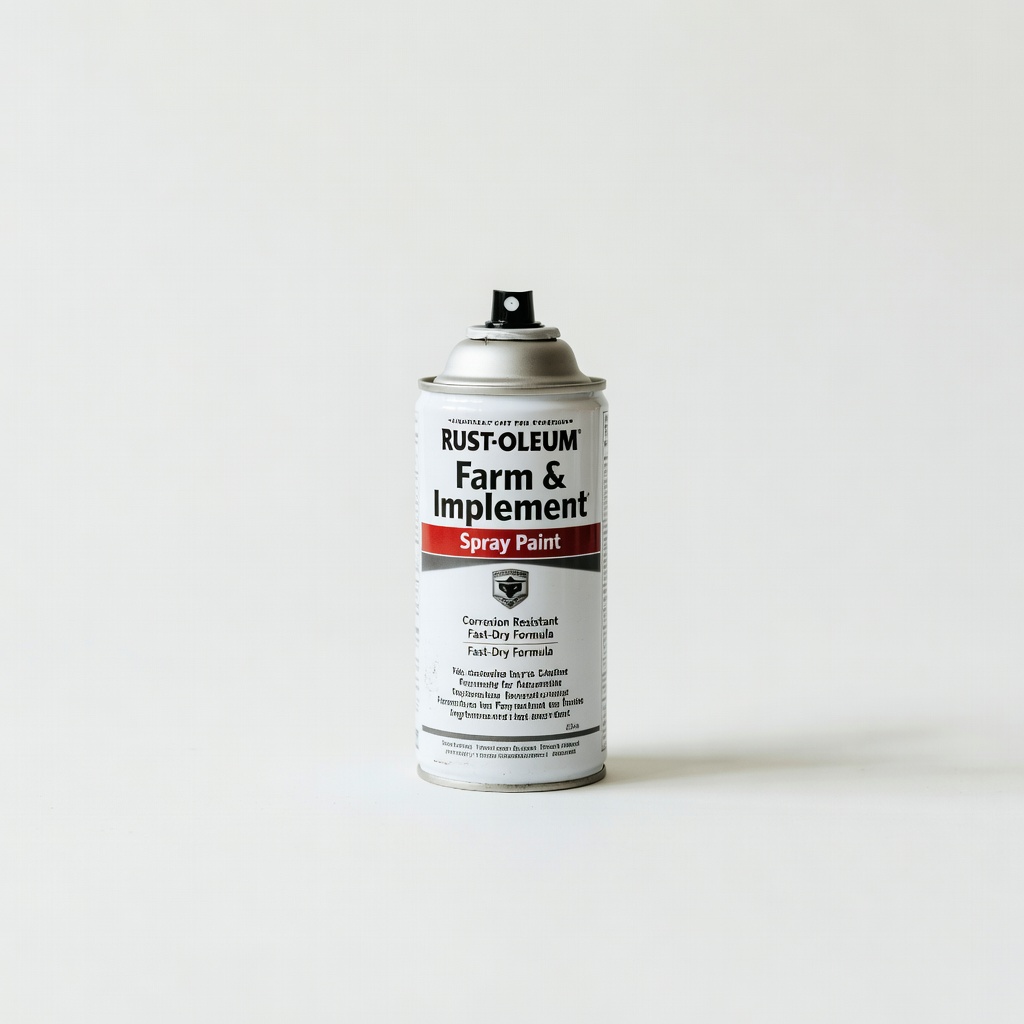
Rust-Oleum Farm & Implement Spray Paint
Quick-drying, weatherproof enamel for outdoor durability.
Best for: Final rust-proof coating on completed frame.
Price Range: $9.99