Gardening enthusiasts often struggle with poor soil conditions, limited space, or back strain from bending over traditional in-ground beds. A raised garden bed frame solves these issues by elevating your planting area, allowing better control over soil composition and making maintenance more accessible. Whether you're a weekend warrior or seasoned grower, building your own frame is a rewarding project that saves money compared to pre-made kits.
In this guide, you'll learn how to design and assemble a basic 4x8-foot raised bed frame using pressure-treated or cedar wood for longevity. We'll cover everything from material selection to final assembly, ensuring your structure is level and secure. By the end, you'll have a functional frame ready for soil and plants.
Expect this project to take 4-6 hours, depending on your experience level. It's rated intermediate, requiring basic carpentry skills like measuring, cutting, and drilling—no advanced tools needed, but safety precautions are essential.
▸What You'll Need
- •Cedar or pressure-treated lumber: 4 pieces of 2x6x8 ft boards for sides (required), 4 pieces of 2x6x4 ft for ends (required)
- •4 corner posts: 4x4x4 ft cedar or treated wood (required for stability)
- •Deck screws: 3-inch galvanized or stainless steel, 100-pack (required)
- •Circular saw or miter saw (required for cutting)
- •Power drill with drill bits (required)
- •Measuring tape and carpenter's square (required)
- •Level (required)
- •Safety gear: gloves, safety glasses, ear protection (required)
- •Optional: Landscape fabric for lining the bottom to prevent weeds
Estimated Time: 4-6 hours
Difficulty: intermediate
▸Step-by-Step Instructions
Step 1: Plan Your Design and Location
Start by deciding on the bed's size— a standard 4x8 feet works well for most yards, providing ample space without overwhelming beginners. Sketch a simple diagram: two 8-foot long sides, two 4-foot end sides, and four corner posts notched to fit the frame boards. Consider sunlight exposure (at least 6-8 hours daily) and proximity to water sources.
Mark the location on level ground, clearing debris and weeds. Why it matters: Proper planning prevents rework and ensures the bed thrives. Expect a flat, cleared 4x8 area ready for assembly.
Use stakes and string to outline the perimeter for precision.
💡 Tips:
- •Choose a spot near your home for easy monitoring.
- •Opt for cedar wood to resist rot naturally.
⚠️ Warnings:
- •Avoid low-lying areas prone to flooding to prevent waterlogging.
Step 2: Cut the Lumber to Size
Measure and mark your 2x6 boards: cut two to 8 feet for longs, two to 4 feet for shorts (accounting for post thickness, subtract 3 inches from ends if notching). For posts, cut 4x4s to 4 feet high, or taller if desired for deeper beds.
Secure wood on sawhorses and use a circular saw for straight cuts. Why it matters: Accurate cuts ensure a snug fit and structural integrity. You'll end up with precisely sized pieces ready for assembly.
Sand rough edges lightly for safety.
💡 Tips:
- •Double-check measurements twice to avoid waste.
- •Wear a dust mask when cutting treated wood.
⚠️ Warnings:
- •Never cut without securing the board to prevent kickback.
Step 3: Notch the Corner Posts
At each end of the four posts, mark and cut 1.5-inch deep notches (half the 2x6 thickness) to receive the side boards. Use a circular saw for the bulk cut and chisel for cleanup, ensuring the notches are square.
This interlocking design adds strength without extra fasteners. Why it matters: Notches create a stable joint that withstands soil weight. Expect posts with clean, fitting slots.
Test-fit a board in the notch to verify alignment.
💡 Tips:
- •Practice on scrap wood if new to notching.
- •Use a combination square for perfect 90-degree angles.
⚠️ Warnings:
- •Don't overcut notches, or the frame will wobble.
Step 4: Assemble the Sides
Lay out the long and short boards alternately around the posts: attach 8-foot boards to one side of each post pair, then ends to the adjacent sides. Pre-drill holes to prevent splitting, then drive 3-inch screws through the boards into the posts (two per joint).
Why it matters: Secure attachment forms the rectangular frame. At this stage, you'll have a freestanding, open rectangle about 4x8 feet.
Check for squareness by measuring diagonals—they should match.
💡 Tips:
- •Clamp pieces together before screwing for stability.
- •Use exterior screws to resist corrosion.
⚠️ Warnings:
- •Avoid over-tightening screws, which can strip wood.
Step 5: Reinforce the Frame
Add cross-bracing if needed for larger beds: screw 2x4 diagonals inside corners. Then, flip the frame and attach additional screws along joints for extra hold.
Why it matters: Reinforcement prevents sagging under soil load (up to 1,000 lbs). Success looks like a rigid, level frame that doesn't flex when pushed.
Place it in position and use a level to adjust post heights by digging or adding soil.
💡 Tips:
- •Level the frame now—it's harder later with soil.
- •Consider adding metal brackets for heavy-duty builds.
⚠️ Warnings:
- •Uneven ground can cause frame stress; shim posts if necessary.
Step 6: Finish and Line the Bed
Sand any sharp edges and apply a wood sealant if using untreated lumber. Line the bottom and sides with landscape fabric, stapling it in place to block weeds while allowing drainage.
Why it matters: Finishing protects the wood and prepares for soil. You'll have a clean, ready-to-fill bed frame.
Fill with soil mix next, but that's a separate step.
💡 Tips:
- •Sealant extends wood life by 2-3 years.
- •Overlap fabric seams for full coverage.
⚠️ Warnings:
- •Skip lining if using fabric pots inside for hydroponics.
▸Pro Tips
- •Pre-treat cuts with sealant to prevent moisture ingress.
- •Build in sections if space is limited—assemble sides separately.
- •Use a cordless drill for mobility around the yard.
- •Incorporate hardware cloth at the bottom to deter pests like gophers.
- •Scale up to 4x4 feet for beginners to reduce material costs.
- •Plant vertically on outer edges to maximize space.
- •Check local codes for bed height if over 18 inches.
▸Common Mistakes to Avoid
- •Using untreated pine: It rots quickly; opt for cedar or treated lumber instead.
- •Skipping the level check: Leads to uneven settling; always verify with a 4-foot level.
- •Overloading with soil too soon: Wait 24 hours for screws to set to avoid joint failure.
- •Poor measurements: Results in gaps; measure from the outside and cut precisely.
- •Ignoring drainage: No holes or lining causes root rot; ensure fabric allows water flow.
▸Troubleshooting
Problem: Frame wobbles after assembly
Solution: Tighten all screws and add diagonal braces; re-level the base by adjusting post depths.
Problem: Wood splits during screwing
Solution: Pre-drill pilot holes slightly smaller than screw diameter; use coated screws for less friction.
Problem: Uneven ground causes tilting
Solution: Dig post holes deeper or use gravel base; for minor issues, shim with concrete blocks and secure.
Problem: Posts rot prematurely
Solution: Apply wood preservative annually; replace with rot-resistant cedar if in wet climates—seek pro help for structural failure.
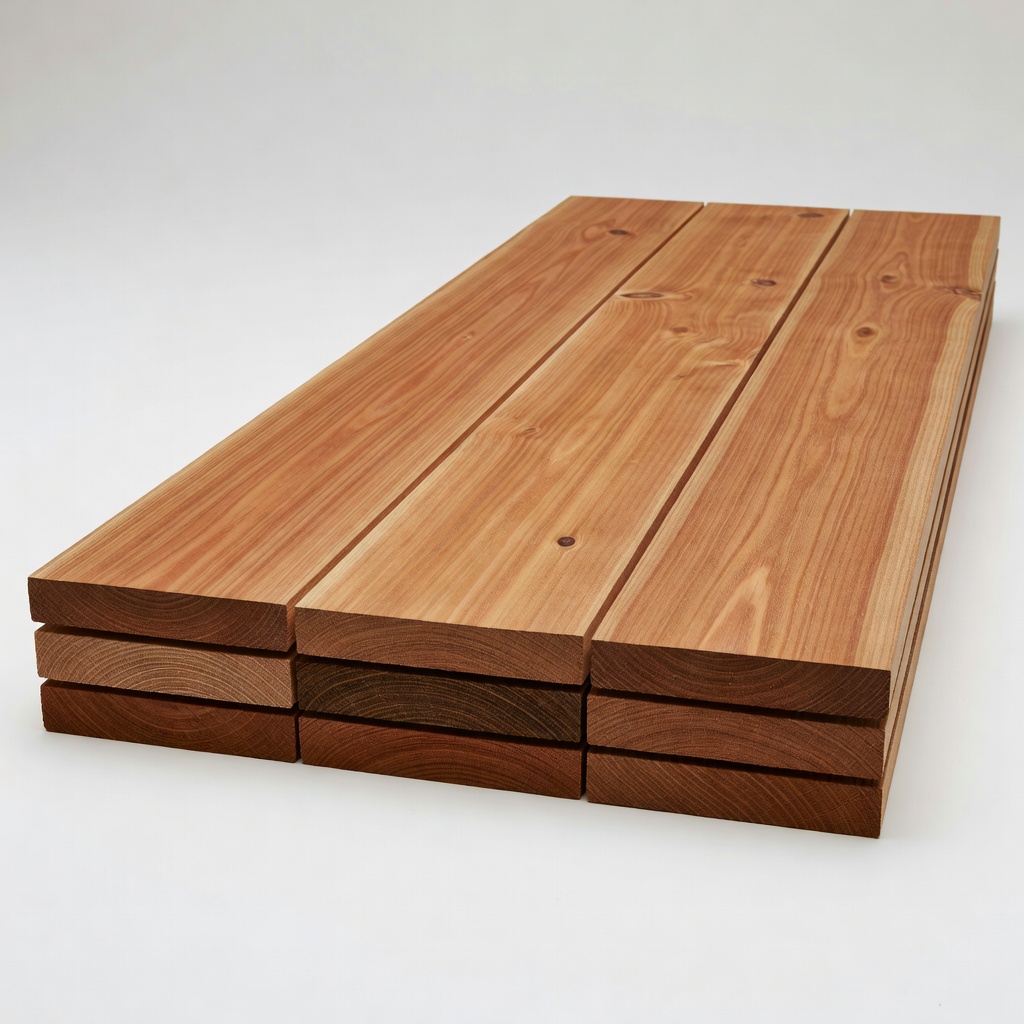
Western Red Cedar 2x6x8 ft Board (4-pack)
Cedar is naturally rot-resistant and chemical-free, ideal for garden contact without leaching toxins into soil.
Best for: Primary framing material for long-lasting beds in vegetable gardens.
Price Range: $50-$80 per pack
DEWALT 20V MAX Circular Saw (DCS391B)
Powerful yet lightweight for clean, accurate cuts on thick lumber without fatigue.
Best for: Cutting boards and notching posts during assembly for intermediate builders.
Price Range: $150-$200
GRK #9 x 3" Star Drive Trim Head Screws (100-pack)
Rust-resistant with sharp threads for secure hold in cedar without splitting wood.
Best for: Fastening frame joints to ensure durability against weather and soil pressure.
Price Range: $20-$30
Milwaukee M18 18V Cordless Drill/Driver Kit
High torque for driving screws into hardwoods efficiently, with long battery life for yard work.
Best for: Pre-drilling and assembling the frame without cords getting in the way.
Price Range: $100-$150
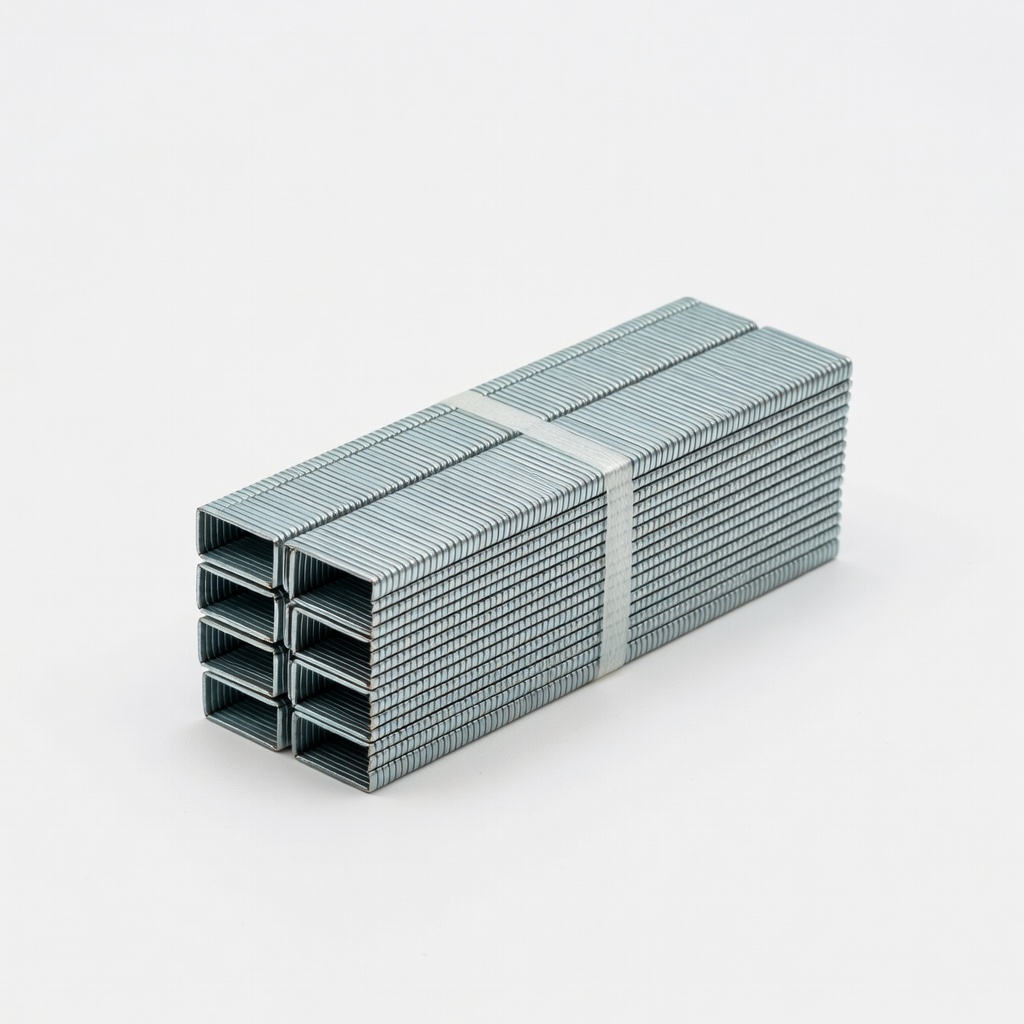
Mutual Industries 4x4 Landscape Staple (100-pack)
Heavy-duty for securing fabric lining, preventing weeds without damaging the frame.
Best for: Attaching bottom liner after assembly to maintain bed integrity.
Price Range: $15-$25