
AMD Ryzen 5 5600
Main CPU for sub-$1000 gaming PC.
$120-$150
AMD Ryzen 5 5600 Excellent price-to-performance for gaming, stock cooler included, great for budget builds.
Get the App
Better experience on mobile
Build a powerful gaming rig without breaking the bank with this step-by-step guide.
With GPU prices fluctuating, building a gaming PC under $1000 might seem challenging, but it's absolutely achievable with smart component choices. This guide walks you through selecting parts that offer the best performance per dollar, assembling your system, and installing the operating system. You'll learn to balance CPU and GPU, choose cost-effective storage, and avoid common pitfalls. By the end, you'll have a fully functional gaming PC capable of 1080p high-settings gaming for years to come.
Estimated Time: 3-4 hours Difficulty: intermediate
Define what games you want to play and at what settings. For a $1000 build, aim for 1080p high/ultra at 60fps or 1440p medium. Allocate roughly 40% of your budget to the GPU and 20% to the CPU. Leave room for a quality power supply and fast storage. Write down your target resolution and frame rate to guide every purchase.
💡 Tips:
⚠️ Warnings:
The CPU and GPU are the heart of your gaming PC. For a $1000 build, an AMD Ryzen 5 5600 or Intel i5-12400F pairs well with an Radeon RX 6600 or RTX 3060. The Ryzen 5600 offers great gaming performance with a B550 motherboard, while the i5-12400F is a bit faster but requires a B660 board. The RX 6600 is often cheaper and nearly as fast as the RTX 3060 at 1080p.
💡 Tips:
⚠️ Warnings:
Pick a motherboard that matches your CPU socket (AM4 for Ryzen 5000, LGA1700 for Intel 12th/13th gen). B550 boards are ideal for AMD, B660 for Intel. Ensure it has enough PCIe slots, M.2 slots, and RAM slots. For a budget build, a micro ATX board can save money and fit in smaller cases.
💡 Tips:
⚠️ Warnings:
16GB of DDR4 RAM (2x8GB) at 3200MHz or 3600MHz is the sweet spot for gaming. For storage, a 1TB NVMe M.2 SSD provides fast load times and ample space for several games. Avoid SATA SSDs for your primary drive; they are slower despite being cheaper. If you need more space later, add a 1-2TB hard drive for bulk storage.
💡 Tips:
⚠️ Warnings:
A 550W 80+ Bronze power supply is sufficient for a Ryzen 5 5600 + RX 6600 build, but 650W gives more headroom for future upgrades. Choose a case with good airflow: mesh front panels and at least one exhaust fan. Cases like the Corsair 4000D Airflow or Fractal Design Meshify C are excellent budget options.
💡 Tips:
⚠️ Warnings:
Work on a clean, hard, non-carpeted surface. Unpack components from their anti-static bags. Wear an anti-static wrist strap or periodically touch an unpainted metal surface to ground yourself. Lay out your motherboard on its box to use as a work surface. Have your motherboard manual handy for reference.
💡 Tips:
⚠️ Warnings:
Lift the CPU socket lever, align the CPU's gold triangle with the triangle on the socket (or notches for Intel), and gently place it in. Lower the lever to lock. Then, apply thermal paste (pea-sized dot) or use pre-applied paste on the cooler. Mount the cooler according to its instructions, tightening screws in a star pattern to ensure even pressure.
💡 Tips:
⚠️ Warnings:
Open the RAM slot clips, align the notch on the RAM stick with the slot, and press firmly until the clips click. Install in slots A2 and B2 (check motherboard manual) for dual-channel. Then, place the motherboard's I/O shield in the case. Screw in standoffs (if not pre-installed), gently lower the motherboard, and secure with screws.
💡 Tips:
⚠️ Warnings:
For an M.2 SSD, insert it at a 30-degree angle into the M.2 slot and secure with a screw (or retention clip). For a SATA SSD/HDD, mount it in a drive bay and connect SATA cable and power. For the graphics card, remove the corresponding PCIe slot covers on the case, align the GPU with the PCIe x16 slot, press down until it clicks, and screw it into the bracket.
💡 Tips:
⚠️ Warnings:
Connect the 24-pin motherboard power cable, 4+4 pin CPU power (top left), and PCIe power cables to the GPU (6+2 pin). Then, connect case front panel headers (power button, reset, LEDs, USB, audio) using the motherboard manual as a guide. Route cables neatly, securing with zip ties. Finally, connect case fans to motherboard fan headers.
💡 Tips:
⚠️ Warnings:
Connect keyboard, mouse, monitor, and power cable. Turn on the power supply switch and press the power button. If everything is connected correctly, the system will post (you'll see a logo or beep). Enter BIOS (usually Delete or F2) to configure: set RAM speed (XMP/DOCP), enable Smart Access Memory (if AMD), set boot order, and check CPU/GPU temperatures.
💡 Tips:
⚠️ Warnings:
Insert Windows or Linux installation USB, set USB as first boot device, and follow on-screen instructions. After OS installation, install chipset drivers, GPU drivers (from AMD or NVIDIA), audio, and network drivers. Run Windows Update to get latest patches. Consider installing MSI Afterburner or GPU-Z to monitor performance.
💡 Tips:
⚠️ Warnings:
Problem: PC turns on but no display on monitor.
Solution: Check monitor input, ensure GPU is fully seated, try different GPU/display cable, reseat RAM. If no improvement, test with a different GPU or use motherboard video output if CPU has integrated graphics.
Problem: System turns off or reboots during gaming.
Solution: Check CPU and GPU temperatures; may be overheating. Ensure fans are spinning and thermal paste is applied. Could also be insufficient PSU wattage or unstable power delivery.
Problem: Boot loop (continuously restarts before OS).
Solution: Check that all power cables are fully inserted. Try booting with one stick of RAM. Clear CMOS (remove battery for 30 seconds). Update BIOS if possible.
Problem: USB ports not working.
Solution: Check front panel USB header connection. For rear USB, ensure chipset drivers are installed. Try different ports.
Problem: Strange noises (clicking, grinding).
Solution: Check if a cable is hitting a fan, or a fan is loose. HDD clicking may indicate failure. Power supply coil whine is normal under load but should be minimal.
Excellent price-to-performance for gaming, stock cooler included, great for budget builds.
Best for: Main CPU for sub-$1000 gaming PC.
Price Range: $120-$150
One of the best value GPUs for 1080p high settings, efficient and reliable.
Best for: Primary graphics card for budget gaming.
Price Range: $200-$250
Reliable RAM with low profile for easy cooler clearance, good speed for Ryzen builds.
Best for: System memory for gaming and multitasking.
Price Range: $35-$45
Fast sequential read/write speeds, great for boot and game loading.
Best for: Primary storage for OS and games.
Price Range: $80-$100
Budget-friendly but reliable enough for mid-range builds, 80+ certified.
Best for: Power supply for system up to RX 6600/Ryzen 5600.
Price Range: $40-$55
Main CPU for sub-$1000 gaming PC.
AMD Ryzen 5 5600 Excellent price-to-performance for gaming, stock cooler included, great for budget builds.

Primary graphics card for budget gaming.
AMD Radeon RX 6600 One of the best value GPUs for 1080p high settings, efficient and reliable.
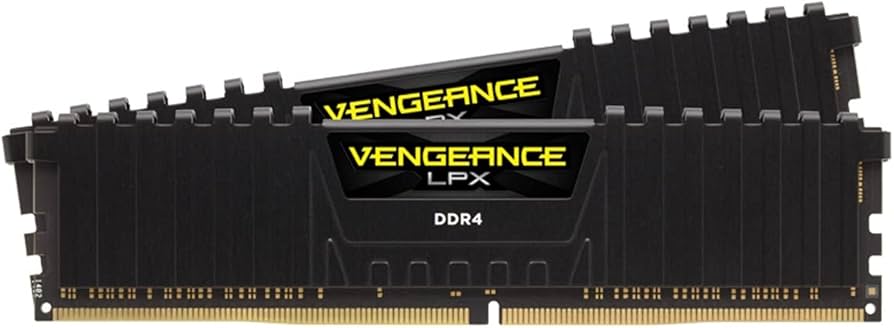
System memory for gaming and multitasking.
Corsair Vengeance LPX 16GB DDR4 3200MHz Reliable RAM with low profile for easy cooler clearance, good speed for Ryzen builds.
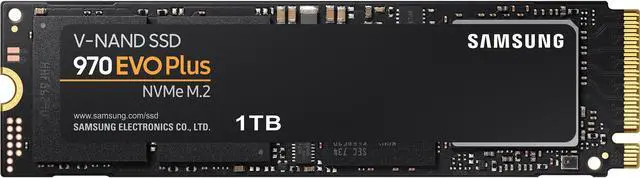
Primary storage for OS and games.
Samsung 970 EVO Plus 1TB NVMe M.2 SSD Fast sequential read/write speeds, great for boot and game loading.
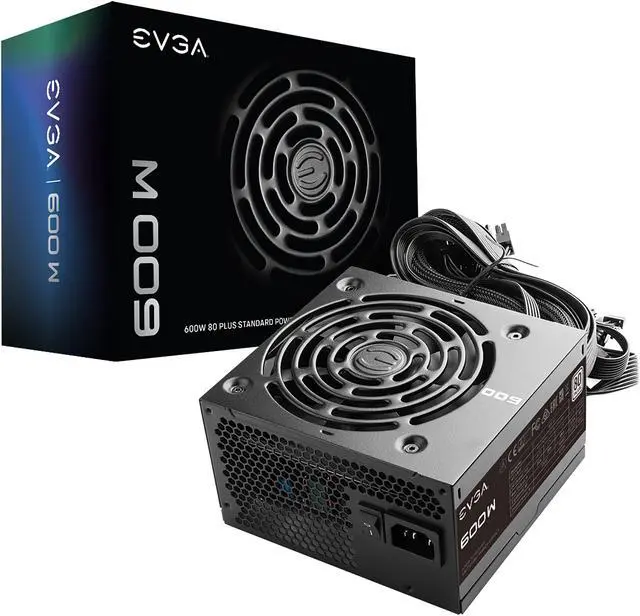
Power supply for system up to RX 6600/Ryzen 5600.
EVGA 600 W1 600W 80+ White Power Supply Budget-friendly but reliable enough for mid-range builds, 80+ certified.