
Energizer CR2032 Lithium Coin Batteries, 4 Count
Primary power for your circuit; buy extras for backups.
$6.99
Energizer CR2032 Lithium Coin Batteries, 4 Count Reliable 3V power source with long shelf life, perfect for multiple tests.
Get the App
Better experience on mobile
Create a simple glowing LED light using coin batteries in minutes – perfect beginner electronics project with no soldering required!
Ever wanted to dip your toes into electronics but felt overwhelmed by complex kits and tools? Building a 3V LED circuit with coin batteries is the ideal starting point. It's fun, inexpensive, and teaches core concepts like polarity and basic circuitry without any risk of shock or complicated wiring.
In this guide, you'll learn how to assemble a working circuit that makes an LED shine brightly. We'll cover everything step-by-step, from identifying components to troubleshooting. Expect a hands-on project that takes just 5-10 minutes and requires no prior experience – just curiosity!
By the end, you'll have a portable glowing light and the confidence to tackle more DIY electronics projects.
Estimated Time: 5-10 minutes Difficulty: beginner
Collect all the items listed in 'What You Need.' Lay them out on a clean, non-conductive surface like a wooden table or plastic mat to avoid shorts.
This step ensures you're ready to build without interruptions. A CR2032 battery provides exactly 3V, matching most basic LEDs perfectly – no resistor needed for short-term use.
Success looks like: All parts organized and visible.
💡 Tips:
⚠️ Warnings:
Look at your LED: the longer leg is the anode (+), shorter leg is the cathode (-). Inside the bulb, the larger metal piece connects to the cathode.
Polarity matters because LEDs only conduct current one way. Wrong connection = no light.
Success looks like: Legs labeled with tape or marker (e.g., '+' on long leg).
💡 Tips:
⚠️ Warnings:
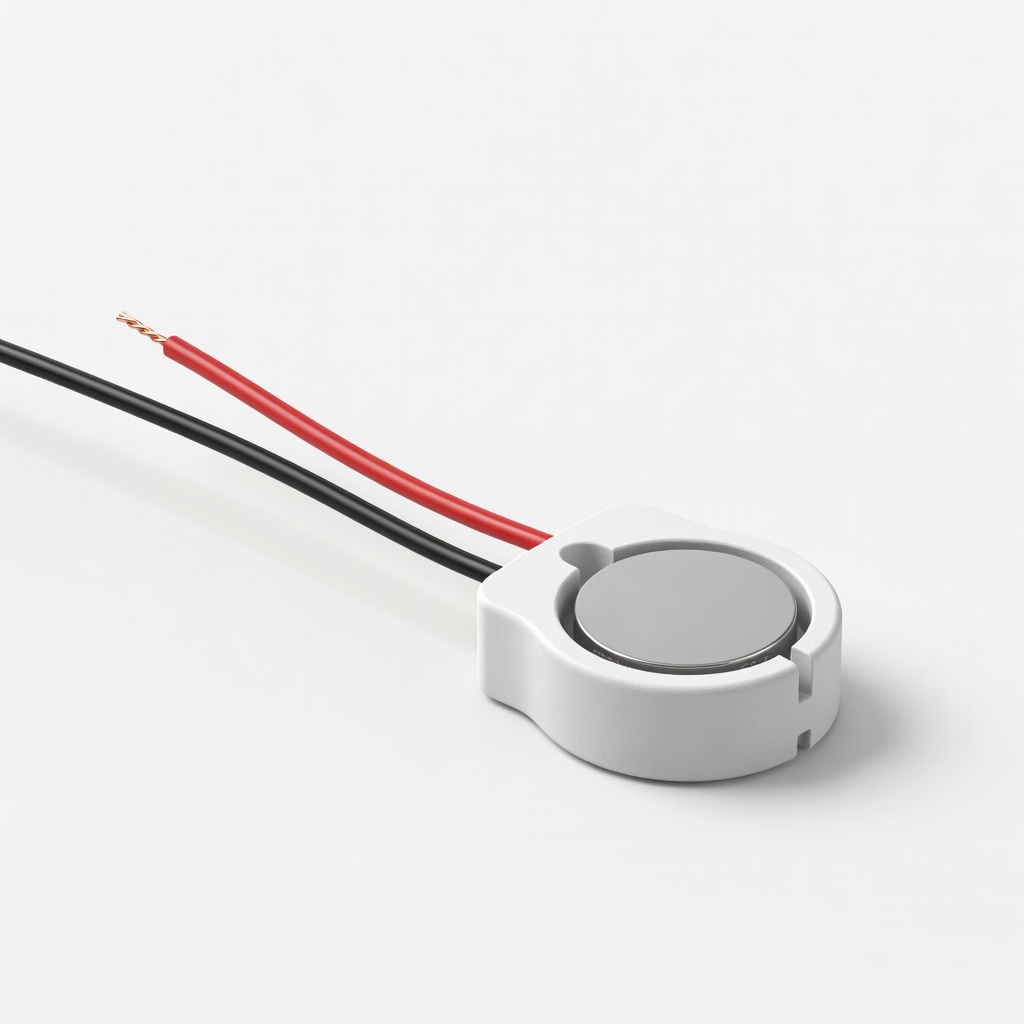
If using a holder, snap the CR2032 battery in positive (+) side up (usually marked). The holder's red wire/lead is positive, black is negative.
Holders make connections reusable and safer than direct contact.
Success looks like: Battery securely snapped in, leads dangling freely.
💡 Tips:
Attach the LED's anode (long leg) to the battery holder's positive (+) lead using an alligator clip or by twisting wires together.
This supplies power to the LED. Expect a firm connection without exposed metal.
Success looks like: Secure + to + link, no loose wires.
⚠️ Warnings:
Clip or twist the LED's cathode (short leg) to the battery holder's negative (-) lead.
Completing the circuit allows current to flow, lighting the LED.
Success looks like: Full loop connected; LED should glow immediately!
💡 Tips:
Power on (battery already in) – your LED should shine steadily. If not, check connections.
Wrap tape around joints for a portable light. This makes it durable.
Success looks like: Bright, steady glow lasting 30+ seconds without fading.
⚠️ Warnings:
Problem: LED doesn't light at all
Solution: Check polarity, battery voltage (>2.7V), and connections. Swap LED if possible.
Problem: LED flickers
Solution: Tighten clips or re-twist wires. Clean oxidation on battery.
Problem: LED very dim
Solution: Battery low or wrong LED type. Use fresh CR2032 and low-Vf LED (red/green).
Problem: Gets hot
Solution: Disconnect immediately – likely short. Insulate and retry.
Reliable 3V power source with long shelf life, perfect for multiple tests.
Best for: Primary power for your circuit; buy extras for backups.
Price Range: $6.99
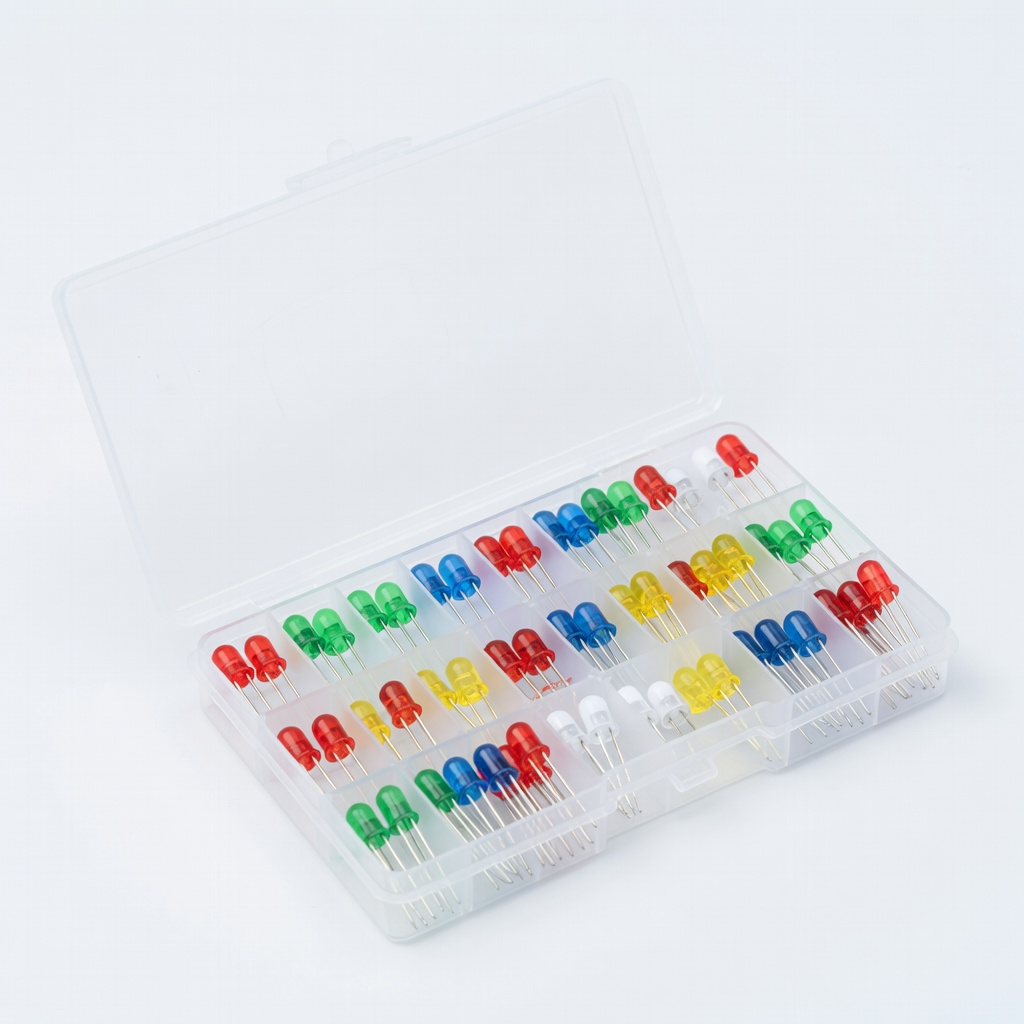
Assortment of 3V-compatible LEDs in various colors/sizes for beginners.
Best for: Pick red/green for easy 3V direct drive; extras for experiments.
Price Range: $9.99
Easy snap-in holder with color-coded leads simplifies connections.
Best for: Reusable for portable projects; no direct battery handling.
Price Range: $7.99 for 6-pack
Color-coded clips for foolproof polarity and quick assembly.
Best for: Clip-based building without soldering – ideal for beginners.
Price Range: $8.98
Primary power for your circuit; buy extras for backups.
Energizer CR2032 Lithium Coin Batteries, 4 Count Reliable 3V power source with long shelf life, perfect for multiple tests.
Pick red/green for easy 3V direct drive; extras for experiments.
Elegoo 120pcs LED Light Emitting Diode Kit Assortment of 3V-compatible LEDs in various colors/sizes for beginners.
Reusable for portable projects; no direct battery handling.
KEYESTUDIO CR2032 Coin Cell Battery Holder with Wires Easy snap-in holder with color-coded leads simplifies connections.
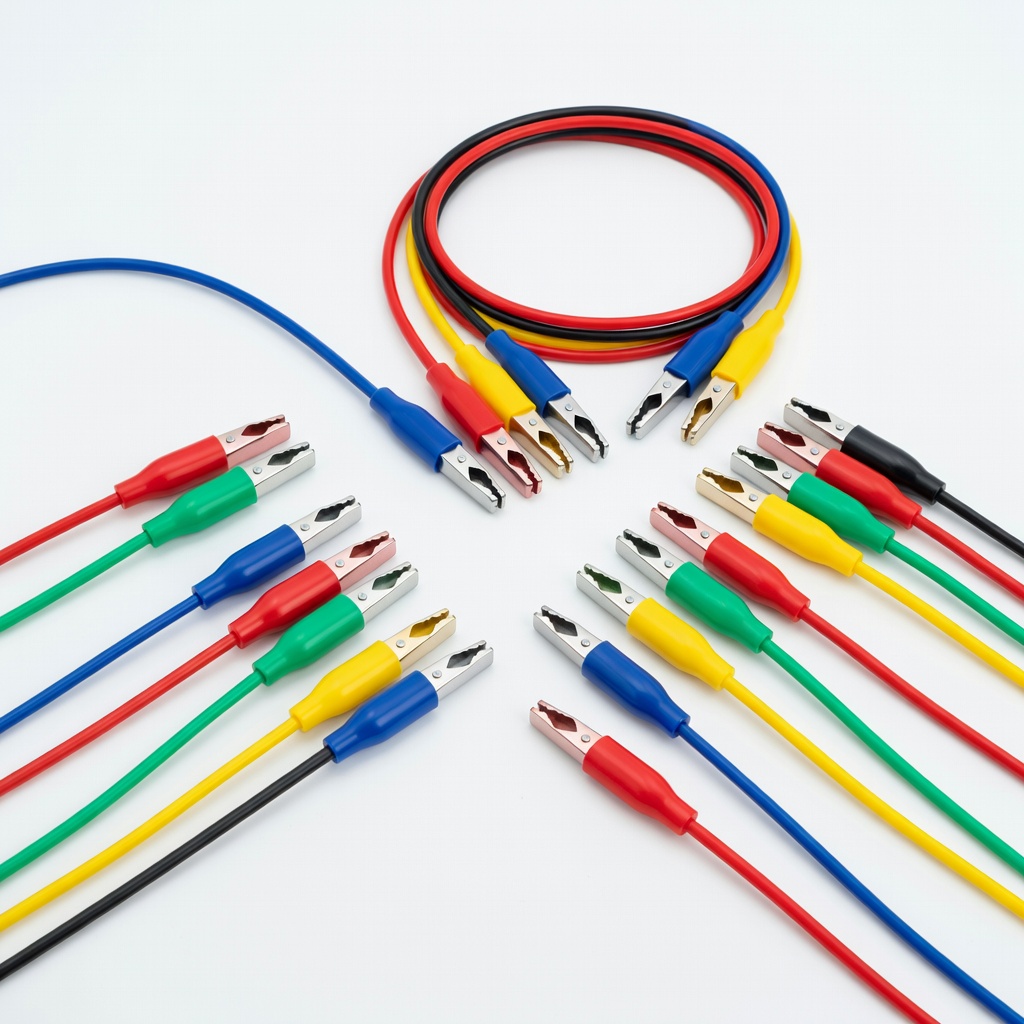
Clip-based building without soldering – ideal for beginners.
Elegoo 65pcs Alligator Test Lead Cables Color-coded clips for foolproof polarity and quick assembly.