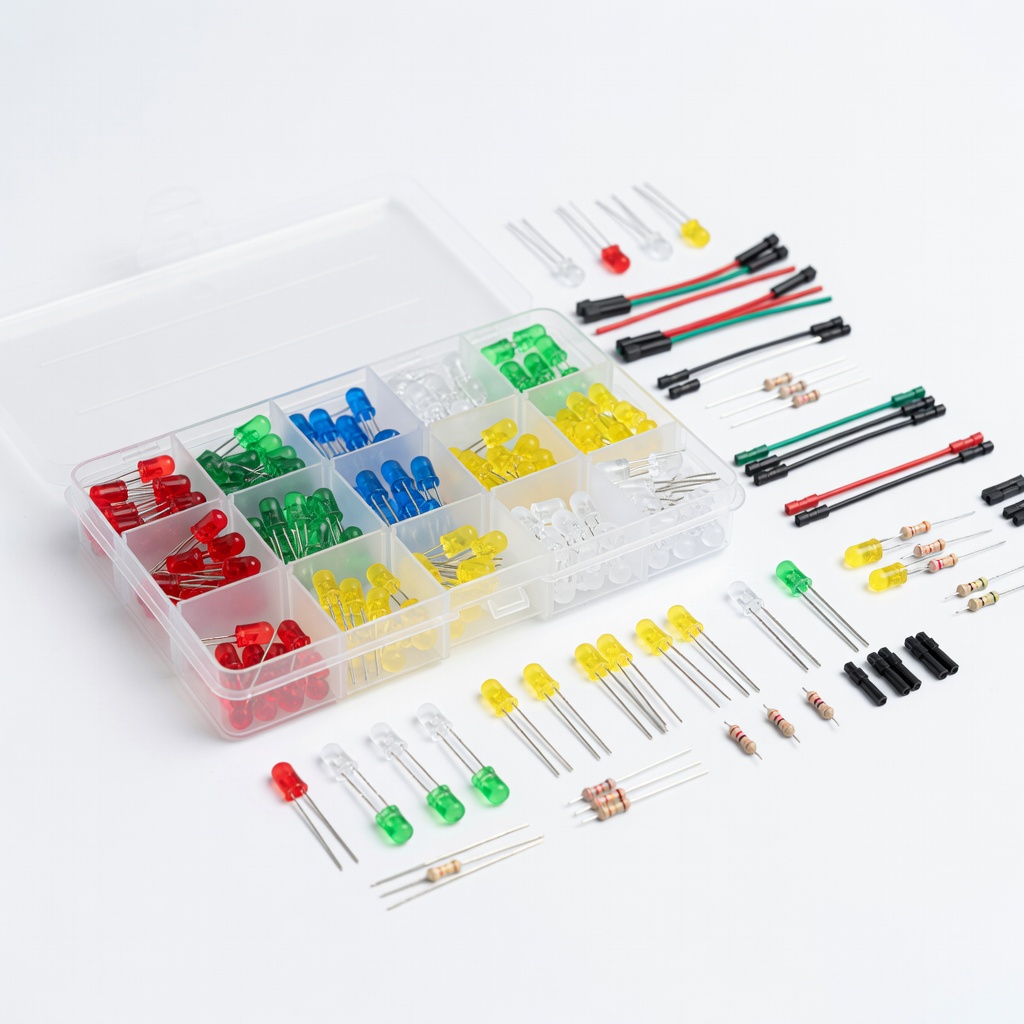
ELEGOO 120pcs LED Light Emitting Diode Kit
Core component for experimenting beyond one LED.
$8.98
ELEGOO 120pcs LED Light Emitting Diode Kit Assortment of 3V-friendly LEDs in multiple colors with right sizes for beginners.
Get the App
Better experience on mobile
Create a glowing LED circuit in under 15 minutes using a simple 3V coin battery – your first step into electronics!
Ever wanted to dip your toes into electronics but felt overwhelmed by complex kits and soldering irons? Building a 3V LED circuit is the perfect beginner project: it's safe, cheap, and instantly rewarding with a bright glow. No prior experience needed – just follow these steps.
In this guide, you'll learn the basics of circuits, polarity, and current limiting while assembling a simple setup that lights up an LED. We'll use a coin cell battery for portability. Expect a fun, frustration-free build that takes 10-15 minutes.
By the end, you'll have a working circuit you can show off, plus the confidence to tackle bigger projects like alarms or wearables.
Estimated Time: 10-15 minutes Difficulty: beginner
Lay out all materials on a clean workspace. Check that your LED has two legs: a longer anode (+) and shorter cathode (-). Insert the CR2032 battery into its holder if using one – positive side up (marked +).
This step ensures you're ready to build without pausing. Success looks like organized parts in front of you, battery holder snapped shut securely.
💡 Tips:
LEDs are like one-way diodes – they only light if current flows from anode (longer leg, +) to cathode (shorter leg, -). Hold the LED so the longer leg is on the left.
Why it matters: Wrong polarity means no light. Flatten the legs slightly with pliers for easier handling. Expect the LED to feel delicate but sturdy.
⚠️ Warnings:
Twist or clip one end of the 220 ohm resistor (color bands: red-red-brown) to the LED's longer anode leg. Use alligator clips or wrap tightly for a solid connection.
The resistor limits current to prevent burning out the LED at 3V. Success: A secure join without exposed bare wire touching other parts.
💡 Tips:
Connect the free resistor end to the battery holder's positive (+) terminal using a jumper wire or clip.
This completes the positive side of the circuit. Why: Ensures controlled current flow. Expect a slight resistance feel from the clip.
Clip or twist the LED's shorter cathode leg to the battery's negative (-) terminal.
Now the loop is closed – current flows from + through resistor, LED, to -. Success: The LED should glow immediately! If not, check connections.
💡 Tips:
⚠️ Warnings:
Power on (if holder has switch) – admire the steady light! Shine in dark for brighter effect.
What success looks like: Bright, consistent glow without flickering or heat. Disconnect after testing to save battery.
Tape connections or use heat-shrink tubing for a wearable badge. Add a switch for on/off.
This makes it a keychain light. Expect durability for daily use.
Problem: LED doesn't light
Solution: Check polarity, connections, battery voltage (>2.9V), resistor value. Swap LED.
Problem: LED flickers
Solution: Tighten clips; clean contacts; replace weak battery.
Problem: LED gets hot
Solution: Disconnect immediately; wrong/no resistor – add 220Ω.
Problem: No components fit
Solution: Use breadboard holes or alligator clips; trim excess leads.
Assortment of 3V-friendly LEDs in multiple colors with right sizes for beginners.
Best for: Core component for experimenting beyond one LED.
Price Range: $8.98
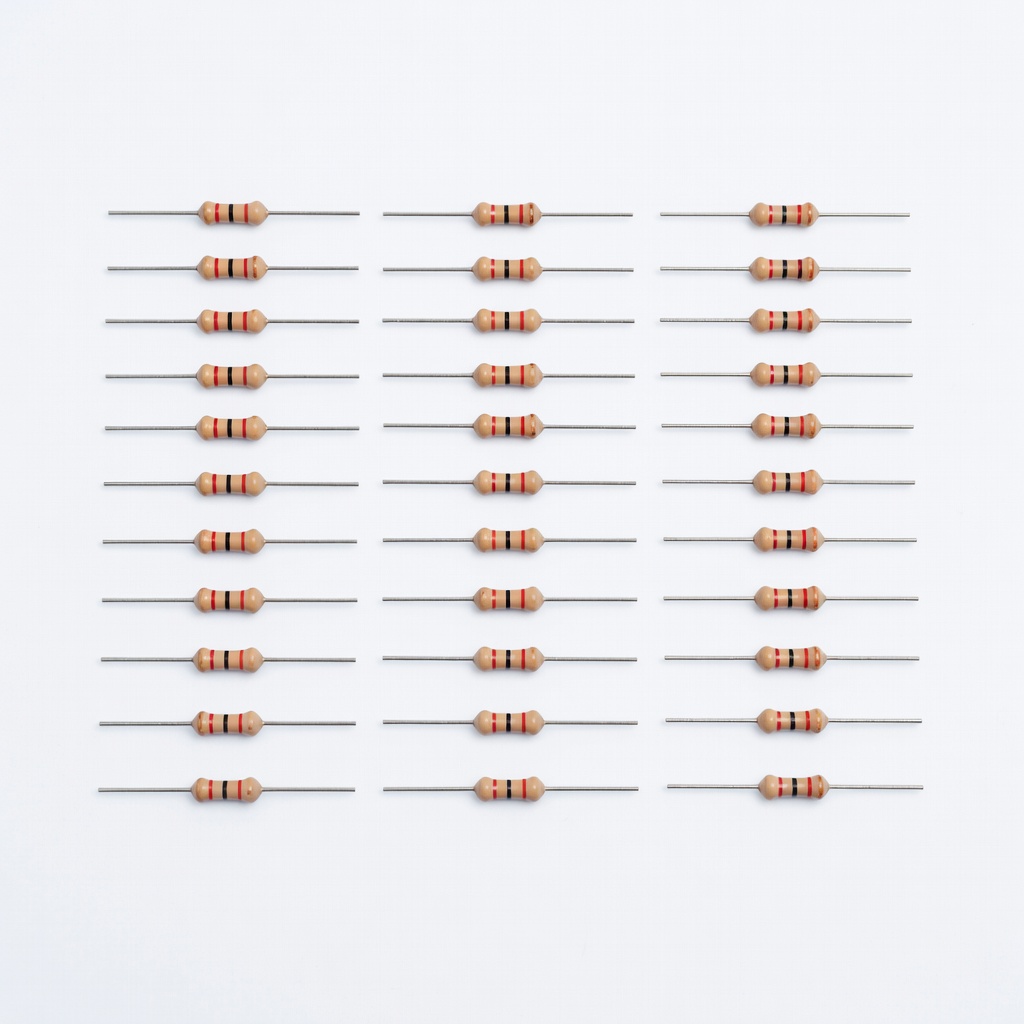
Precise 1% tolerance pack – essential for safe current limiting.
Best for: Protects every LED project; extras for future builds.
Price Range: $5.99
Reliable 3V power source with long shelf life.
Best for: Immediate power without holder issues.
Price Range: $6.99
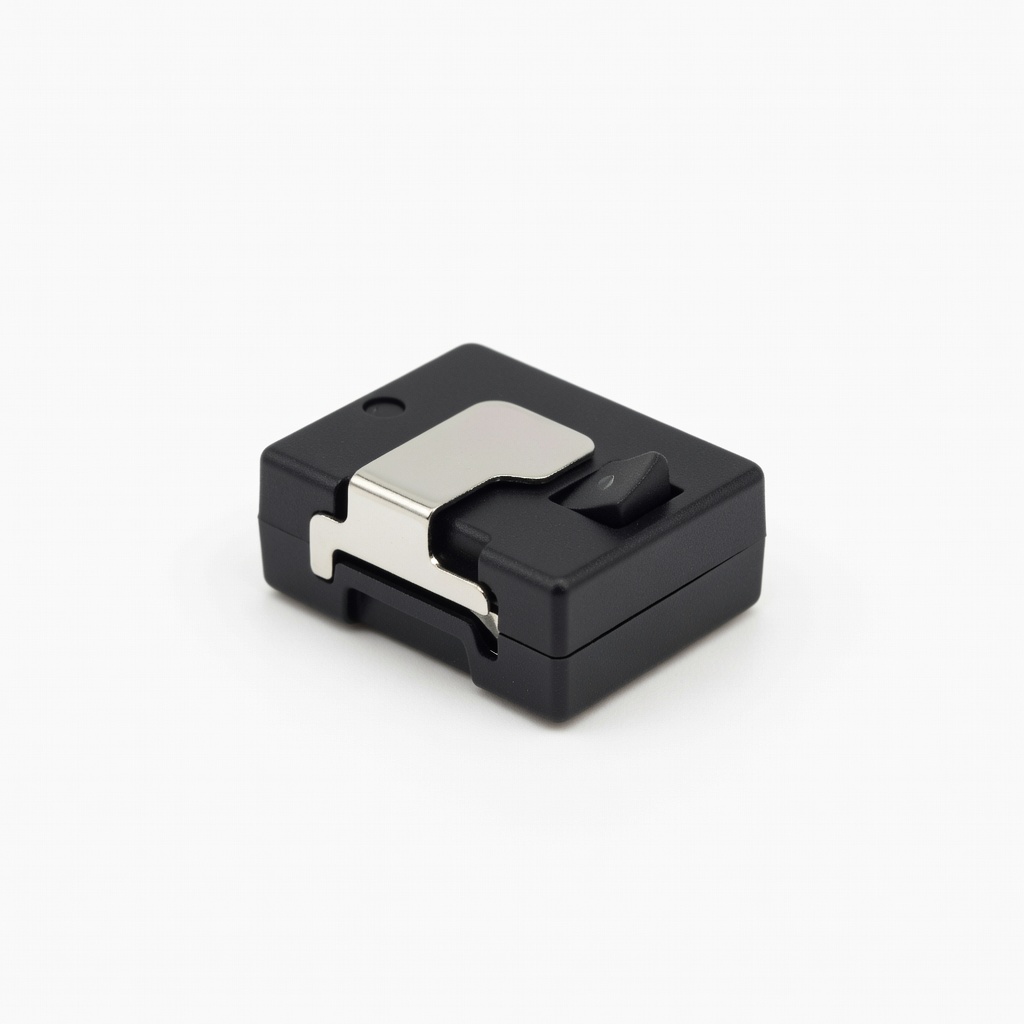
Easy on/off and secure hold – beginner-friendly.
Best for: Portable circuits without loose batteries.
Price Range: $6.99
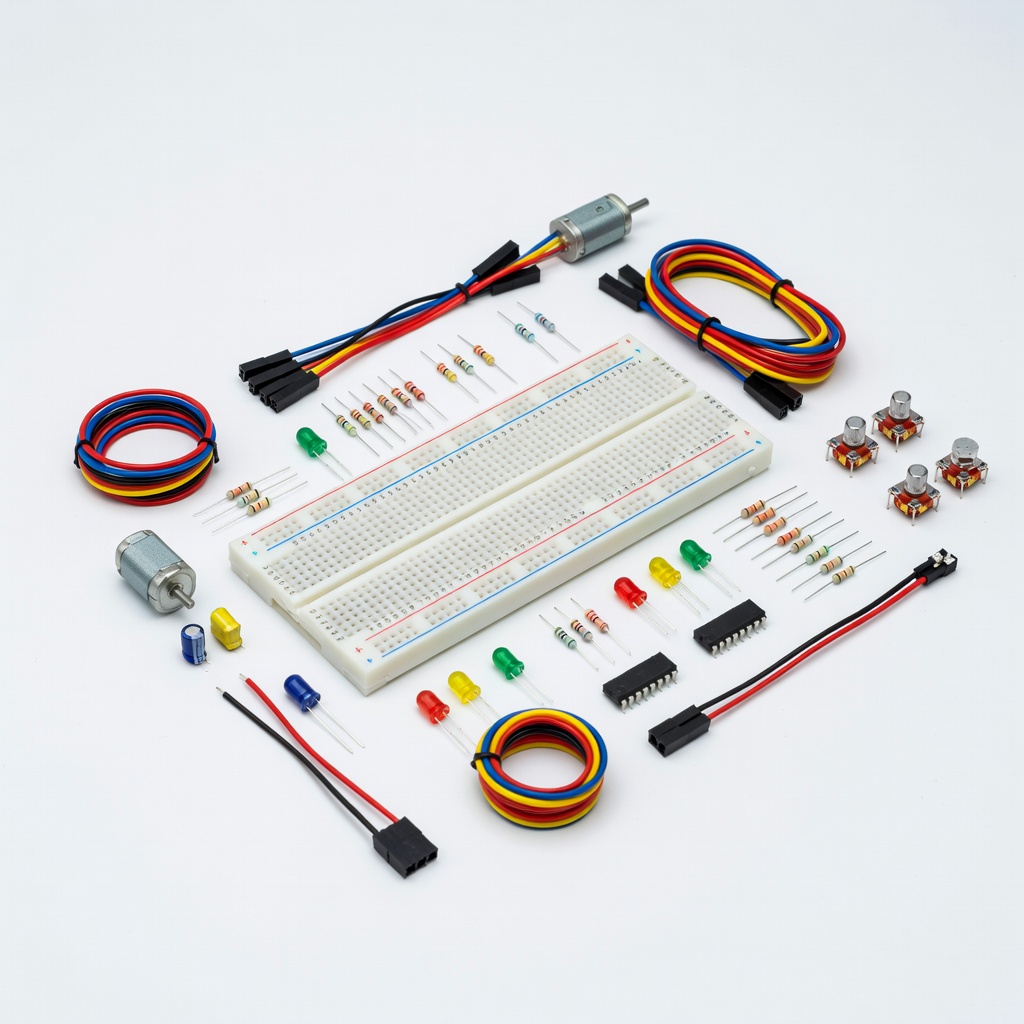
Includes breadboard, wires, resistors – all-in-one starter.
Best for: No-solder prototyping for multiple experiments.
Price Range: $23.50
Core component for experimenting beyond one LED.
ELEGOO 120pcs LED Light Emitting Diode Kit Assortment of 3V-friendly LEDs in multiple colors with right sizes for beginners.
Protects every LED project; extras for future builds.
EDGELEC 100pcs 220 Ohm Resistors Precise 1% tolerance pack – essential for safe current limiting.

Immediate power without holder issues.
Energizer CR2032 Lithium Coin Batteries 4 Pack Reliable 3V power source with long shelf life.
Portable circuits without loose batteries.
DAOKAI CR2032 Coin Cell Battery Holder with Switch Easy on/off and secure hold – beginner-friendly.
No-solder prototyping for multiple experiments.
ELEGOO Upgraded Breadboard Kit Includes breadboard, wires, resistors – all-in-one starter.