Uneven abrasive finishing in metal polishing can ruin hours of work, leaving behind visible scratches, holograms, or burn marks that compromise both aesthetics and durability. For advanced fabricators, jewelers, and restorers, balancing abrasives—progressing methodically through grits and compounds—is key to flawless surfaces on aluminum, stainless steel, or brass.
In this guide, you'll learn a precise step-by-step process to balance your abrasive sequence, ensuring each stage removes the previous scratches completely while minimizing material loss. Expect to spend 1-2 hours per medium-sized workpiece (e.g., 12x12 inch panel), depending on starting condition. This advanced tutorial assumes familiarity with power tools and safety protocols.
By the end, your metal will shine with a defect-free polish ready for final protection, saving time on rework and elevating your finishing skills.
▸What You'll Need
- •Variable-speed rotary polisher or angle grinder (4-7 inch backing plate)
- •Progressive grit ALOX or silicon carbide sandpaper/discs (80, 120, 220, 400, 600, 1000, 2000 grit)
- •Assorted polishing compounds (cutting, polishing, ultra-fine glaze)
- •Styrene or cotton buffing wheels/pads (sisal for cutting, cotton for polishing)
- •Clean metal workpiece (e.g., aluminum panel or stainless part)
- •Safety gear: respirator (NIOSH-approved for dust), nitrile gloves, safety goggles, hearing protection
- •Isopropyl alcohol (99%) and microfiber cloths for cleaning
- •Lubricant (water for wet sanding, polishing oil optional)
- •Inspection light (LED work light for defect spotting)
- •Optional: edge marking tool (fine marker for tracking progress)
Estimated Time: 1-2 hours per 12x12 inch workpiece
Difficulty: advanced
▸Step-by-Step Instructions
Step 1: Assess and Clean the Workpiece
Inspect the metal surface under bright, angled light to identify deep scratches, pits, or oxidation. Mark heavy defects with a fine-tip marker for targeted removal. Degrease thoroughly with isopropyl alcohol and a microfiber cloth to remove oils, fingerprints, or residues—contaminants cause uneven abrasion.
Why it matters: A clean baseline prevents embedded grit from creating new scratches during progression. Expect a uniform matte surface ready for coarse work.
💡 Tips:
- •Use oblique lighting to reveal holograms from prior work.
⚠️ Warnings:
- •Avoid touching cleaned areas with bare hands.
Step 2: Select and Prepare Abrasive Sequence
Choose a balanced grit progression: start 2-3x coarser than the deepest scratch (e.g., 80-120 grit for heavy damage). Prepare discs/papers for each stage (220, 400, 600, 1000, 2000). Balance means each grit fully removes the prior one's scratches before advancing—no skips.
Test on a scrap: Sand a test patch and inspect at 10x magnification. Success: No visible prior scratches.
💡 Tips:
- •ALOX abrasives cut faster on metals than silicon carbide.
Step 3: Rough Cut with Coarse Grit (80-220)
Attach 80-120 grit disc to polisher at 1,800-2,400 RPM. Use light pressure, overlapping passes in straight lines (not circles) with water lubricant for wet sanding. Work until uniform matte, no shiny spots.
Progress to 220 grit immediately after, increasing RPM slightly. Why balance here: Removes bulk material evenly, establishing flatness. Expect heavy swarf removal and heat buildup—pause to cool.
⚠️ Warnings:
- •Never exceed 3,000 RPM or you'll gouge the metal.
Step 4: Intermediate Sanding (220-600 Grit)
Switch to 220 grit, change direction 90° from previous passes. Sand until no coarse scratches remain (feel with fingertip—should be uniformly smooth). Advance to 400 then 600 grit, reducing RPM to 1,200-1,800.
Inspect frequently: Tilt under light for even dullness. This stage balances removal rates, preventing 'stepping' where finer grits can't catch up.
💡 Tips:
- •Light pressure (weight of tool only) prevents digs.
Step 5: Fine Prep Sanding (600-2000 Grit)
Use 600-1000 grit dry or wet at 800-1,200 RPM, straight-line passes. Final 2000 grit refines to near-polish haze. Clean thoroughly between grits with alcohol to avoid contamination.
Success metric: Surface feels glassy smooth, no tactile scratches under light finger drag. This ultra-fine balance ensures compounds won't amplify defects.
⚠️ Warnings:
- •Contaminated discs cause re-scratching—discard if clogged.
Step 6: Apply Cutting Compound and Buff
Mount sisal wheel, apply heavy cut compound (e.g., coarse aluminum cut). Speed 2,000-2,800 RPM, firm pressure, cross-hatch pattern. Buff until scratches vanish, wiping residue often.
Why: Transitions abrasives to gloss-building. Expect rapid heat—use short bursts.
💡 Tips:
- •Compound bar on spinning wheel for even application.
Step 7: Polish with Medium Compound
Switch to soft cotton wheel, medium polish compound at 1,500-2,000 RPM. Lighter pressure, overlapping circles now. Remove all cutting wheel holograms.
Inspect: Mirror reflection should be clear, no swirls.
Step 8: Final Glaze and Inspect
Ultra-fine glaze on clean wheel, 1,000-1,500 RPM. Light passes for mirror finish. Final check under multiple lights/angles for balance—flawless reflection means success.
Clean with alcohol, apply wax/sealant.
💡 Tips:
- •Finger test: No drag means perfect.
▸Pro Tips
- •Always change direction 90° between grits for faster scratch removal verification.
- •Use a marker dye on edges to track even progression—fades uniformly when balanced.
- •Wet sanding reduces dust and heat by 50%, extending abrasive life.
- •Calibrate polisher RPM with tachometer for precision.
- •Keep 20% overlap in passes for seamless blending.
- •Store abrasives in airtight containers to prevent oil contamination.
- •Pro move: Dual-action polisher for final stages minimizes holograms.
▸Common Mistakes to Avoid
- •Skipping grits: Causes visible scratches carrying through—always verify removal before advancing.
- •Circular motions too early: Creates swirls; stick to linear until polishing stage.
- •Excessive pressure/speed: Leads to burns or digs—let the abrasive do the work.
- •Poor cleaning between steps: Embeds coarse grit, ruining fine stages.
- •Ignoring heat buildup: Warps thin metals—cool with compressed air.
▸Troubleshooting
Problem: Holograms or swirls persist
Solution: Revert one grit back, re-sand linearly; ensure proper wheel compound match.
Problem: Burn marks or discoloration
Solution: Cool immediately with water; blend with finer grit. Use foil tape on edges.
Problem: Uneven finish (high/low spots)
Solution: Re-level with 220 grit flat sanding block; check workpiece flatness first.
Problem: Compounds balling up
Solution: Clean wheel with rake; use less product, higher RPM.
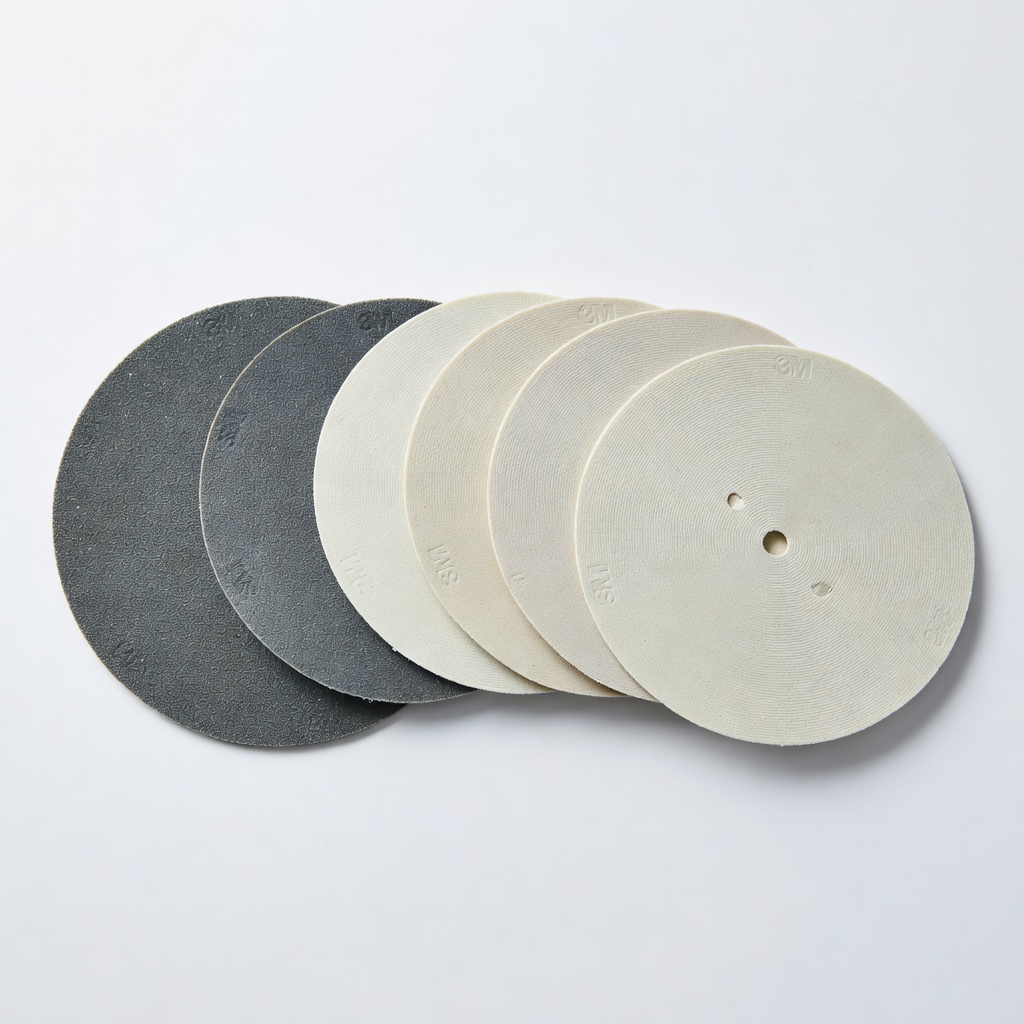
3M Perfect-It Sandpaper Discs Assortment (3-5" 80-2000 Grit)
Premium ALOX abrasives for fast, consistent metal cutting without loading.
Best for: All sanding stages; hook-and-loop for quick swaps.
Price Range: $25-$35
Flitz Metal Polish Paste (Large Tube)
Versatile final compound removes light oxidation and achieves mirror shine safely.
Best for: Glazing stage on stainless/aluminum; non-abrasive for maintenance.
Price Range: $12.99
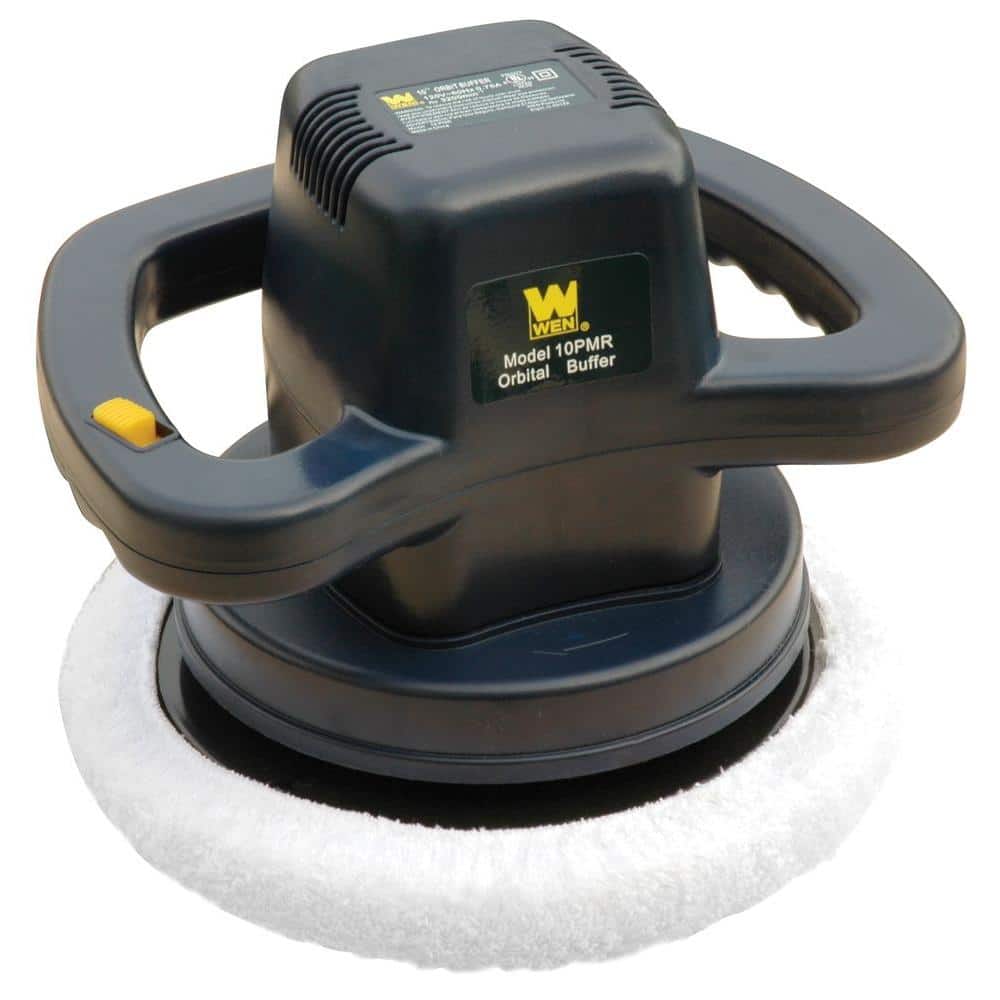
WEN 10PMR 11-Amp Variable Speed Polisher
Precise RPM control (2,000-7,500) essential for balancing abrasives without burning.
Best for: All buffing/sanding; lightweight for extended sessions.
Price Range: $59.99
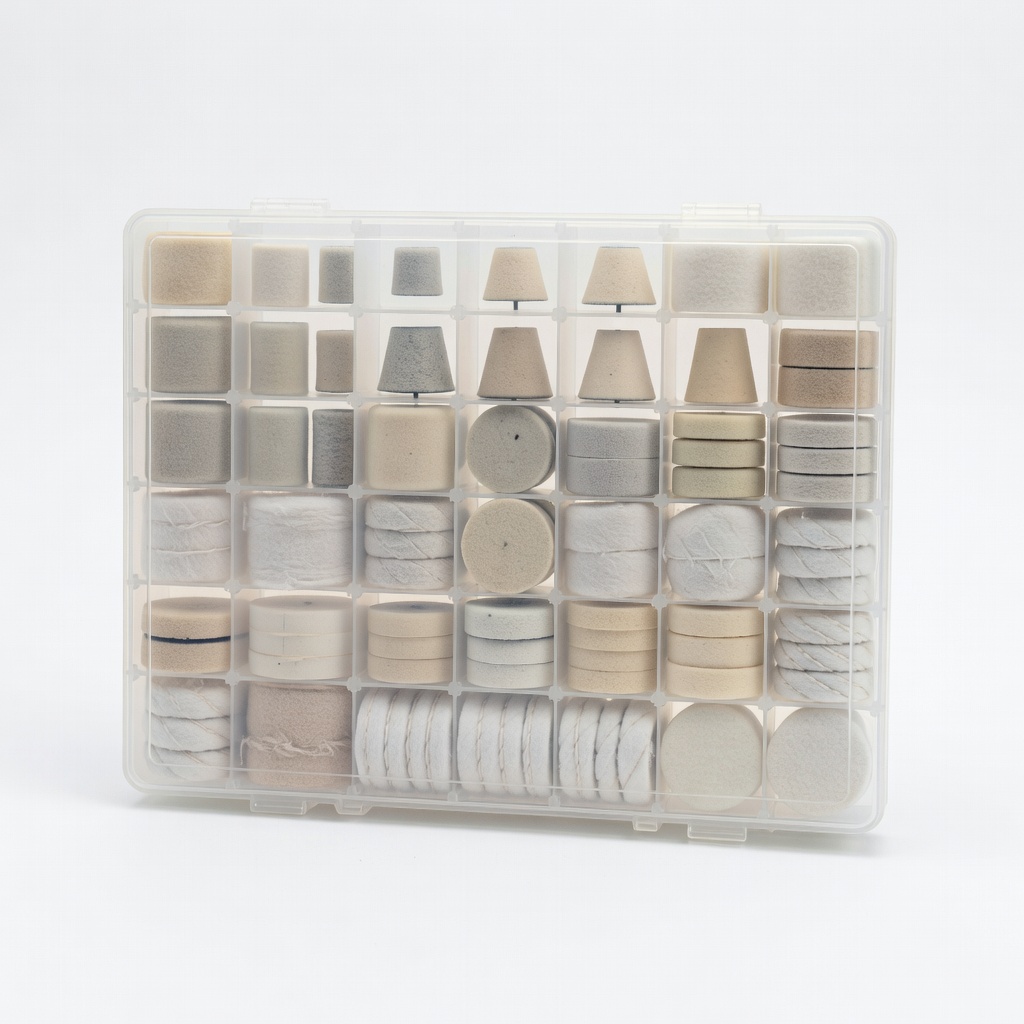
Chicago Electric 100-Piece Buffing Wheel Kit
Variety of sisal/cotton wheels for cut-to-polish progression.
Best for: Dedicated wheels per compound to avoid cross-contamination.
Price Range: $19.99
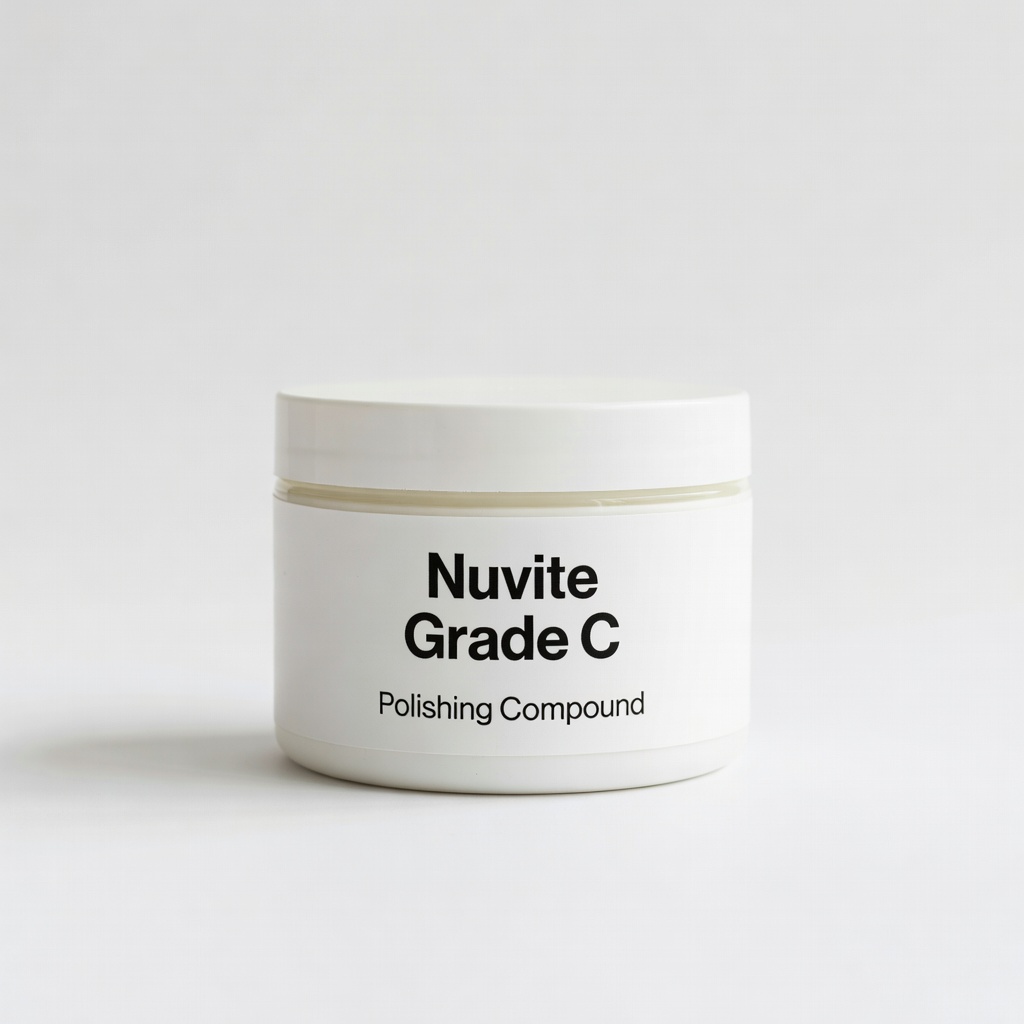
Nuvite Grade C Polishing Compound
Professional-grade for aluminum; chemical resistance post-polish.
Best for: Heavy cutting on aircraft-grade metals.
Price Range: $28-$35