If your 3D printing workspace is buried under tangled filament spools, scattered nozzles, and loose parts, you're not alone—clutter slows down projects and leads to frustration. A large 3D printer supplies organizer solves this by providing modular storage that's customizable and expandable.
In this beginner-friendly guide, you'll learn to assemble a popular large modular organizer (like the 'Supreme Organizer System' from Printables.com), using pre-printed parts. The process involves sorting, fitting, and securing components—no advanced skills needed. Expect sturdy, wall- or desk-mountable storage that holds dozens of spools and tools.
Total assembly takes 45-60 minutes, with simple tools. By the end, you'll have a pro-level setup boosting your productivity.
▸What You'll Need
- •Pre-printed organizer parts (download free STL files from Printables.com, e.g., 'Supreme Organizer' by 3D Print Bunny—print with PLA, 0.2mm layer height, 20-30% infill)
- •M3x10mm screws (50-100 pack, stainless steel)
- •M3 hex nuts or heat-set threaded inserts (50 pack)
- •Precision screwdriver set (Phillips #1 and hex driver for M3)
- •Optional: Super glue for extra reinforcement
- •Optional: Sandpaper (220 grit) for smoothing burrs
Estimated Time: 45-60 minutes
Difficulty: beginner
▸Step-by-Step Instructions
Step 1: Download Model and Verify Printed Parts
Start by downloading a reliable model like the 'Supreme Organizer System' from Printables.com (search 'large 3D printer organizer modular'). Ensure all parts are printed accurately—no warping or missing pieces. Sort them into categories: frame panels (4-6 large flats), connectors (20+ small brackets), bins/drawers (8-12), and spool holders (4-6 arms).
Lay everything on a clean table. Count parts against the model's BOM (bill of materials). Success looks like organized piles ready for assembly, confirming you have extras for mistakes.
💡 Tips:
- •Print test pieces first to dial in settings.
- •Use color-coded filament for easy identification.
⚠️ Warnings:
- •Don't skip sorting—mismatched parts waste time later.
Step 2: Dry Fit the Base Frame
Align the four main frame panels (bottom and three sides) without screws. Slide connectors into slots—they should fit snugly with minimal play. Test stability by gently shaking; it should hold shape but not be locked.
This step ensures print quality. Expect slight friction; if too loose, note for glue later. Success: A rectangular base frame standing firm at ~12x18 inches.
💡 Tips:
- •Work on a soft mat to avoid scratches.
- •Take photos for reference.
Step 3: Install Threaded Inserts or Nuts
Heat threaded inserts with a soldering iron (350°C) and press into designated holes on panels (per model instructions). Or slide hex nuts into slots. Do 20-30 at a time. Cool before handling.
Why? They create strong threads for repeated assembly/disassembly. Expect a satisfying 'click' fit; success is smooth screw insertion without cross-threading.
⚠️ Warnings:
- •Overheat inserts or they'll deform—practice on scraps.
Step 4: Secure the Base Frame
Insert M3 screws through frame holes into inserts/nuts (8-12 total). Tighten with screwdriver to finger-tight + 1/4 turn. Check squareness with a ruler—diagonals equal.
This locks the foundation. Expect rigid structure; wobble means re-loosen and realign.
💡 Tips:
- •Use a torque limiter if available to avoid stripping.
Step 5: Attach Bins and Drawers
Snap or screw 4-6 bins into frame slots/rails. For drawers, attach sliders first, then insert. Test sliding—smooth open/close.
These hold tools/nozzles. Success: All bins secure, drawers glide without binding.
⚠️ Warnings:
- •Lubricate rails with dry PTFE spray if sticky.
Step 6: Add Top Frame and Spool Holders
Secure top panel like base (4-6 screws). Mount spool arms to sides—screw or clip. Load a test spool; it should spin freely.
Completes enclosure. Expect full height ~24 inches; stable when loaded.
💡 Tips:
- •Orient spool holders for easy access.
Step 7: Reinforce and Smooth
Apply super glue to stress joints if needed. Sand rough edges. Wipe clean.
Boosts durability. Success: Professional finish, no sharp bits.
Step 8: Mount and Organize Supplies
Wall-mount with screws (pre-drill) or place on desk. Fill with filament, tools. Label bins.
Final step. Success: Clutter-free workspace, everything accessible.
💡 Tips:
- •Add LED strips inside for visibility.
▸Pro Tips
- •Print connectors in flexible TPU for forgiving fits.
- •Batch-print parts overnight to save time.
- •Use a parts tray for screws to avoid losses.
- •Scale model 110% for larger storage if your printer allows.
- •Add rubber feet to base for non-slip stability.
- •Customize with engravings via slicer modifiers.
- •Test load capacity before full use—start light.
▸Common Mistakes to Avoid
- •Rushing dry fit—leads to misaligned holes; always test first.
- •Over-tightening screws—strips plastic threads; use moderate torque.
- •Poor print orientation—causes weak layers; follow model guidelines.
- •Ignoring tolerances—loose prints need glue, tight ones need sanding.
- •Skipping reinforcements—heavy loads cause sagging over time.
▸Troubleshooting
Problem: Parts don't fit snugly
Solution: Sand high spots or scale prints 99% in slicer for retry. Use glue for permanent fix.
Problem: Screws strip threads
Solution: Replace with larger M4 or add inserts. Back out and retry gently.
Problem: Frame wobbles after assembly
Solution: Add diagonal braces (print extras) or glue joints. Check level surface.
Problem: Drawers stick
Solution: Clean with isopropyl alcohol; apply dry lubricant or beeswax.
HATCHBOX PLA 3D Printer Filament 1.75mm 1KG Spool
Reliable, low-warp PLA perfect for printing sturdy organizer parts without failures.
Best for: Printing the base panels and bins for durability under load.
Price Range: $24.99
M3 Screw Kit Stainless Steel 860Pcs Assortment
Complete set with exact sizes needed, including washers for secure fastening.
Best for: All screw connections in frame and bins—extras for future projects.
Price Range: $16.99
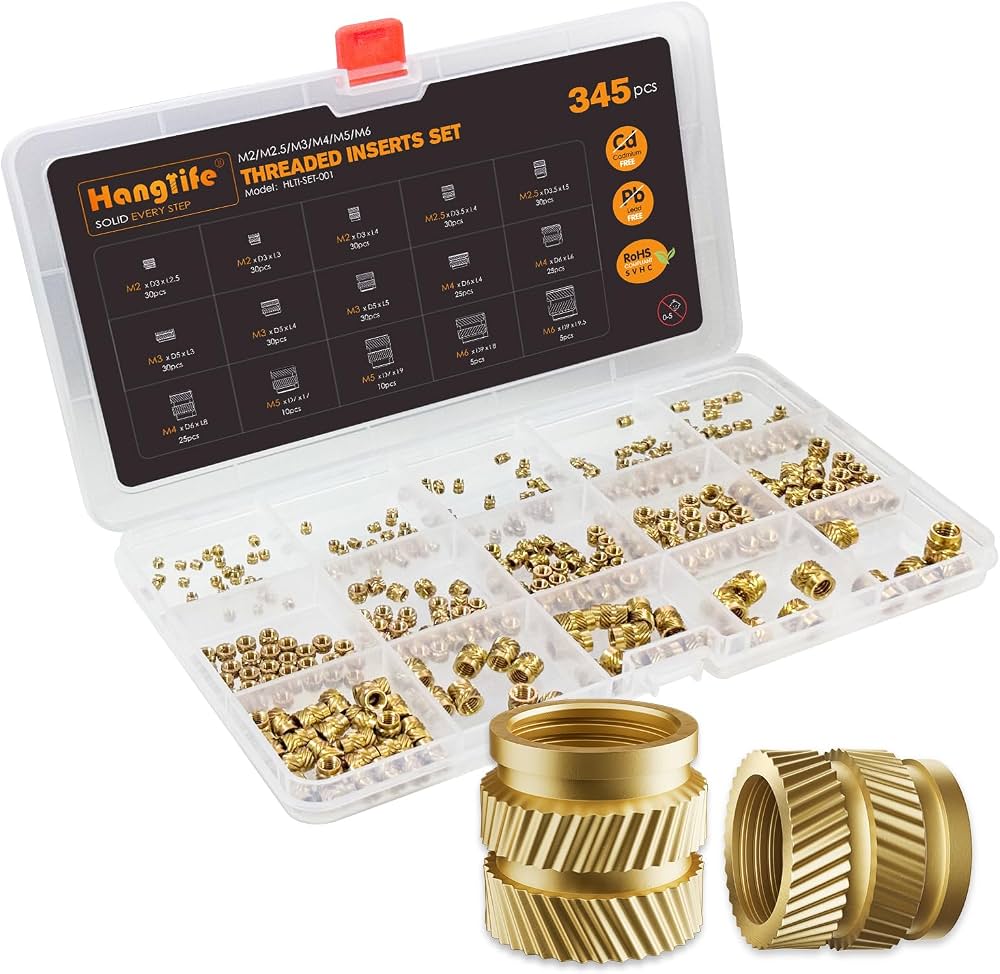
Brass Heat-Set Threaded Inserts M3 250pcs
Professional strength threads that won't strip, ideal for modular designs.
Best for: Installing in panels for easy disassembly and reuse.
Price Range: $12.99
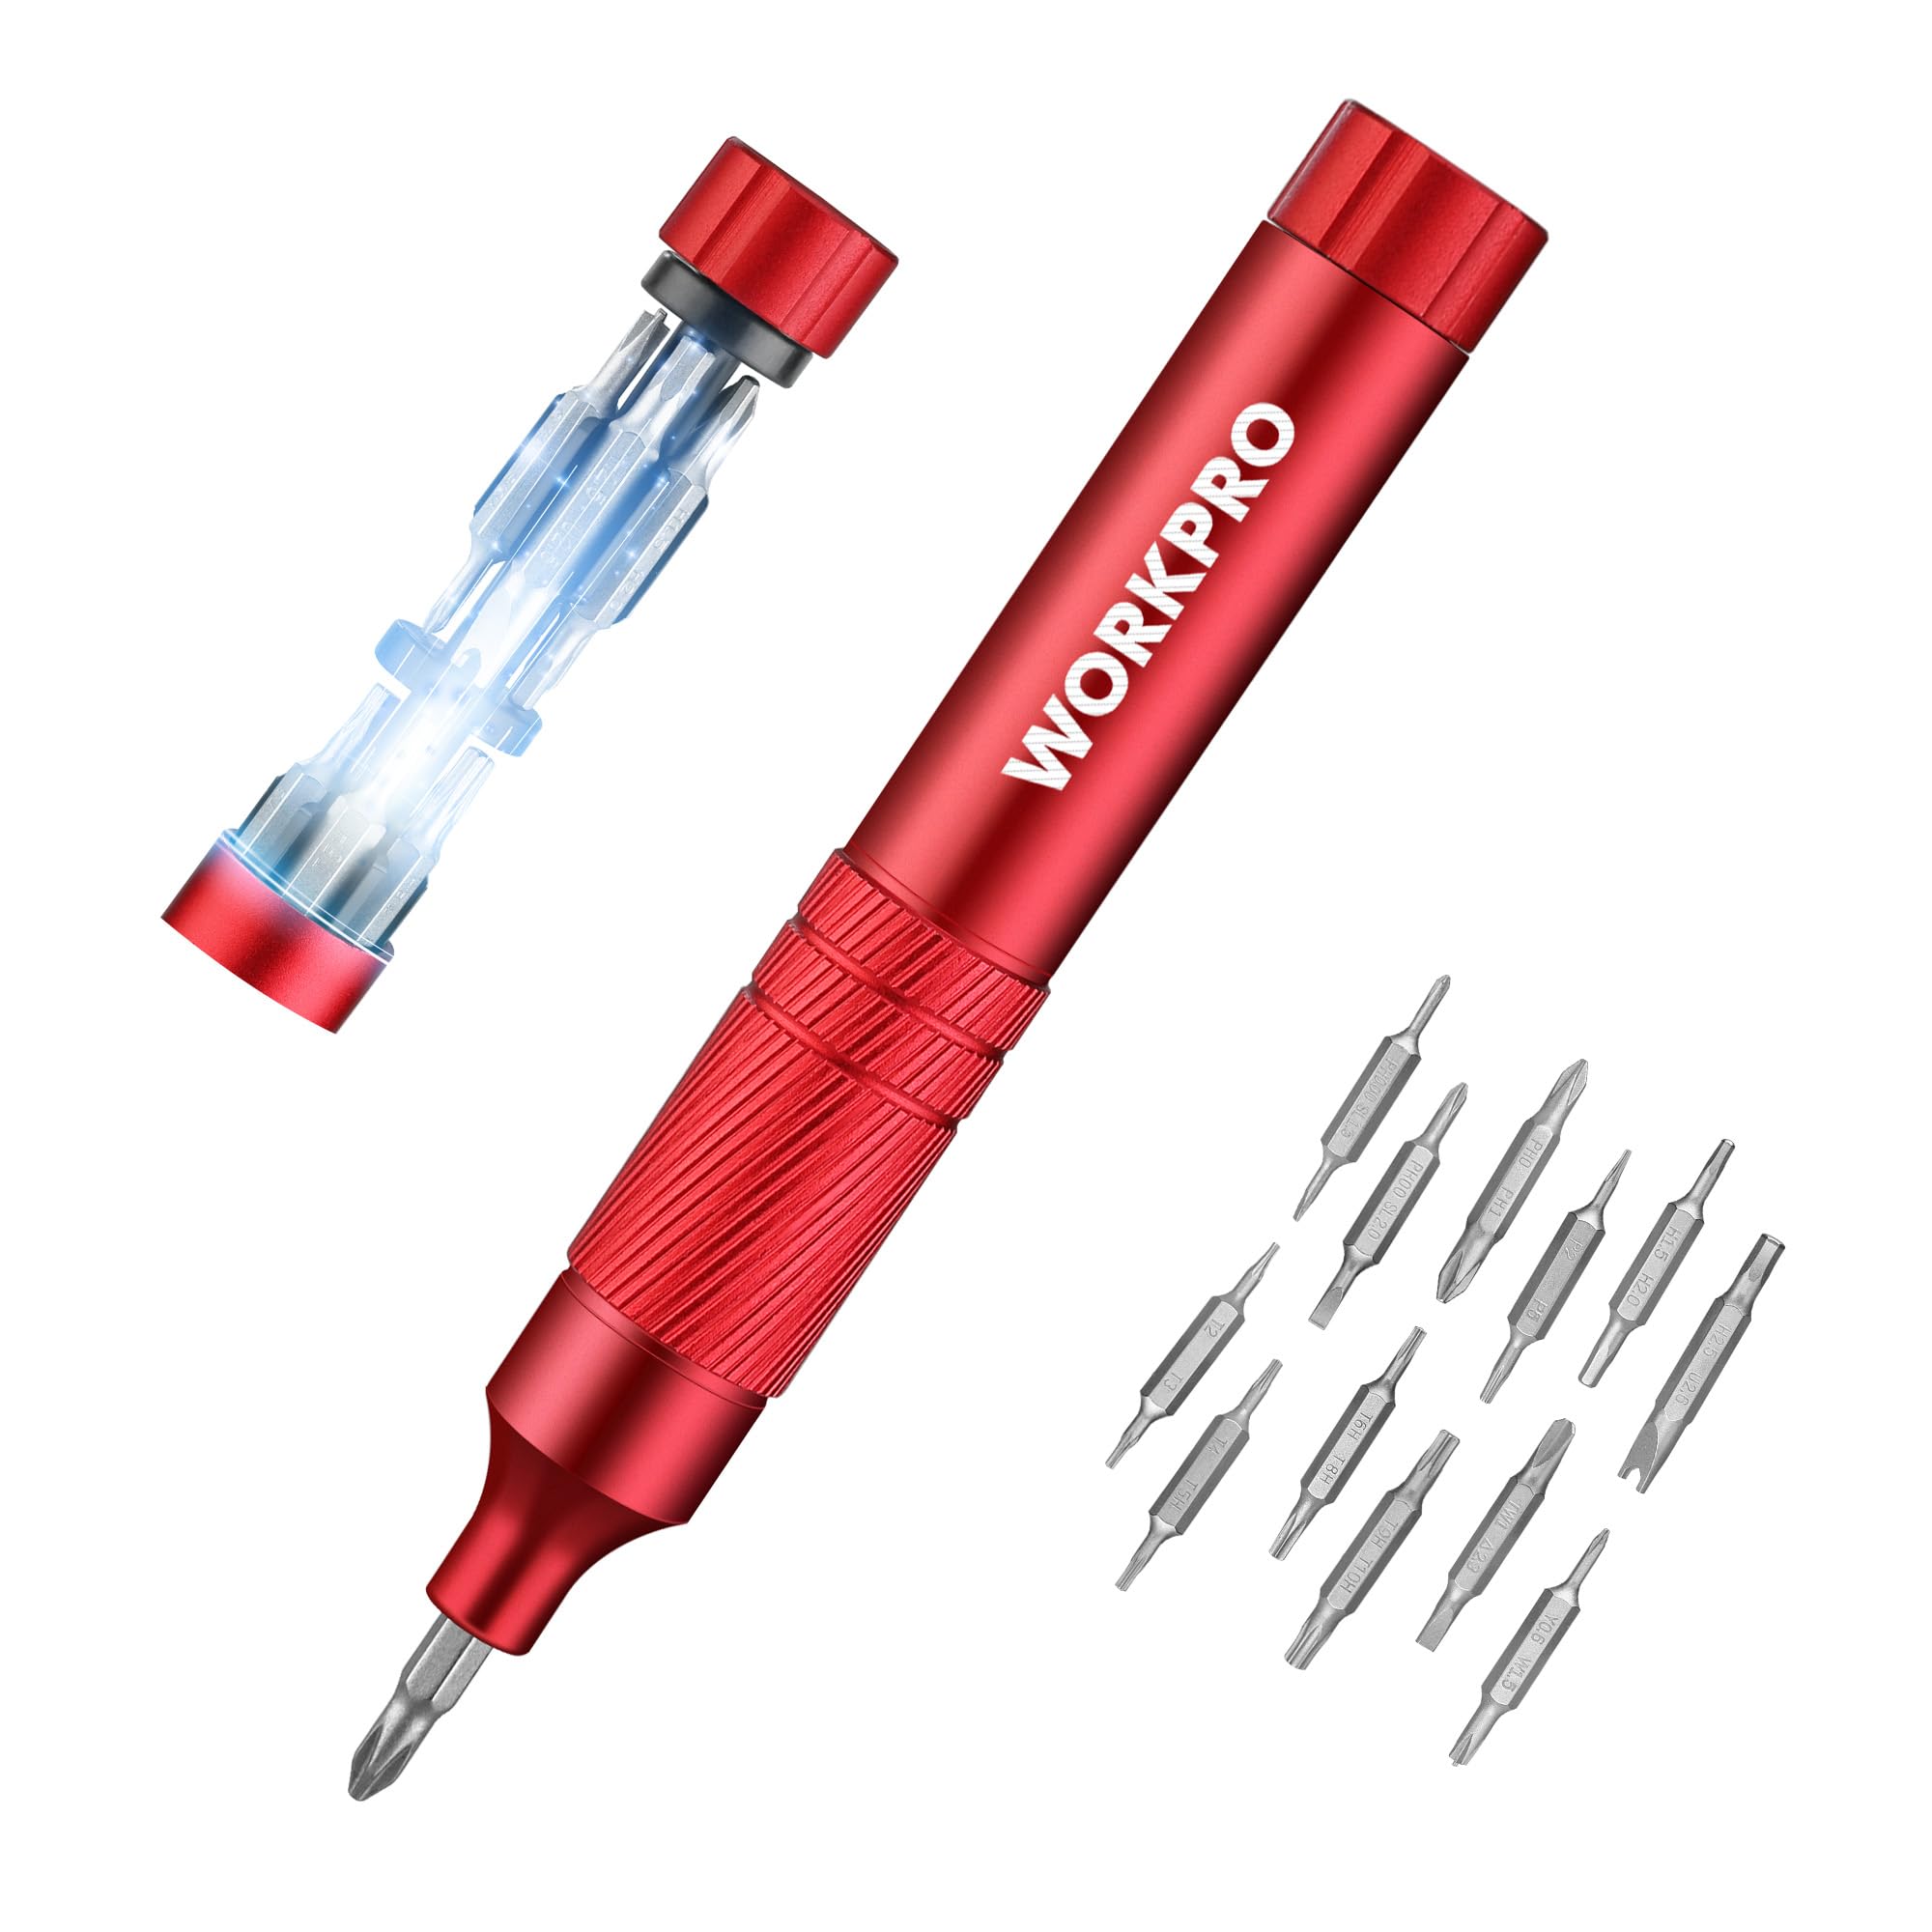
WORKPRO 24-Piece Precision Screwdriver Set
Magnetic tips and ergonomic handles for precise, fatigue-free assembly.
Best for: Tightening small M3 screws without slipping.
Price Range: $12.99
Gorilla Super Glue Gel 20g
Quick-set, gap-filling for reinforcing joints without mess.
Best for: Securing loose fits or adding permanent strength.
Price Range: $5.99