Struggling with tiny parts, missing screws, or tools that kids can't handle? Assembling action figure vehicles like Batmobiles or spaceship playsets shouldn't require a toolbox or adult supervision. This guide solves that pain by showing you simple, hand-only techniques that work for most snap-together kits from brands like Imaginext or Hot Wheels.
You'll learn a foolproof 8-step process to build stable, durable vehicles ready for action figure adventures. No prior experience needed—perfect for beginners, parents, or collectors. Expect smooth snaps, sturdy results, and playtime in under 20 minutes.
We'll cover sorting parts, alignment tricks, testing stability, plus tips to avoid breakage. By the end, your vehicle will roll, transform, or launch figures flawlessly.
▸What You'll Need
- •Tool-free action figure vehicle kit (e.g., snap-together Batmobile or Hot Wheels playset)
- •Clean, flat surface like a table
- •Good natural or lamp lighting
- •Optional: Magnifying glass for tiny parts
- •Optional: Soft cloth or gloves for better grip
Estimated Time: 10-20 minutes
Difficulty: beginner
▸Step-by-Step Instructions
Step 1: Unbox and Inspect All Parts
Carefully open the packaging and lay out every piece on your flat surface. Check for completeness against the box image or parts list—most kits have 10-30 pieces like chassis, wheels, body panels, and accessories.
Why it matters: Missing or damaged parts early saves frustration later. Expect colorful plastic pieces with numbered tabs or icons matching instructions.
Tip: Dispose of packaging immediately to avoid mix-ups.
💡 Tips:
- •Photograph the unboxed parts for reference.
⚠️ Warnings:
- •Don't toss small bags until inspected—tiny screws or pins might hide there (though tool-free kits rarely have them).
Step 2: Sort Parts by Assembly Order
Group pieces into piles: base/chassis (largest), wheels/axles, body panels, interior (seats), and extras (weapons, stickers). Use the instruction manual's exploded diagram as a guide.
This creates a logical flow, reducing search time during builds. Success looks like organized piles mirroring the manual's steps.
Lay them out left-to-right for sequential building.
💡 Tips:
- •Label piles with sticky notes if building over multiple sessions.
Step 3: Review the Instruction Manual
Read the full pictorial guide (usually 1-2 fold-out sheets). Note icons for 'push-snap' or 'twist-lock'—no tools mean relying on these.
Familiarity prevents wrong alignments. What to expect: Simple diagrams showing 5-10 snaps, numbered 1-20.
Pro move: Trace steps with a finger as you go.
💡 Tips:
- •Keep manual open beside your workspace.
⚠️ Warnings:
- •Ignore any 'tools recommended' notes—these kits are designed hand-only.
Step 4: Snap Together the Base Chassis
Align numbered tabs (e.g., 1A to 1B) and gently push until you hear/feel a 'click.' Press evenly with thumbs, wiggling if needed.
This forms the foundation—stability starts here. Success: A rigid frame that doesn't wobble.
Hold at edges to avoid fingerprints on clear parts.
💡 Tips:
- •Warm plastic slightly by rubbing for easier snaps in cold rooms.
⚠️ Warnings:
- •Never force—misaligned tabs crack plastic.
Step 5: Attach Wheels or Thrusters
Slide axles into chassis slots, then pop wheels on with a firm downward push. Rotate to lock if applicable.
Why: Enables movement for play. Expect smooth rolling post-attachment—no grinding.
Test spin each wheel individually.
💡 Tips:
- •Lubricate with a breath of air for stubborn axles.
⚠️ Warnings:
- •Don't over-push; axles can bend.
Step 6: Assemble and Attach Body Panels
Clip side panels over chassis clips, starting from front/back. Interlock adjacent panels before final press.
Builds the exterior shell. Success: Seamless coverage with no gaps.
Align logos for aesthetics.
💡 Tips:
- •Press one side at a time for leverage.
⚠️ Warnings:
- •Skip if panels are directional (left/right marked).
Step 7: Add Seats, Cockpit, and Accessories
Drop seats into slots, snap cockpit cover, attach extras like missiles via clips.
Personalizes for figures. Expect secure holds for 4-6" figures.
Final touch: Apply stickers per manual.
💡 Tips:
- •Test fit your action figure now.
Step 8: Test Stability and Play
Roll/push vehicle across table, load figure, shake gently. Re-snap any loose parts.
Confirms durability. Success: Smooth operation, no detachment during play.
Store upright to maintain shape.
💡 Tips:
- •Celebrate with a test battle!
⚠️ Warnings:
- •Avoid drops until fully tested.
▸Pro Tips
- •Work in bright light to spot alignment notches.
- •Use fingernails for precise leverage on small tabs.
- •Build on carpet to cushion accidental drops.
- •Involve kids by letting them sort/handle large pieces.
- •Breath on cold plastic for flexibility.
- •Keep pieces warm in sunlight pre-assembly.
- •Number parts with marker if manual is unclear.
▸Common Mistakes to Avoid
- •Forcing misaligned parts, causing cracks—always align first.
- •Losing tiny accessories—sort and count upfront.
- •Skipping manual review, leading to backward assembly.
- •Over-tightening snaps, bending clips—gentle pressure only.
- •Assembling on uneven surface, warping base.
▸Troubleshooting
Problem: Part won't snap/click
Solution: Check alignment, wiggle side-to-side, warm plastic. If bent, gently flex back.
Problem: Wheels don't spin freely
Solution: Remove, clean axle slots with cloth, reinsert without excess force.
Problem: Vehicle wobbles after assembly
Solution: Re-check all base snaps; add tape temporarily if clip broken (rare).
Problem: Sticker won't stick
Solution: Clean surface with dry cloth, apply over warm plastic.
Fisher-Price Imaginext DC Super Friends Batmobile
Designed for tool-free snap assembly with large, kid-friendly clips—perfect beginner kit.
Best for: Ideal for first-time builders; assembles in 10 mins with Batman figure included.
Price Range: $19.99
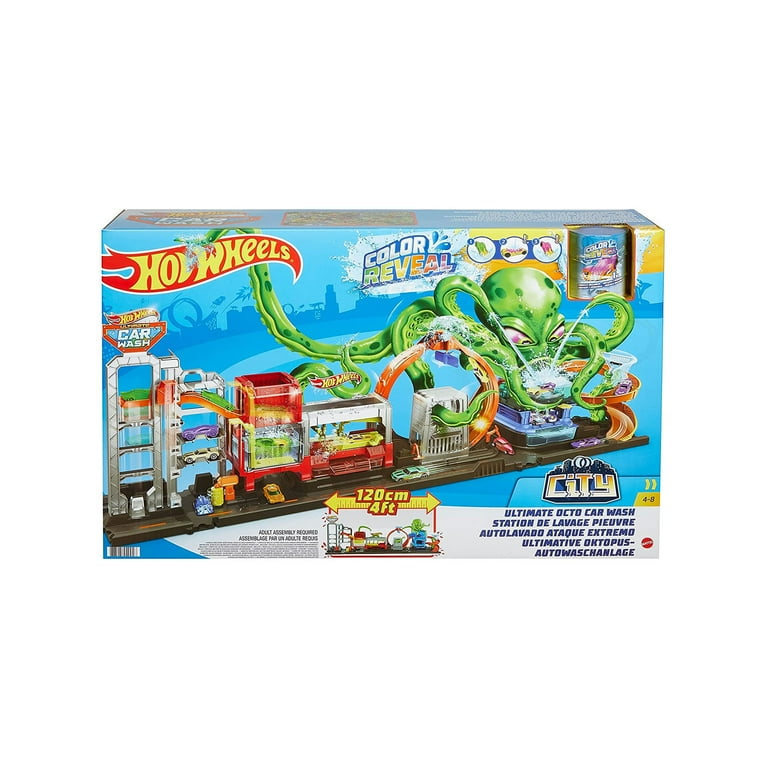
Hot Wheels City Ultimate Octo Garage Playset
Snap-together pieces with intuitive locks, no tools needed for quick setup.
Best for: Great for vehicle + launcher combos; holds multiple cars for group play.
Price Range: $40-50
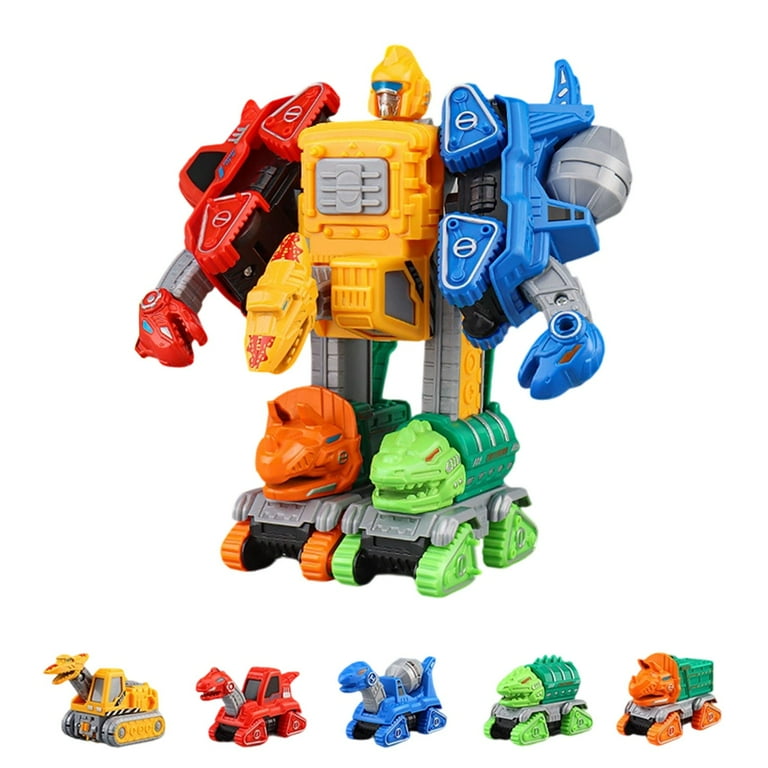
Transformers Rescue Bots Academy Roar and Rescue Dino Playset
All-hand assembly with durable connectors; transforms easily without tools.
Best for: For dinosaur vehicle fans; stable for rough play.
Price Range: $29.99
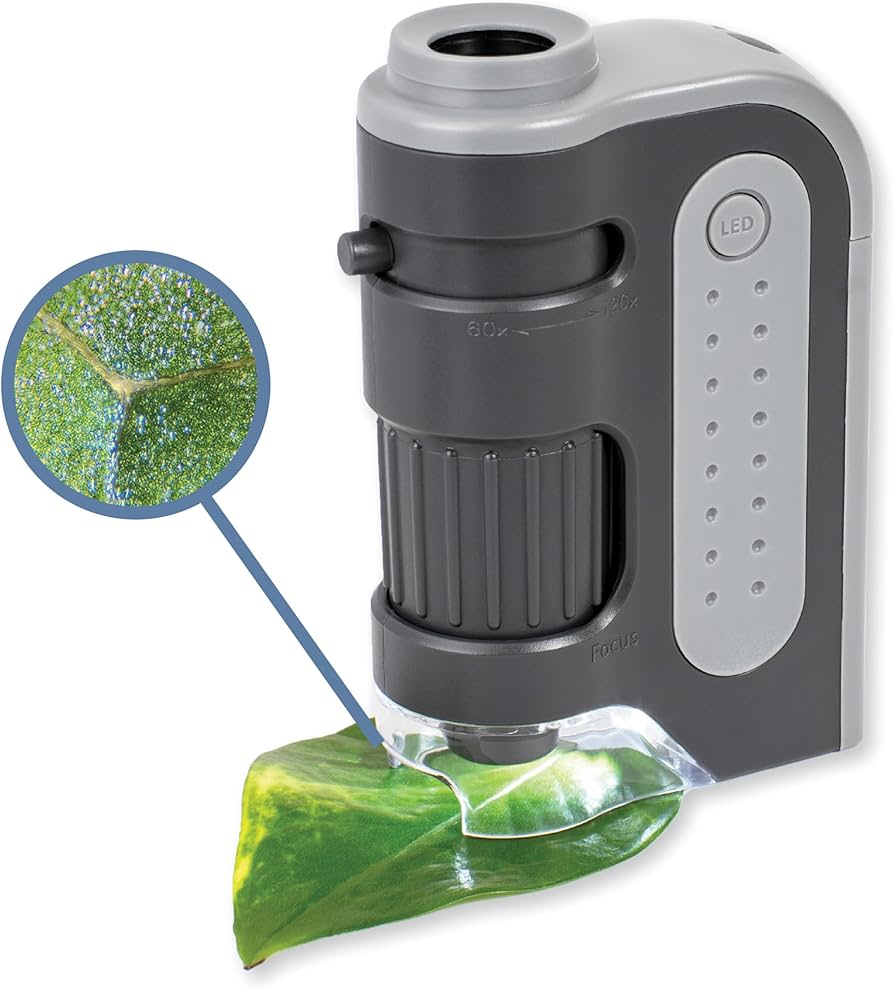
Carson MicroBrite Plus 120x LED Pocket Microscope
Magnifies small tabs/clips for precise no-tool alignment.
Best for: Essential for tiny parts in detailed kits; pocket-sized for easy use.
Price Range: $8.99
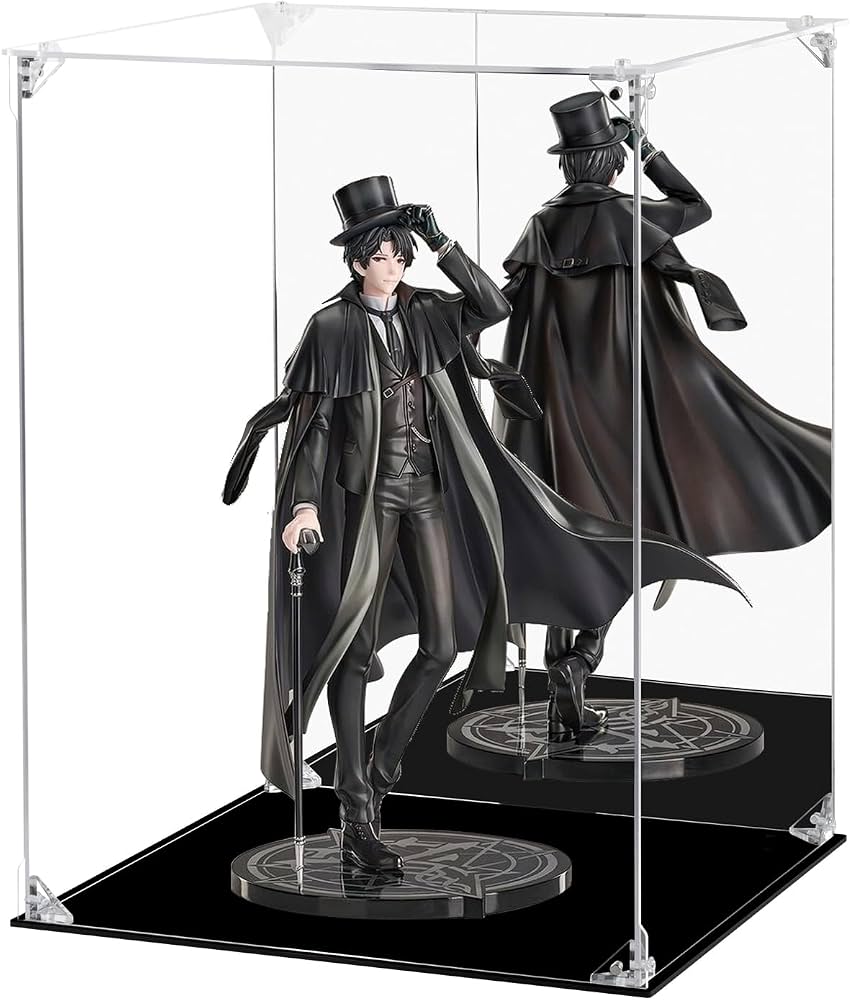
Akstore Action Figures Display Case
Protects assembled vehicles from dust; stackable for collections.
Best for: Post-assembly storage to keep playsets pristine.
Price Range: $15-25