Winged eyeliner is a classic look that can elevate any makeup style, but it's notorious for being difficult to master. Many beginners get intimidated by the idea of drawing a sharp, even flick. The good news? With the right technique, tools, and a bit of patience, you can create a perfect winged liner that complements your eye shape. In this guide, you'll learn a foolproof method using simple steps that build from preparation to cleanup. We'll cover product recommendations, common pitfalls, and troubleshooting tips so you can confidently rock that cat eye. Expect to spend about 15-20 minutes on your first attempt, but with practice, you'll be able to do it in under five!
▸What You'll Need
- •Eyeliner of choice (liquid pen, gel liner with angled brush, or felt-tip liner – recommended for beginners)
- •Magnifying mirror (optional but helpful)
- •Makeup remover or micellar water and cotton swabs (for corrections)
- •Eye primer (optional, helps liner stay put)
- •Tape or business card (optional, to create a clean edge)
- •Concealer and small brush (optional, to clean up and sharpen the wing)
- •Mascara (optional, to finish the look)
Estimated Time: 15-20 minutes (first time), 2-5 minutes with practice
Difficulty: beginner
▸Step-by-Step Instructions
Step 1: Prep Your Eyelids
Start with a clean, oil-free eyelid. Apply an eyeshadow primer if you have one – this prevents smudging and helps the liner glide on smoothly. Set the primer with a translucent powder or a nude eyeshadow to create a dry, even base. If you don't have primer, a thin layer of concealer set with powder works too. This step ensures your liner lasts all day and doesn't transfer to your crease.
💡 Tips:
- •Use a dedicated eye primer for best results; it also helps your shadow stick better.
⚠️ Warnings:
- •Avoid applying heavy moisturizer or oily eye cream before liner – it will cause the liner to skip or smudge.
Step 2: Choose the Right Eyeliner and Tool
For beginners, a felt-tip or pen-style liquid liner is easiest because it offers control and a precise tip. Gel liner in a pot with a fine angled brush gives more flexibility but requires practice. Avoid pencil liners for winged looks – they're harder to get sharp wings. If using a pen, shake it gently before each use to ensure the tip is saturated. Have a cotton swab dipped in makeup remover nearby for quick fixes.
💡 Tips:
- •Test the liner on your hand first to see how it flows. If it's dry or clumpy, replace it.
⚠️ Warnings:
- •Don't pump the pen too much – it can cause air bubbles and uneven flow.
Step 3: Map the Wing with Light Dots
Look straight ahead into a mirror. Using your eyeliner, make a small dot where you want the wing tip to end – typically in line with the outer corner of your eye and the end of your eyebrow. This dot will be the peak of your wing. Then make a second dot along your lash line, about two-thirds of the way from the inner corner to the outer corner. These dots are your guides; they help keep both eyes symmetrical.
💡 Tips:
- •If you have hooded eyes, angle the wing slightly more upward to avoid it getting lost in the fold.
⚠️ Warnings:
- •Don't make the dots too thick – keep them subtle so you can adjust easily.
Step 4: Draw the Wing Line from Dot to Corner
Connect the outer dot to the outer corner of your eye with a thin, straight line. This creates the bottom edge of the wing. Keep your eye open and relaxed while you do this – don't stretch the skin. Use short, feathery strokes for better control. The line should angle upward toward the end of your eyebrow. If you mess up, use a cotton swab dipped in makeup remover to erase and try again.
💡 Tips:
- •Rest your elbow on a flat surface to steady your hand. Tilt your head back slightly for a better angle.
⚠️ Warnings:
- •Avoid pulling your eyelid taut – it will distort the shape and cause the liner to look uneven when you let go.
Step 5: Connect the Wing to Your Upper Lash Line
Now draw a line from the tip of your wing back toward your upper lash line, roughly one-third of the way from the outer corner. This creates the top edge of the wing and forms a small triangle. Fill in this triangle lightly. Then, continue that line along your upper lash line from the outer corner to the inner corner, staying as close to the lashes as possible. Try to keep the line thin toward the inner corner and gradually thicken it toward the wing.
💡 Tips:
- •Use small dots along the lash line and connect them for a smooth line.
⚠️ Warnings:
- •Don't make the line too thick at the inner corner – it can look harsh and make your eyes appear smaller.
Step 6: Fill and Perfect the Wing
Using the tip of your liner, fill in the small triangle you created at the outer corner. Make sure there are no gaps – the wing should be a solid shape. If you need a sharper edge, take a flat concealer brush with a tiny amount of concealer and trace along the bottom of the wing to clean it up. This step transforms a messy wing into a crisp one.
💡 Tips:
- •For a symmetrical look, do both eyes step-by-step rather than finishing one completely.
⚠️ Warnings:
- •Don't overfill – a wing that is too thick can overwhelm your eye shape.
Step 7: Thicken the Line or Add a Second Coat
If you desire a bolder look, go over the line again once the first layer is dry (about 30 seconds). This ensures even color and opacity. Focus on the area from the middle of the eye to the wing – the inner corner should remain thin. For a more dramatic cat eye, slightly extend the wing or thicken it upward. Always let layers dry to prevent smudging.
💡 Tips:
- •Use a magnifying mirror to check for any missed spots along the lash line.
⚠️ Warnings:
- •Too many layers can become cakey and may flake off. Two layers is usually enough.
Step 8: Clean Up and Create Sharp Edges
Dip a pointed cotton swab in micellar water or makeup remover and gently trace along the bottom of the wing to remove any stray liner. You can also use a small angled brush with concealer to carve out a crisp wing shape underneath. This step is especially helpful if you have hooded eyes or want a super-sharp finish. Let the concealer dry, then dust a little translucent powder over it to set.
💡 Tips:
- •Use a clean cotton swab for each eye to avoid transferring makeup.
⚠️ Warnings:
- •Be gentle – rubbing too hard can remove your foundation or eyeshadow.
Step 9: Add Mascara (Optional)
Finish your eye look with a coat of mascara. Curl your lashes first, then apply mascara from root to tip. Focus on the outer lashes to complement the wing. If you have very straight lashes, consider using a waterproof formula to hold the curl. Mascara helps blend the liner with your natural lashes and makes the wing look more cohesive.
💡 Tips:
- •Use a lash comb to separate any clumps before they dry.
⚠️ Warnings:
- •Wait for your eyeliner to be completely dry before applying mascara to avoid smudging.
Step 10: Check Symmetry and Make Final Adjustments
Step back from the mirror and look at your eyes together. Are the wings even? Do they angle similarly? If one wing is slightly higher or longer, you can adjust by adding more liner or cleaning up with remover. Sometimes a tiny difference is not noticeable to others, but if it bothers you, use the concealer trick to add or subtract. Once satisfied, you're done!
💡 Tips:
- •Take a photo with your phone – it often reveals asymmetry that your eyes miss in the mirror.
⚠️ Warnings:
- •Don't obsess over perfection – slight asymmetry is natural and can look charming.
▸Pro Tips
- •Start with a thin line – you can always build it up, but removing excess is harder.
- •Use tape as a guide: place a piece of tape from the outer corner of your eye to your temple, then draw along the edge. Remove tape gently before the liner dries completely.
- •Rest your elbow on a table and your pinky on your cheek to steady your hand.
- •Practice on a piece of paper first: draw small wings to get comfortable with the motion.
- •If you have shaky hands, try a gel liner with a brush – it gives more control than liquid pens.
- •Always keep your eye open and look straight into the mirror when drawing the wing – closed-eye techniques can lead to unwanted curves.
- •Use an eyeshadow that matches your liner to set the liner and increase staying power (e.g., black shadow patted over black liner).
- •Apply a nude or white eyeliner on your waterline to make your eyes look more awake and balance the black wing.
▸Common Mistakes to Avoid
- •Making the wing too long or too thick: Beginners often overestimate the size of the wing. Start small – the wing should be an extension of your lower lash line, not a separate line.
- •Uneven wings: Doing one eye completely before starting the other leads to asymmetry. Work on both eyes simultaneously, step by step.
- •Smudging before the liner dries: Touching or blinking immediately after application can ruin the sharp line. Keep eyes closed or look down for 10-15 seconds after applying.
- •Using the wrong eyeliner type: Pencils are too thick for crisp wings. Stick to liquid or gel formulas for sharp lines.
- •Ignoring your eye shape: A wing that works for almond eyes might not flatter round or hooded eyes. Adjust the angle and thickness accordingly.
▸Troubleshooting
Problem: My hand shakes when drawing the wing.
Solution: Rest your elbow on a flat surface and brace your pinky against your cheek. You can also try sitting down with a mirror placed at eye level.
Problem: The wing smudges or transfers to my upper lid.
Solution: Make sure you set your eyelid with primer and powder. Also, use a waterproof or long-wear eyeliner. Let it dry completely before opening your eye fully.
Problem: My wings don't match each other.
Solution: Use mapping dots (as in Step 3) to ensure symmetry. You can also remove the entire wing with a makeup wipe and start over – don't try to fix one side by overdoing the other.
Problem: The liner skips or looks patchy.
Solution: This usually happens if the eyeliner has dried out or your primer is too oily. Replace your liner if it's old, or shake the pen well. On the eyelid, make sure the surface is matte and powder-free (but not greasy).
Problem: The wing curves down instead of up.
Solution: Draw the wing with your eye open and facing straight ahead. Look at the angle of your lower lash line – the wing should follow that upward direction. If it still droops, use tape to guide a straighter line.
Stila Stay All Day Waterproof Liquid Eyeliner
Highly pigmented, precise felt tip, and truly waterproof – great for beginners because it dries quickly and doesn't smudge.
Best for: Best for creating sharp wings that last all day without touch-ups.
Price Range: $22 - $24
NYX Epic Ink Liner
Super fine tip for ultra-precise lines, excellent pay-off, and a more affordable price point. Perfect for practicing wings.
Best for: Everyday use and practice – easy to control and comes in multiple shades.
Price Range: $7 - $10
e.l.f. Cosmetics No Budge Shadow Stick
Smudge-proof and long-wearing – can be used as a base or even as a liner for a softer look. Great for beginners who struggle with liquid liners.
Best for: Use as a creamy eyeliner that sets quickly; can be blended for a smoky effect or sharpened with a small brush.
Price Range: $5 - $6
Maybelline Eye Studio Master Precise Liquid Eyeliner
Felt-tip pen with a unique flex tip that allows both thin and thick lines. Very user-friendly and budget-friendly.
Best for: Ideal for beginners wanting a drugstore option that performs like high-end liners.
Price Range: $6 - $9
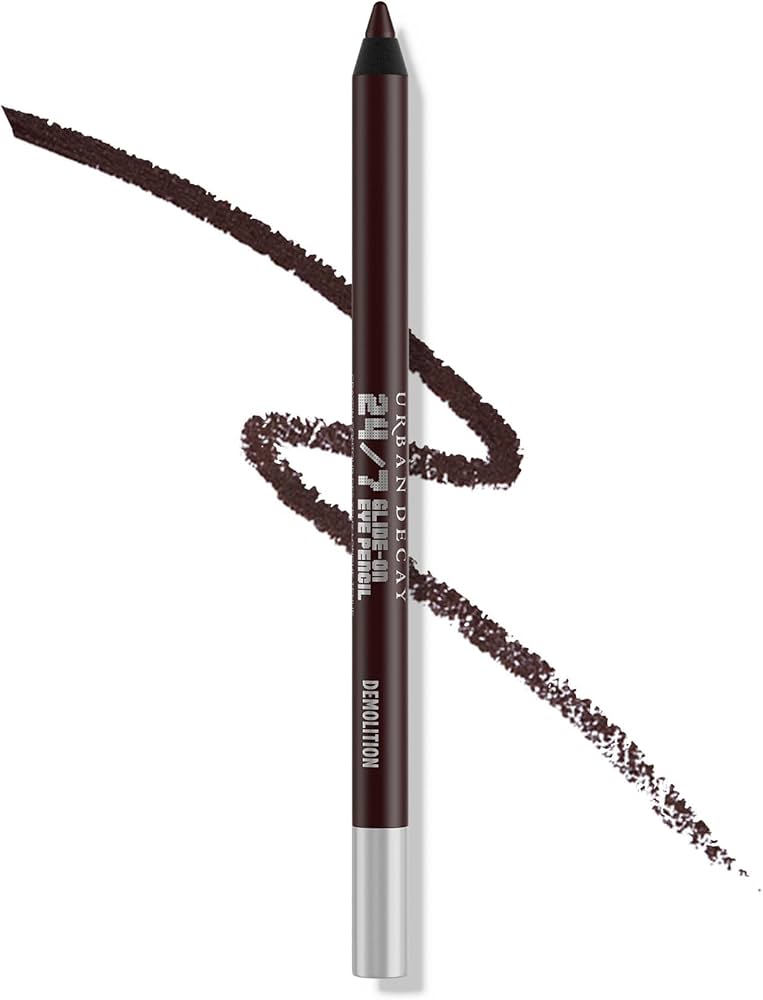
Urban Decay 24/7 Glide-On Eye Pencil
Not for winged tips but excellent for tightlining and smudging along the lash line. Pairs perfectly with a liquid wing for a fuller look.
Best for: Use on the waterline or to fill in gaps between lashes before applying the wing.
Price Range: $20 - $23