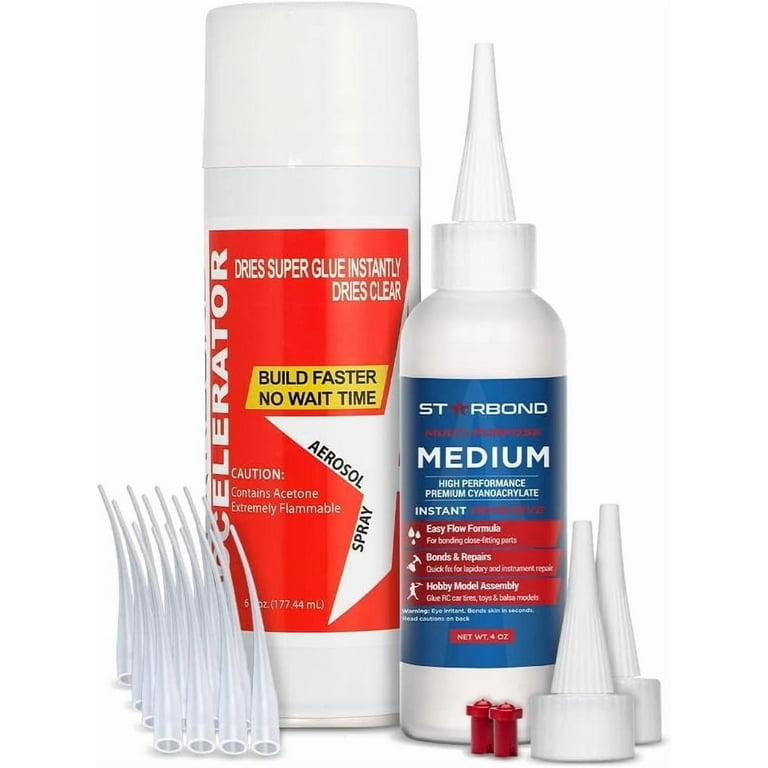
Starbond 4 oz CA Glue Accelerator
DIY repairs, models, crafts needing quick holds.
$12.99
Starbond 4 oz CA Glue Accelerator Ultra-fast activation (3-10 sec bonds), low odor, works with all CA viscosities; top-rated for hobbyists.
Get the App
Better experience on mobile
Learn to use adhesive accelerators with CA glues for instant, ultra-strong bonds that save time on DIY, repairs, and crafts.
Struggling with slow-curing super glue that leaves parts dangling while you wait? Adhesive accelerators solve this by instantly kickstarting the polymerization of cyanoacrylate (CA) glues, creating bonds in seconds instead of minutes. This guide is perfect for intermediate DIYers, hobbyists, and repair pros who want reliable, lightning-fast results.
You'll master the safe, effective application process step-by-step, including prep, application, and troubleshooting. Expect to complete your first bond in under 15 minutes with practice. No more frustration—just rock-solid holds for plastics, metals, wood, and more.
By the end, you'll know exactly when and how to use accelerators without waste or weak joints, boosting your project efficiency.
Estimated Time: 10-15 minutes per bond (plus 5 minutes prep) Difficulty: intermediate
Choose a well-ventilated area, ideally outdoors or under a fume hood, as accelerators release strong vapors that can irritate eyes and lungs. Lay down newspaper or a disposable mat to catch drips. Wear nitrile gloves and safety goggles immediately—these fumes and chemicals are no joke.
Why it matters: Proper setup prevents health risks and mess. Expect a slight chemical smell; if it's overwhelming, improve airflow.
Success looks like: Clean, protected surface ready for work.
💡 Tips:
⚠️ Warnings:
Wipe both surfaces with isopropyl alcohol using a lint-free cloth to remove oils, dust, or contaminants. Let them air dry completely (30-60 seconds). Roughen smooth surfaces lightly with 220-grit sandpaper if needed for better adhesion.
This step is crucial because contaminants weaken bonds, even with accelerators. Expect surfaces to feel tack-free and matte.
Success looks like: Spotless, dry parts that repel water droplets.
💡 Tips:
⚠️ Warnings:
Choose based on project: spray for even coverage on large areas, pump/liquid for precision on small parts, or wipes for portability. Shake well if aerosol.
Accelerators work by providing alkaline activators that trigger CA curing. Match viscosity to glue—thinner for tight gaps.
Success looks like: Activator ready, nozzle unclogged.
💡 Tips:
Lightly mist, pump, or brush accelerator onto only one surface—thin, even coat, no puddles. Hold parts vertically if possible to avoid runoff. Wait 5-10 seconds for it to evaporate slightly.
Why one surface? Excess on both can cause premature curing or blooming (white residue). Expect a wet shine that dries tacky.
Success looks like: Uniform, misty film without drips.
💡 Tips:
⚠️ Warnings:
Add a small drop or bead of CA glue to the untreated surface—enough to fill gaps but not squeeze out excessively. Use medium-viscosity for most jobs.
Glue reacts instantly with accelerator on contact. Expect fizzing or heat upon assembly.
Success looks like: Precise glue bead, no strings.
💡 Tips:
Align and press parts together with 10-30 PSI pressure (firm hand squeeze). Hold for 5-30 seconds—bond forms instantly.
This ensures full contact. Expect warmth and immediate tackiness.
Success looks like: Parts stuck tight; can't pull apart easily.
💡 Tips:
⚠️ Warnings:
After 30 seconds, test gently. Full strength in 24 hours. Wipe any squeeze-out immediately with accelerator or acetone.
Inspect for gaps or white bloom. Cure fully before stress.
Success looks like: Seamless, clear bond holding under twist/pull.
💡 Tips:
Dispose of wipes in sealed bag. Clean tools with acetone. Store products capped, cool, dry.
Prevents accidents. Expect residue to harden fast.
Success looks like: Tidy space, products sealed.
💡 Tips:
⚠️ Warnings:
Problem: Bond not instant or weak
Solution: Check compatibility, reduce accelerator amount, ensure dry surfaces. Retest with fresh materials.
Problem: White powdery residue (blooming)
Solution: Less accelerator, better ventilation. Buff off with fine sandpaper post-cure.
Problem: Cracked or brittle bond
Solution: Too much accelerator or humidity. Use less and store in dry area.
Problem: Fumes too strong
Solution: Switch to pump-style, improve airflow, or work outside.
Ultra-fast activation (3-10 sec bonds), low odor, works with all CA viscosities; top-rated for hobbyists.
Best for: DIY repairs, models, crafts needing quick holds.
Price Range: $12.99
Industrial-grade for metals/plastics, extends CA range to low-energy surfaces.
Best for: Automotive repairs, heavy-duty bonds.
Price Range: $10-15
Reliable spray for even coverage, OEM quality, minimal residue.
Best for: Precision assembly, electronics.
Price Range: $20-25
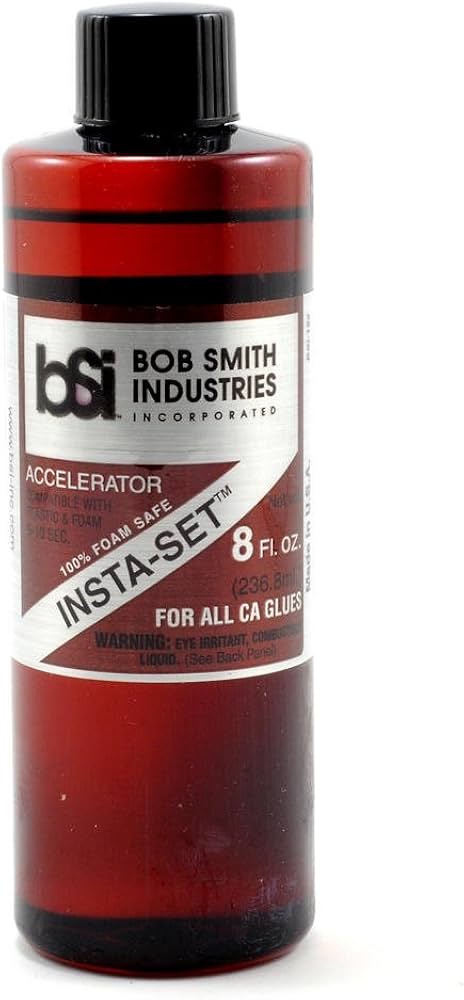
No-fume pump for indoor use, favorite for RC/model building.
Best for: Hobby projects, sensitive areas.
Price Range: $14.99
For gap-filling thick CA, prevents runny messes.
Best for: Woodworking, irregular surfaces.
Price Range: $13.99
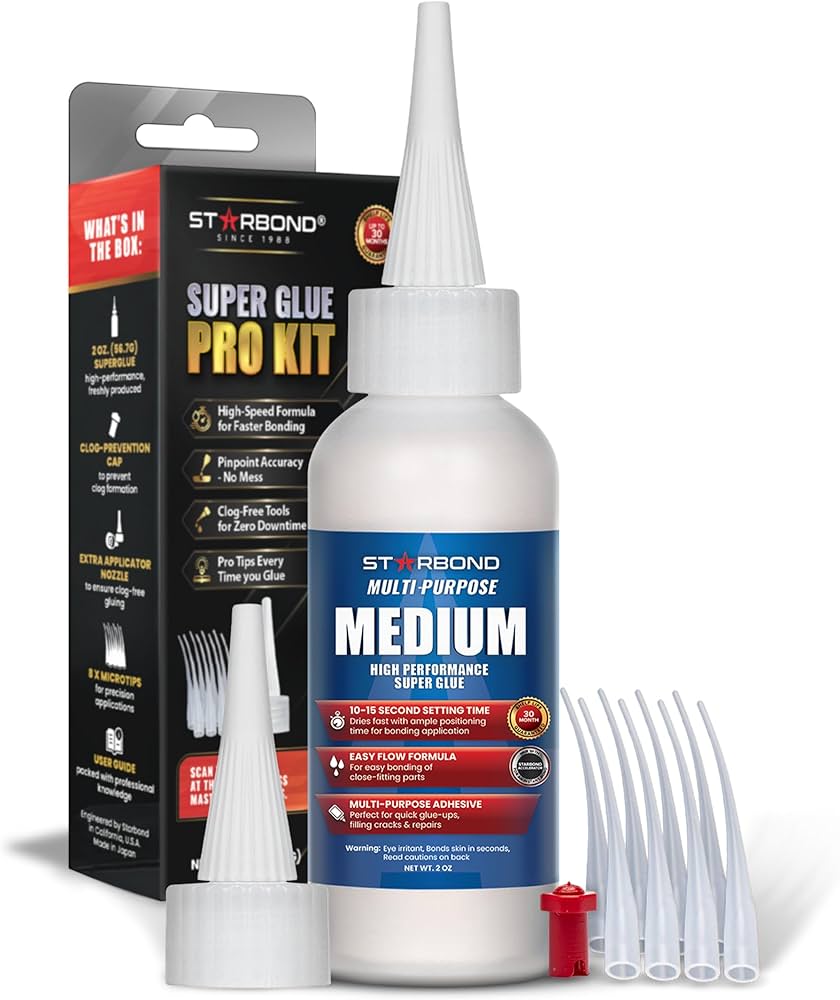
DIY repairs, models, crafts needing quick holds.
Starbond 4 oz CA Glue Accelerator Ultra-fast activation (3-10 sec bonds), low odor, works with all CA viscosities; top-rated for hobbyists.

Automotive repairs, heavy-duty bonds.
Permatex 80054 Surface Prep Activator Industrial-grade for metals/plastics, extends CA range to low-energy surfaces.

Precision assembly, electronics.
Loctite SF 7455 Activator Reliable spray for even coverage, OEM quality, minimal residue.
Hobby projects, sensitive areas.
BSI Insta-Set Accelerator 8 oz Pump No-fume pump for indoor use, favorite for RC/model building.
Woodworking, irregular surfaces.
Starbond EM-150 Thick Accelerator For gap-filling thick CA, prevents runny messes.