Strong winds can turn your cozy outdoor oasis into a chaotic mess, sending chairs flying and tables toppling, leading to costly repairs or injuries. If you've ever chased after a runaway lounge chair during a storm, you know the frustration. Anchoring your outdoor furniture is a simple yet essential step to protect your investment and enjoy worry-free outdoor living.
In this guide, you'll learn multiple effective techniques to anchor accent furniture like loveseats, side tables, and planters against wind, tailored for intermediate DIYers. We'll cover assessing your setup, choosing the right anchoring method, and installing it securely. Whether you have a small balcony or a sprawling deck, these steps will help you create a stable outdoor space.
Expect to spend 1-2 hours depending on the number of pieces, with moderate effort involving basic tools and materials. No advanced skills required, but some physical work like digging or lifting is involved.
▸What You'll Need
- •Heavy-duty sandbags or concrete weights (required for weighted method)
- •Furniture anchors or stakes (required for ground anchoring)
- •Bungee cords or ratchet straps (required for tying down)
- •Drill with masonry bits (if mounting to concrete or wood)
- •Measuring tape and level (for precise placement)
- •Gloves and safety glasses (recommended for protection)
- •Optional: Weatherproof sealant for exposed metal parts
Estimated Time: 1-2 hours
Difficulty: intermediate
▸Step-by-Step Instructions
Step 1: Assess Your Outdoor Space and Furniture
Begin by evaluating the wind exposure of your patio or deck. Walk around your setup during a breezy day to identify which pieces are most vulnerable—lightweight wicker chairs or tall planters often topple first. Measure the dimensions of each furniture item and note the surface type: grass, concrete, wood deck, or gravel.
This step is crucial because it determines the best anchoring method. For example, soft soil suits stakes, while hard surfaces need weights or mounts. Success looks like a clear list of items to secure and an understanding of local wind patterns (check average speeds via weather apps).
Tip: If your area experiences frequent high winds over 30 mph, prioritize all loose items.
💡 Tips:
- •Use a wind speed app to log typical gusts in your location for better planning.
⚠️ Warnings:
- •Avoid anchoring in high-traffic areas where stakes could trip people.
Step 2: Choose the Right Anchoring Method
Select a method based on your assessment: weighted anchors for portability, ground stakes for permanence, or tie-downs for quick fixes. Weighted options like sandbags work well on any surface without drilling, while stakes are ideal for lawns.
Why it matters: The wrong method can fail in storms, causing more damage. Expect to decide on 1-2 methods per piece—for instance, weights for a coffee table and straps for umbrellas. Success: A plan matching your furniture's weight and mobility needs.
For intermediate users, combine methods for extra stability, like weights plus ties.
💡 Tips:
- •Opt for non-permanent methods if you rearrange furniture seasonally.
⚠️ Warnings:
- •Don't use flimsy plastic ties; they snap in strong winds.
Step 3: Gather and Prepare Materials
Collect all tools and anchors, ensuring they're rated for outdoor use and your estimated wind speeds. Fill sandbags with sand or gravel if empty, and test straps for elasticity. Clean furniture legs or bases to ensure secure attachment.
Preparation prevents mid-project delays and ensures durability. What to expect: Materials ready in one spot, with anchors pre-adjusted. Success: Everything organized, no missing pieces.
This step builds confidence for installation.
💡 Tips:
- •Buy UV-resistant materials to prevent sun damage over time.
⚠️ Warnings:
- •Overfill sandbags to avoid bursting; aim for 75% capacity.
Step 4: Position Furniture Securely
Arrange your furniture in its final spot, using a level to ensure even placement. For grouped pieces like a sectional, position them close together to reduce wind catch. Mark anchor points on the ground or furniture with chalk.
Why it matters: Proper positioning minimizes wind resistance. Expect slight adjustments for stability. Success: Furniture level and grouped, with marks for anchors.
Pro tip: Face seating away from prevailing winds if possible.
💡 Tips:
- •Add non-slip pads under legs for extra grip on smooth surfaces.
⚠️ Warnings:
- •Don't overcrowd; allow 2-3 feet between pieces for airflow.
Step 5: Install Weighted Anchors
For the weighted method, place sandbags or concrete blocks at each leg or corner, securing with straps if needed. Distribute weight evenly—about 50 lbs per leg for medium furniture. Tighten connections firmly but not so much as to damage frames.
This is ideal for renters or hard surfaces. Why it matters: Weights counterbalance wind lift. Expect furniture to feel solid. Success: No wobbling when pushed.
If using blocks, wrap in fabric to prevent scratches.
💡 Tips:
- •Use adjustable straps to fine-tune tension as seasons change.
⚠️ Warnings:
- •Avoid placing weights where they block walkways.
Step 6: Drive in Ground Stakes or Anchors
For lawn areas, hammer stakes into the soil near furniture legs, then attach with ties or chains. Use a mallet for 12-18 inch stakes, driving them at a 45-degree angle away from the piece for pull resistance. For decks, drill pilot holes and screw in eye bolts.
Permanence is key here for high-wind zones. What to expect: Firm soil hold after 5-10 strikes per stake. Success: Stakes immovable by hand.
Test by tugging; add more if loose.
💡 Tips:
- •In sandy soil, use longer stakes or auger-style anchors.
⚠️ Warnings:
- •Call 811 before digging to avoid utilities.
Step 7: Secure with Tie-Downs and Straps
Loop bungee cords or ratchet straps through furniture frames and anchors, crossing them for X-pattern stability. Adjust tension so furniture compresses slightly without creaking. For overhead items like umbrellas, tie to fixed points like railings.
This method adds redundancy. Why it matters: Prevents sliding in gusts. Expect a taut setup. Success: Furniture stays put during a manual shake test.
Use locking carabiners for quick release.
💡 Tips:
- •Color-code straps for easy identification per piece.
⚠️ Warnings:
- •Inspect ties monthly for wear; replace frayed ones.
Step 8: Test and Finalize the Setup
Simulate wind by pushing or using a fan on pieces. Walk away and observe for movement. Apply weatherproof sealant to metal parts if exposed. Document your setup for future reference.
Testing ensures reliability. What to expect: Minor tweaks needed. Success: Zero movement in moderate tests, ready for real winds.
Revisit after the first storm.
💡 Tips:
- •Involve a helper for simultaneous pushing on larger sets.
⚠️ Warnings:
- •Don't test in actual high winds; stay safe indoors.
▸Pro Tips
- •Combine methods (e.g., weights + stakes) for ultimate security in windy regions.
- •Store lightweight cushions indoors during storms to reduce wind load.
- •Use reflective tape on anchors at night for visibility and safety.
- •For sloped yards, level furniture first with shims before anchoring.
- •Re-anchor after heavy rain, as soil can soften and loosen stakes.
- •Invest in modular anchors for easy seasonal storage.
- •Monitor local weather forecasts to preemptively tighten setups.
▸Common Mistakes to Avoid
- •Underestimating wind strength: Always over-anchor by 20-30% for safety; check local averages to avoid failures.
- •Using indoor-rated materials: Outdoor elements degrade cheap ties quickly; opt for UV- and weather-resistant options to prevent snapping.
- •Skipping the test phase: Untested setups fail unexpectedly; always simulate wind to catch issues early.
- •Over-tightening straps: This warps frames; aim for firm but flexible tension to allow natural movement.
- •Ignoring surface type: Stakes in concrete without drilling cause breakage; match method to your patio material.
▸Troubleshooting
Problem: Anchors loosen in soft or wet soil
Solution: Switch to weighted anchors or use longer, spiral stakes; re-drive after rain and add gravel for drainage.
Problem: Furniture shifts on slick concrete
Solution: Add rubber grips or non-slip mats under legs; drill for permanent mounts if needed.
Problem: Straps stretch or fray over time
Solution: Inspect quarterly and replace with heavy-duty bungees; store extras for quick swaps.
Problem: High winds still cause tipping
Solution: Reinforce with additional weights; if persistent, consult a professional for custom installations like wall mounts. Seek help if structural damage occurs.
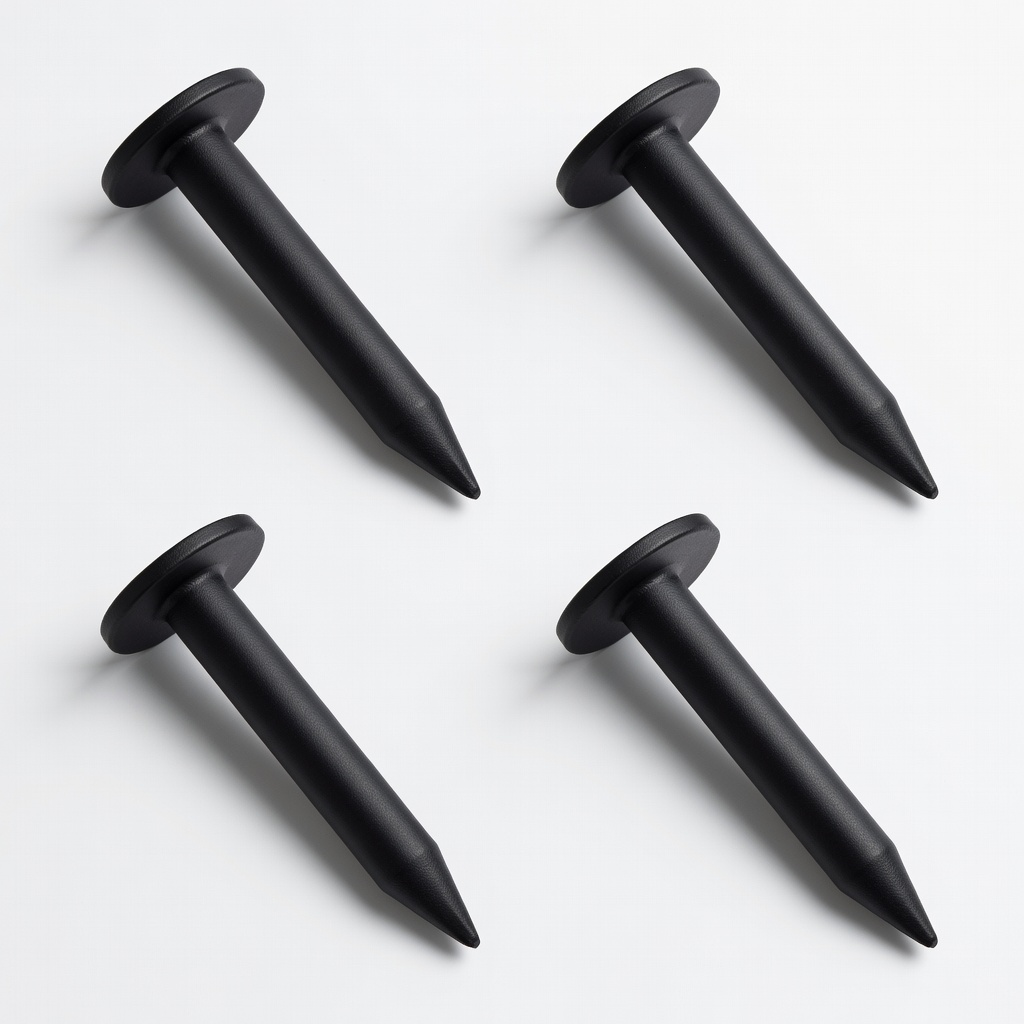
Quictent 4-Pack Heavy Duty Outdoor Furniture Anchor Stakes
These galvanized steel stakes provide strong ground penetration for lawns, preventing uplift in winds up to 50 mph.
Best for: Ideal for anchoring chairs and tables on grass or soil; easy to install with a mallet.
Price Range: $15.99
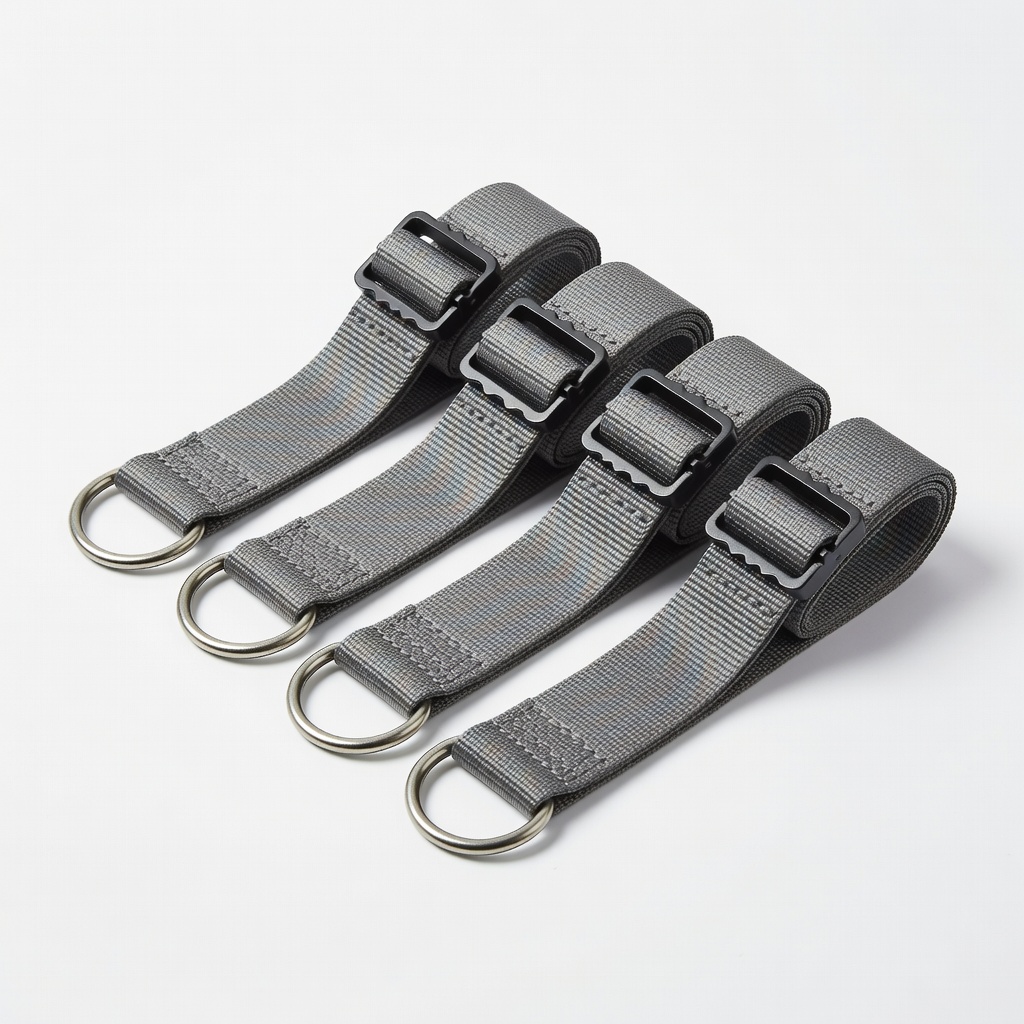
Mytee Products Furniture Anchor Straps (4-Pack)
Durable nylon straps with adjustable buckles secure furniture to anchors without drilling, offering flexibility for various surfaces.
Best for: Great for tying down loveseats or side tables on decks; quick-release for rearrangement.
Price Range: $12.99
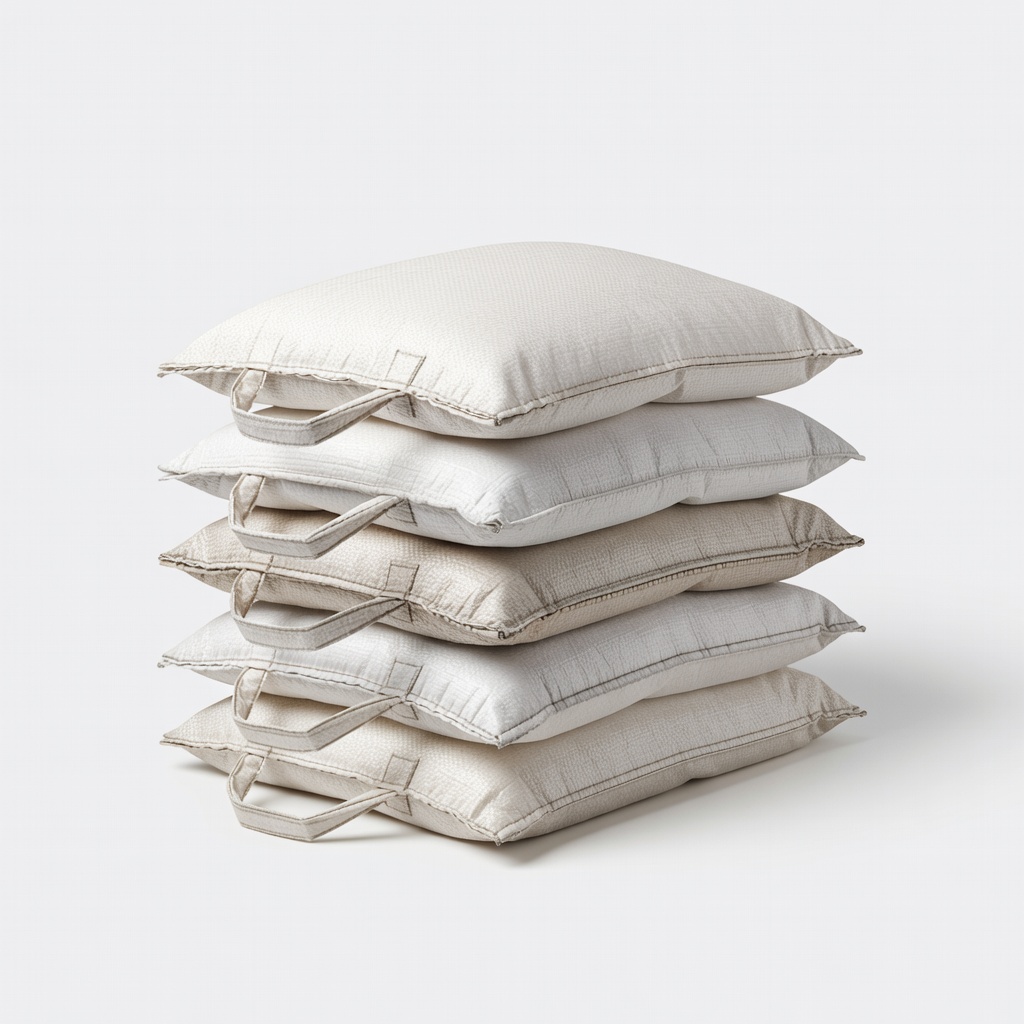
Sandbag Store Heavy Duty Sandbags (6-Pack, Empty)
Fillable with sand for customizable weight, these are UV-resistant and reusable for non-permanent anchoring on any flat surface.
Best for: Perfect for concrete patios or balconies where stakes aren't feasible; add 50+ lbs per bag.
Price Range: $19.99
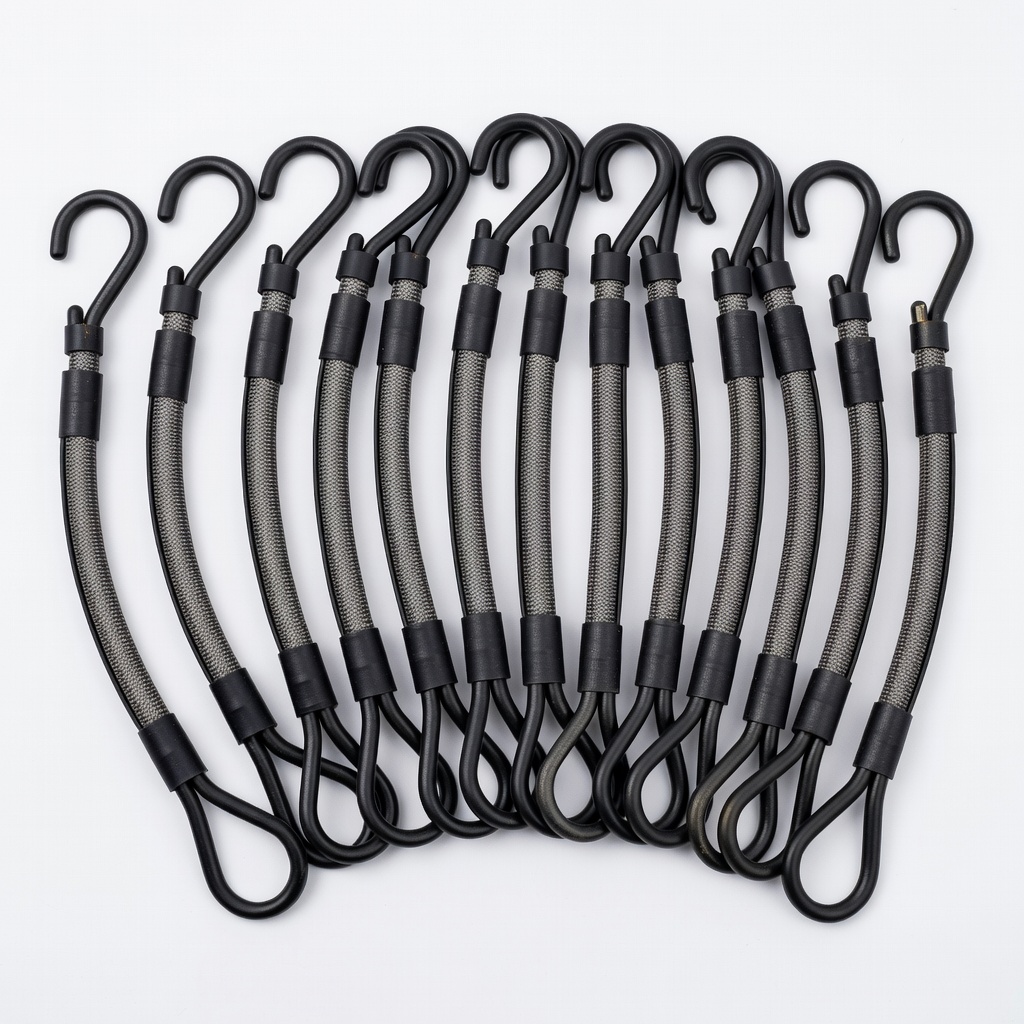
Keeper 01230 18-Inch Waterproof Bungee Cords (10-Pack)
Waterproof and elastic, these cords provide shock-absorbing tension to keep anchors secure without damaging frames.
Best for: Use for connecting furniture to weights or stakes in variable weather; assorted hooks for versatility.
Price Range: $9.99
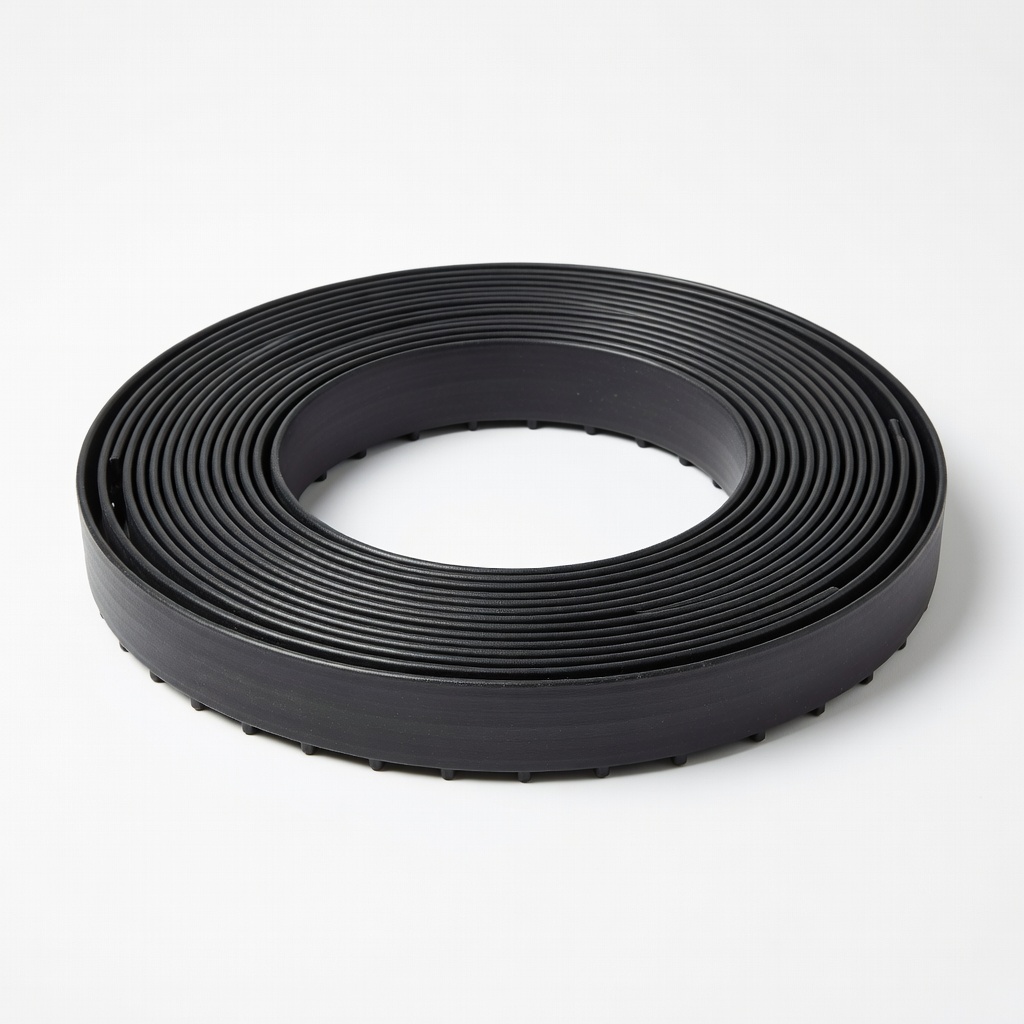
Dimex EasyFlex Plastic Landscape Edging (40 ft)
While primarily for borders, sections can be buried as low-profile weights for lightweight accents, adding stability without visibility.
Best for: Budget option for planters or small tables in gardens; cut to size for custom weights.
Price Range: $24.99