Planning a Disney parks vacation is thrilling, but nothing kills the magic faster than an uncomfortable backpack digging into your shoulders or a bag that's too small for snacks and souvenirs. Choosing the right backpack can make or break your day. This guide walks you through everything you need to know to select the best backpack for Disney parks in 2026—covering size, organization, security, comfort, and must-have features like water bottle pockets and rain covers. Whether you're a first-timer or a seasoned visitor, you'll learn what to look for and why, plus get product recommendations that fit every budget.
▸What You'll Need
- •A backpack (to evaluate or purchase) – look for lightweight fabric, padded straps, multiple compartments
- •A tape measure or soft ruler to check dimensions for locker requirements
- •Your smartphone or notebook to note preferences (color, features, price)
- •Access to Amazon or local stores to compare options
- •Prerequisite knowledge: basic understanding of your own packing needs (e.g., snacks, change of clothes, phone charger)
Estimated Time: 45 minutes to 1 hour to read the guide and research backpacks
Difficulty: beginner
▸Step-by-Step Instructions
Step 1: Understand Disney’s Bag Policy
Before you even start shopping, know the rules. Disney allows bags up to 24" long x 15" wide x 18" high, though smaller bags under 18" x 14" x 9" are easiest for rides. All bags are subject to security screening—so you want easy-access compartments. See-through bags or those with quick-open pockets speed up entry. Why this matters: A bag that's too large may be turned away, and a difficult-to-search bag causes delays. Check the official Disney website for 2026 updates, as policies occasionally change.
💡 Tips:
- •A bag under 18" x 14" x 9" can usually be stored at your feet or in a locker.
- •If you carry a small bag, consider a 10-14 liter daypack for maximum flexibility.
⚠️ Warnings:
- •Don't assume all backpacks are allowed – oversized hiking packs may exceed size limits.
Step 2: Decide on Size: 15–20 Liters Is Sweet Spot
Most Disney-goers find that a 15 to 20-liter backpack is perfect. It fits snacks, a light jacket, power bank, sunscreen, and a water bottle without being bulky. Smaller (10L) works for minimalists, while larger (25L+) can be heavy after hours of walking. Use a liter-to-dimensions chart: 15L ≈ 17" x 12" x 8". Why this matters: Overpacking leads to a sore back; underpacking means buying expensive snacks all day.
💡 Tips:
- •Pack in advance: fill your potential bag with what you'd bring to test comfort.
⚠️ Warnings:
- •Avoid bags that are too deep (more than 9") as they hit your back and make you sweat more.
Step 3: Prioritize Comfort: Padded Straps and Back Panel
You'll be walking 8–12 miles per day. Look for padded, contoured shoulder straps (2"+ wide) and a breathable mesh back panel. Sternum straps help distribute weight, and a hip belt (on larger bags) reduces shoulder strain. Why this matters: Unpadded straps dig into your shoulders, and a non-breathable back makes you sweat profusely in the Florida sun.
💡 Tips:
- •Try on the backpack with weight inside before buying.
- •Consider a bag with a hidden rain cover that doubles as extra padding.
⚠️ Warnings:
- •Avoid cheap foam straps that flatten quickly – they lose cushioning after a few hours.
Step 4: Choose Organization: Multiple Compartments and Pockets
A main compartment, a front zippered pocket for small items, and side mesh pockets for water bottles are essential. Bonus: a padded tablet sleeve, a quick-access phone pocket on the strap, and a hidden security pouch. Why this matters: Fumbling for items in a single-compartment bag wastes time and can hold up your party. Quick access to hand sanitizer, snacks, or phone is key.
💡 Tips:
- •Look for a key clip – attaching keys or sunglasses case prevents losing them.
⚠️ Warnings:
- •Too many small pockets can actually be confusing – stick to 3–4 well-placed ones.
Step 5: Consider Security: RFID Blocking and Lockable Zippers
Disney parks are generally safe, but crowds attract pickpockets. Backpacks with RFID-blocking pockets protect your credit cards/passport. Zippers that can be secured with a small lock or clip deter opportunistic theft. Some bags have hidden zippers or slash-proof materials. Why this matters: You don't want to worry about your wallet while riding Space Mountain or watching fireworks.
💡 Tips:
- •Use a small carabiner to clip two zipper pulls together – quick and effective.
- •Keep valuables in an interior pocket, not the outer bottle holder.
⚠️ Warnings:
- •Avoid bags that only have one lockable compartment – spread out your valuables.
Step 6: Check Material: Lightweight, Water-Resistant, Durable
Rain showers and water rides (Splash Mountain, etc.) are common. Look for backpacks made of water-resistant nylon or polyester (e.g., 210D – 420D denier). Avoid heavy canvas – it soaks up water. A built-in rain cover is a huge plus for sudden downpours. Why this matters: Wet gear is uncomfortable and can ruin electronics. A lightweight fabric keeps total weight down (aim for under 1 lb / 450g for a 15L bag).
💡 Tips:
- •Test water resistance by sprinkling water on the fabric – water should bead up.
⚠️ Warnings:
- •Water-resistant is not waterproof – pack valuable electronics in a ziplock bag.
Step 7: Evaluate Closure Type: Zippers vs. Drawstrings vs. Rolltops
Most Disney backpacks use zippers for security and ease. Drawstring backpacks are light but offer no security and dig into shoulders when loaded. Rolltop backpacks are stylish but slow to access. Recommendation: Stick with zippered backpacks – look for two-way zippers so you can reach in from either side. Why this matters: Quick access during parades or to grab a snack without taking the bag off.
💡 Tips:
- •Check zipper quality – metal zippers last longer than plastic but can be heavier.
⚠️ Warnings:
- •Drawstring bags can cause items to spill if not tied tightly – avoid for valuables.
Step 8: Test the Weight Distribution: Walk and Twist
Once you have a candidate, load it with typical items (water bottle, jacket, snacks, phone charger) and wear it for 10 minutes. Walk around, twist, bend over. The bag should stay close to your back and not sway. Adjust straps so the weight sits on your upper back (not lower spine). Why this matters: A bag that swings throws off your balance and causes fatigue.
💡 Tips:
- •If you can, simulate waiting in line by standing still for 5 minutes – note if straps slip.
⚠️ Warnings:
- •Don't buy a bag that feels heavy when empty – it will feel worse with gear.
Step 9: Consider Ride Compatibility: Smaller Is Better
On many Disney rides, you'll keep your backpack on your lap or under your feet. Some rides (like Tron or Flight of Passage) require you to store loose articles in lockers or pouches. A smaller backpack (15L) fits better. If you have a larger bag, you'll need to rent a locker (additional cost per day). Why this matters: Constantly taking on/off a big bag is annoying; plus you might have to buy a locker.
💡 Tips:
- •Wear your backpack on the front for tight rides to avoid hitting seat backs.
⚠️ Warnings:
- •Some rides have weight limits for bags stored on the vehicle – check ride policies.
Step 10: Make Your Final Decision: Compare Top Options
After evaluating size, comfort, organization, security, and material, list your top 3 backpacks. Read recent reviews from Disney visitors (check forums like Disboards or Reddit). Prioritize bags that are one-year or newer to get 2026-relevant advice. Why this matters: Newer models may have improved features like more breathable mesh or better water resistance.
💡 Tips:
- •Buy from a retailer with easy returns – you can test at home before the trip.
⚠️ Warnings:
- •Avoid counterfeit bags sold on third-party sites – stick to Amazon or official brand stores.
▸Pro Tips
- •Use packing cubes to organize items – they compress clothes and make it easy to switch bags.
- •Attach a hand sanitizer and a small sunscreen to your backpack’s front clip via a carabiner for quick access.
- •Freeze a water bottle overnight and use it as an ice pack – it will melt and provide cold water later.
- •Keep a small ziplock bag for valuables you remove for security check – you can stuff it in a pocket.
- •Wear your backpack on the front when in tight crowds to prevent theft and keep it secure.
- •Bring a reusable shopping bag inside your backpack – great for souvenirs without overstuffing the main bag.
- •Test your backpack with a full water bottle to ensure side pockets are deep enough not to spill.
▸Common Mistakes to Avoid
- •Buying a bag too large – leads to overpacking, back pain, and ride restrictions.
- •Choosing style over comfort – a cute bag with thin straps causes shoulder pain mid-afternoon.
- •Ignoring water resistance – unexpected rain or water rides soak electronics and snacks.
- •Forgetting security features – easy-access outer pockets are prime targets for pickpockets.
- •Buying without checking dimensions – bag may exceed Disney’s size limit at security.
▸Troubleshooting
Problem: My backpack is making my back sweaty.
Solution: Switch to a bag with a ventilated mesh back panel. Alternatively, wear a moisture-wicking shirt and consider a bag with a suspended mesh back that creates an air gap.
Problem: The bag doesn't fit under the seat on rides.
Solution: Use a smaller daypack (under 18"x14"x9") or rent a locker. If you're stuck, wear the bag on your front to reduce bulk.
Problem: Zippers keep jamming or breaking.
Solution: Choose bags with YKK zippers (a sign of durability). If it's already broken, you can use a small pliers to gently straighten the zipper track, but replacement is best.
Problem: Items fall out of side bottle pockets when I bend over.
Solution: Look for pockets with elastic tops or cinch cords. Use a carabiner to attach the bottle to the bag, or switch to a bag with deeper pockets.
Problem: Rain soaked through the bag without a cover.
Solution: Buy a universal rain cover (sized for your bag's liters) from Amazon, or pack a dry bag for electronics.
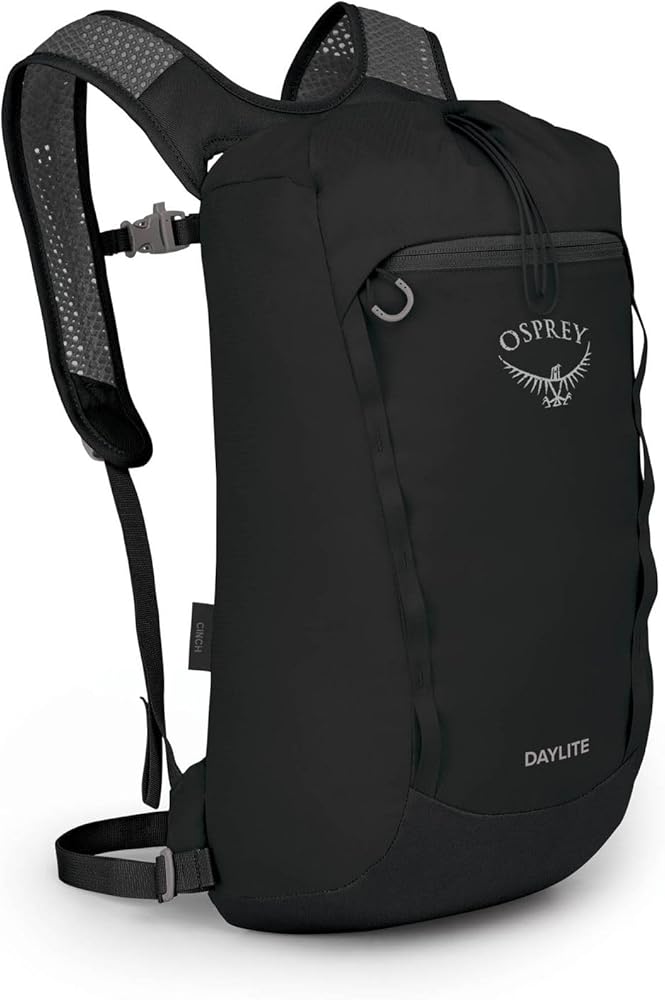
Osprey Daylite Daypack (13L/20L)
Lightweight, comfortable, with excellent back ventilation and a water bottle pocket. Comes in 13L and 20L sizes – perfect for Disney.
Best for: Ideal for a minimalist day at the park with a jacket, snacks, and a phone.
Price Range: $60–$85
Herschel Novel Duffle Backpack
A stylish duffle-backpack hybrid with a large main compartment, padded laptop sleeve, and a drawstring closure. Water-resistant material.
Best for: Great for carrying souvenirs and a change of clothes. The duffle shape makes it easy to open for security checks.
Price Range: $80–$110
SwissGear Sion Backpack (19L)
Affordable, well-organized with multiple pockets including a padded tablet compartment and side mesh bottle holders. Has a lockable zipper.
Best for: Budget-friendly option for families – enough space for a family’s snacks and water bottles.
Price Range: $35–$50
Nike Utility Power Backpack (20L)
Durable, sporty design with a large main compartment, front zip pockets, and a padded back. Has reflective details for evening safety.
Best for: Suitable for active Disney days – comfortable for walking and light enough to run with.
Price Range: $50–$70
Travelon Anti-Theft Classic Backpack (15L)
Designed for security: RFID blocking pockets, locking zippers, slash-resistant straps and body, and a cut-resistant shoulder strap.
Best for: Best for those worried about pickpockets – great for carrying passports and wallets.
Price Range: $65–$90