
Woodland Scenics Earth Color Kit
Base terrain for any environment, from dirt roads to alien planets.
$20-$25
Woodland Scenics Earth Color Kit Versatile paints and earth materials for authentic ground texturing.
Get the App
Better experience on mobile
Elevate your custom action figure dioramas with top accessories for realistic terrain, lighting, and props that bring scenes to life.
Action figure collectors love displaying their heroes in static poses, but custom dioramas transform collections into immersive storytelling worlds—like a Marvel battlefield or Star Wars outpost. Without the right accessories, dioramas look flat and uninspired, leaving your figures feeling lost. This guide solves that by revealing the best accessories tailored for intermediate builders.
You'll learn the top categories of accessories, why they matter, and how to integrate them for pro-level results. We'll break down selections with real examples, tips for sourcing, and product picks. Expect to spend 1-2 hours planning your first enhanced diorama—no advanced skills needed beyond basic gluing and painting.
By the end, you'll have a shopping list and blueprint to create dynamic scenes that wow at conventions or on shelves.
Estimated Time: 1-2 hours to plan and source; 4-8 hours to build a basic diorama Difficulty: intermediate
Terrain forms the foundation of any diorama, mimicking environments like rocky mountains, urban streets, or forest floors. For action figures, choose scalable materials like EVA foam or extruded polystyrene sheets that match 1:12 or 1:18 scales.
Why it matters: Realistic ground prevents figures from looking like they're floating. Cut foam into hills or ruins, then layer with sand, gravel, or flock grass for texture. Expect a sturdy base 12-24 inches wide for 4-6 figures.
Pro builders stack layers for depth—think a crashed spaceship on uneven ground.
💡 Tips:
⚠️ Warnings:
Ground cover like static grass, ballast, or Diorama Texture Paint adds lifelike details. Products from Woodland Scenics scatter easily with applicators.
This elevates immersion: A barren base bores viewers, but tufts of grass or mud puddles sell the scene. Apply in layers—glue ballast first, then flock with a sieve. Results feel rugged and battle-worn, perfect for dynamic poses.
💡 Tips:
Props like crates, weapons racks, or vehicles scale your world. 3D-printed or kitbashed items from brands like Super7 fit seamlessly.
Why essential: Props give figures context—a Batman on a gargoyle needs gothic ledges. Source from hobby shops; resize with sandpaper. Expect modular pieces for endless reconfiguration.
⚠️ Warnings:
Mini LED strips or fiber optics create mood—spotlights for heroes, flickering for explosions. Battery-powered kits avoid wiring hassles.
Lighting transforms flat displays: Shadows add depth, glows highlight details. Position under shelves or in recesses. You'll see poses pop with realistic ambiance.
💡 Tips:
Clear acrylic stands or risers elevate figures securely. Multi-pose options from Tamashii Nations support dynamic stances.
Prevents wobbling: Figures stay mid-jump without glue damage. Layer risers for multi-level scenes like a skyscraper fight.
Paints, powders, and tufts for battle damage or explosions. Citadel weathering kits excel here.
Finishes the story: Dust on boots or scorch marks sell action. Dry-brush for subtlety; results look professionally aged.
💡 Tips:
⚠️ Warnings:
Glue elements to a plywood or foam board base, ensuring stability. Add backdrops for infinity depth.
This ties it together: Test poses, adjust sightlines. Expect a shelf-ready masterpiece ready for photos.
Problem: Figures won't stay posed on uneven terrain.
Solution: Embed wire armatures in foam or use poseable stands; add non-slip pads.
Problem: Paint chipping after assembly.
Solution: Apply flexible varnish and avoid rigid glues; build in sections.
Problem: Diorama too heavy for shelf.
Solution: Use lightweight foam over wood; hollow out dense areas.
Problem: Lighting too bright or hot.
Solution: Dim with resistors or use low-voltage LEDs; add diffusers.
Versatile paints and earth materials for authentic ground texturing.
Best for: Base terrain for any environment, from dirt roads to alien planets.
Price Range: $20-$25
Flexible, easy-to-cut foam for custom hills and walls.
Best for: Building modular terrain that withstands handling.
Price Range: $15-$20
Clear, adjustable stands perfect for 6-inch figures.
Best for: Stable posing on risers without damaging feet.
Price Range: $10-$15
Battery-powered, dimmable lights for dramatic effects.
Best for: Illuminating hidden scenes or figure highlights.
Price Range: $12-$18
Quick-drying, matte finish for realistic weathering.
Best for: Detailing props and bases post-assembly.
Price Range: $3-$5
Base terrain for any environment, from dirt roads to alien planets.
Woodland Scenics Earth Color Kit Versatile paints and earth materials for authentic ground texturing.
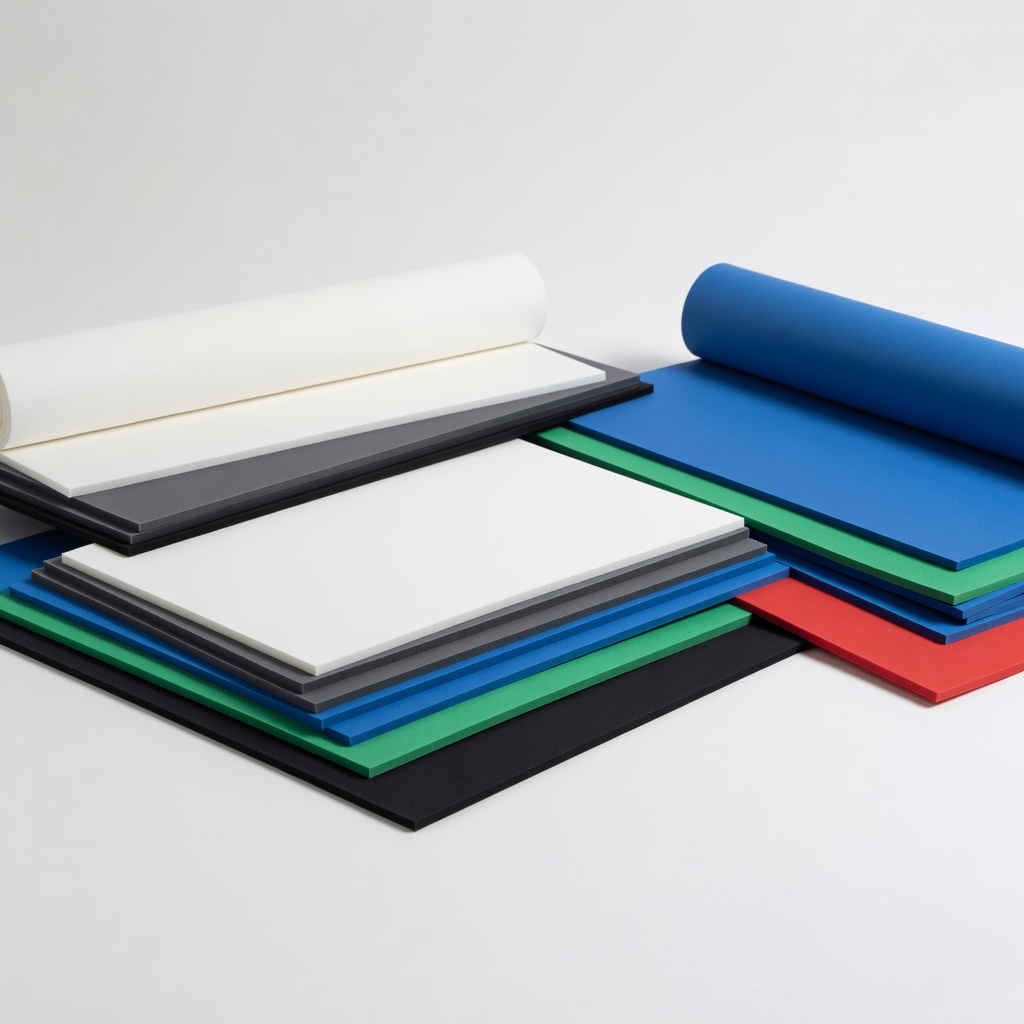
Building modular terrain that withstands handling.
APEX Hobby Supplies EVA Foam Sheets Flexible, easy-to-cut foam for custom hills and walls.
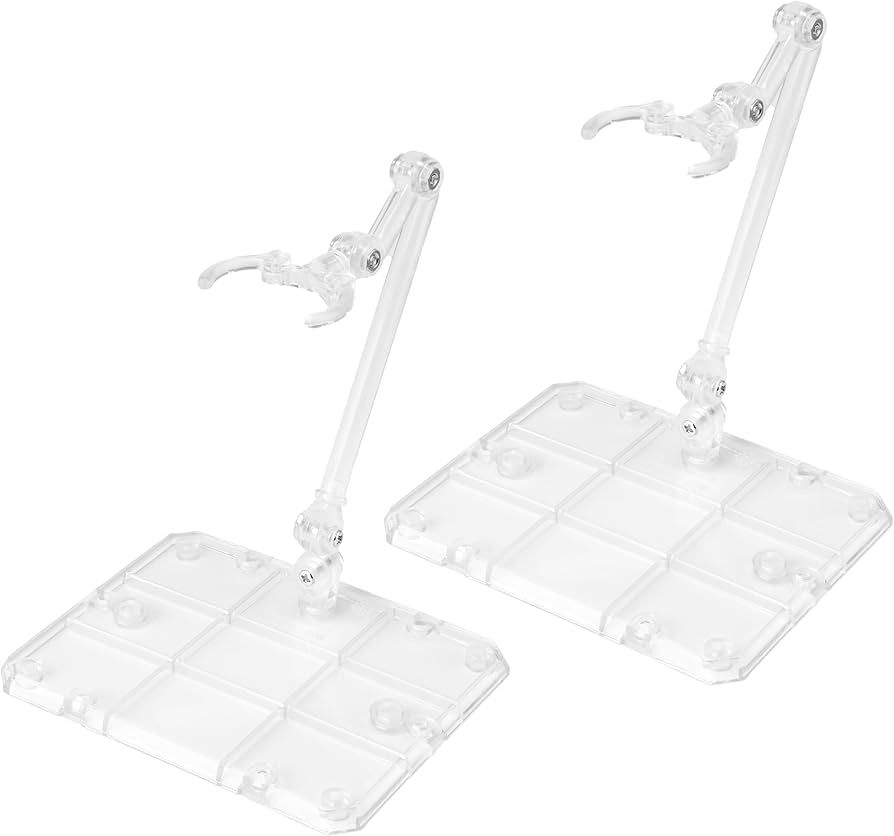
Stable posing on risers without damaging feet.
Tamashii Nations Display Stand Set Clear, adjustable stands perfect for 6-inch figures.
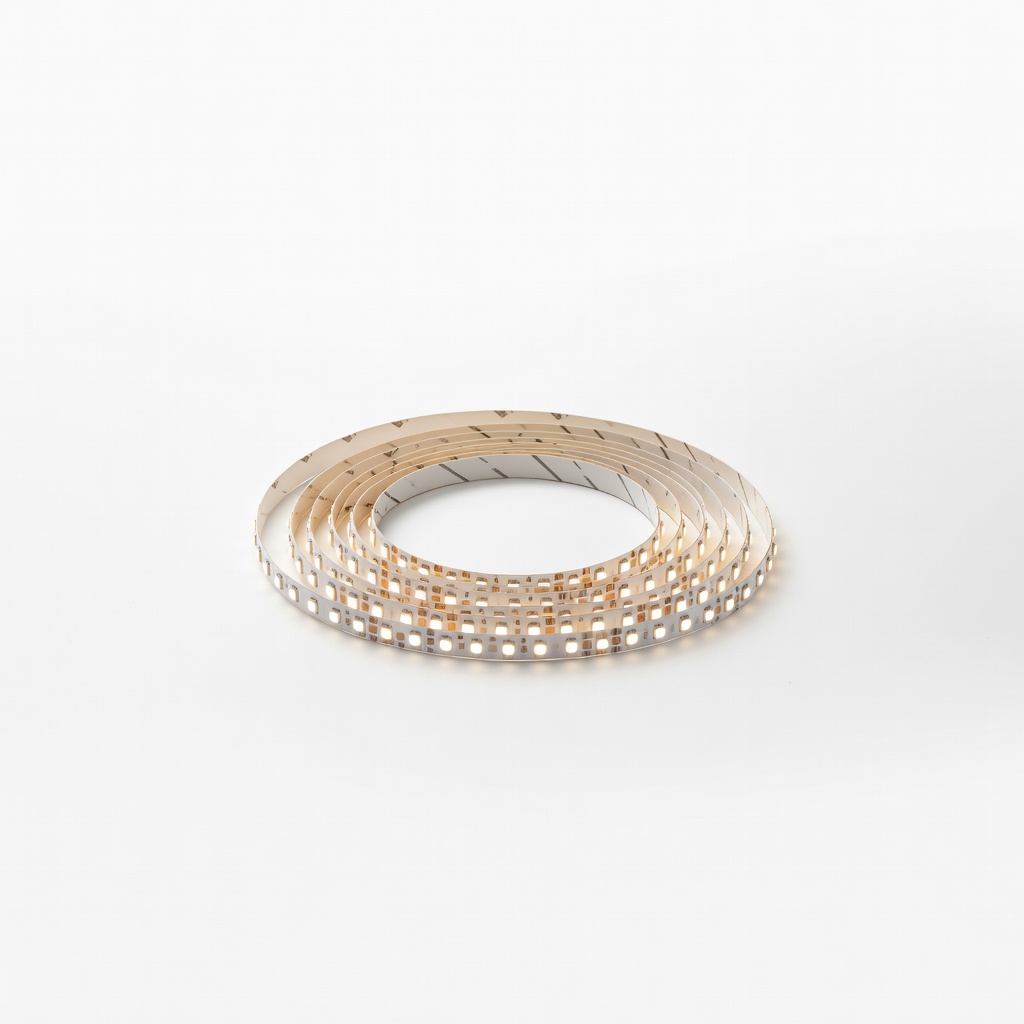
Illuminating hidden scenes or figure highlights.
GKYEE Mini LED Strip Lights Battery-powered, dimmable lights for dramatic effects.
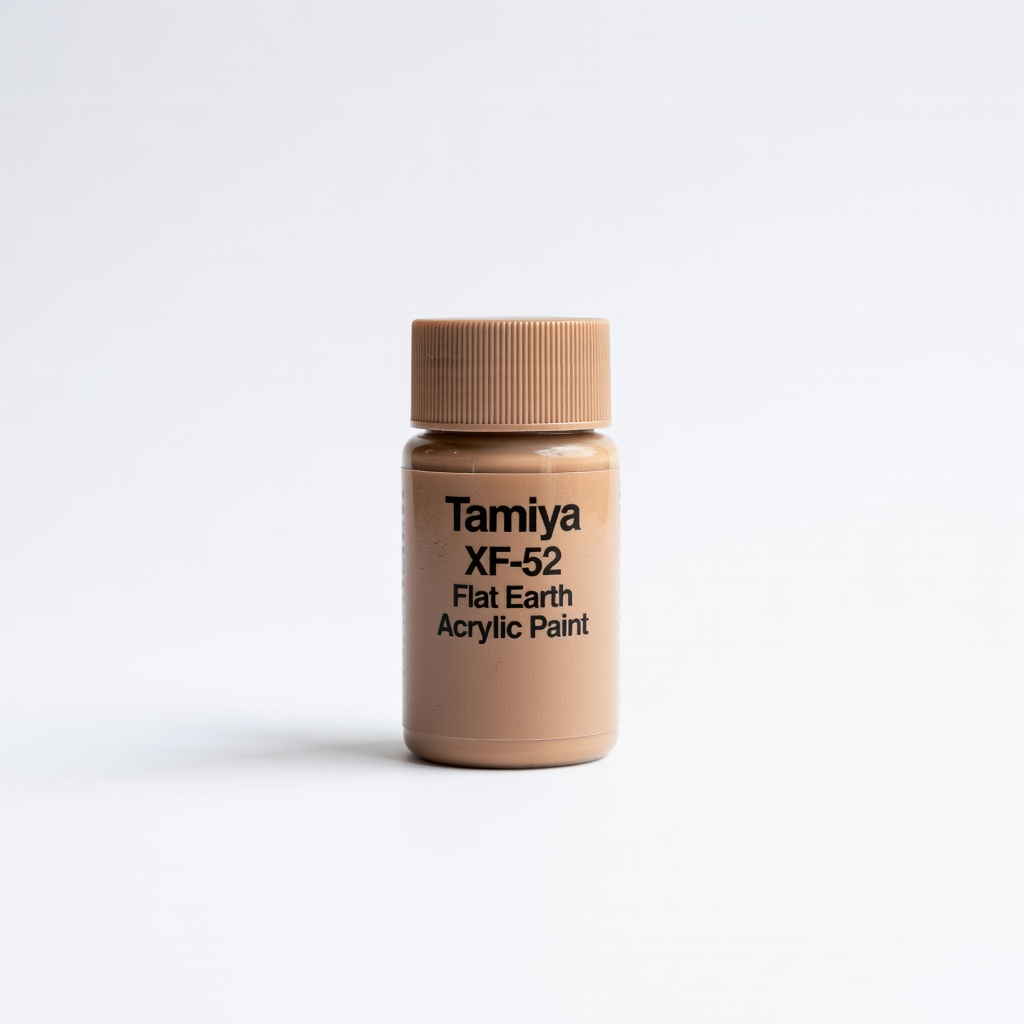
Detailing props and bases post-assembly.
Tamiya XF-52 Flat Earth Acrylic Paint Quick-drying, matte finish for realistic weathering.